How to Install Docker on Ubuntu 24.04 LTS (Step-by-Step Beginner Guide)

Containerization has become a core skill for IT Operations, DevOps engineers, and system administrators. Whether you’re deploying microservices, running CI/CD pipelines, or managing isolated environments, Docker simplifies everything.
In this guide, you will learn how to install Docker on Ubuntu 24.04 LTS using the official Docker repository. We will follow best practices recommended by Docker to ensure stability and long-term maintainability.
This tutorial works for:
- Ubuntu 24.04 LTS Desktop
- Ubuntu 24.04 LTS Server
- Cloud VM instances (AWS, GCP, Azure, etc.)
Let’s get started.
Why Install Docker from the Official Repository?
Ubuntu provides Docker packages in its default repository. However, they are often outdated.
Installing Docker from the official Docker repository ensures:
- Latest stable version of Docker Engine
- Security updates directly from Docker
- Full compatibility with Docker CLI and plugins
- Production-ready configuration
For IT operations environments, using the official repository is strongly recommended.
Step 1 – Update Your System
Before installing any new software, update your package index:
sudo apt update
sudo apt upgrade -y
This ensures your system is fully patched before installing Docker.
Step 2 – Install Required Dependencies
Docker requires some prerequisite packages to allow APT to use repositories over HTTPS.
Run:
sudo apt install ca-certificates curl gnupg lsb-release -yThese packages enable secure repository verification and downloads.
Step 3 – Add Docker’s Official GPG Key
Next, add Docker’s official GPG key to verify package authenticity.
sudo mkdir -p /etc/apt/keyringsThen download the key:
curl -fsSL https://download.docker.com/linux/ubuntu/gpg | sudo gpg --dearmor -o /usr/share/keyrings/docker-archive-keyring.gpgSet proper permissions:
sudo chmod a+r /etc/apt/keyrings/docker.ascThis step ensures your system trusts Docker’s repository.
Step 4 – Add Docker Repository to Ubuntu 24.04
Now add the official Docker repository:
echo "deb [arch=$(dpkg --print-architecture) signed-by=/usr/share/keyrings/docker-archive-keyring.gpg] https://download.docker.com/linux/ubuntu $(lsb_release -cs) stable" | sudo tee /etc/apt/sources.list.d/docker.list > /dev/nullUpdate the package index again:
sudo apt updateAt this point, Ubuntu recognizes Docker’s official packages.
Step 5 – Install Docker Engine
Now install Docker Engine along with required components:
sudo apt install docker-ce docker-ce-cli containerd.io docker-buildx-plugin docker-compose-plugin -yThis installs:
- docker-ce (Docker Community Edition)
- docker-ce-cli (Docker CLI)
- containerd (container runtime)
- Docker Buildx plugin
- Docker Compose plugin
Installation may take a few minutes depending on your internet speed.
Step 6 – Verify Docker Installation
After installation, verify Docker is running:
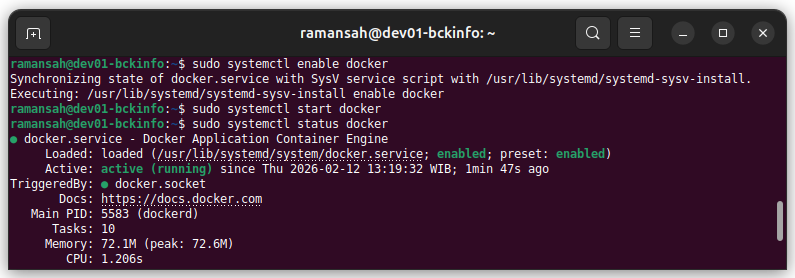
sudo systemctl status dockerYou should see:
Active: active (running)If Docker is running successfully, test it by running:
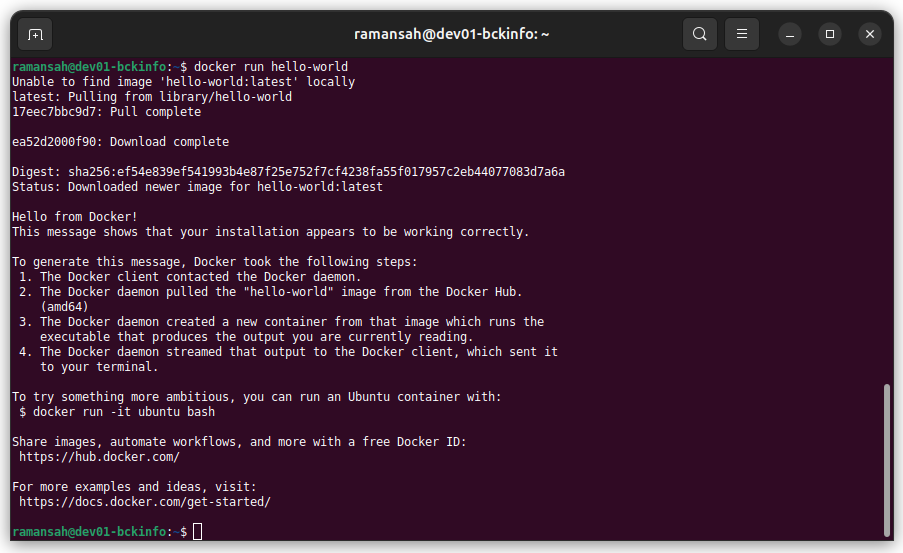
sudo docker run hello-worldIf the installation works correctly, Docker will download a test image and print a success message.
Congratulations — Docker is now installed on Ubuntu 24.04 LTS.
Step 7 – Enable Docker to Start on Boot
To ensure Docker starts automatically after reboot:
sudo systemctl enable dockerThis is especially important for production servers.
Step 8 – Run Docker Without sudo (Optional but Recommended)
By default, Docker requires sudo. To run Docker as a normal user:
Add your user to the docker group:
sudo usermod -aG docker $USERThen log out and log back in (or run):
newgrp dockerTest again:
docker run hello-worldIf it works without sudo, the configuration is complete.
How to Check Docker Version
To verify installed Docker version:
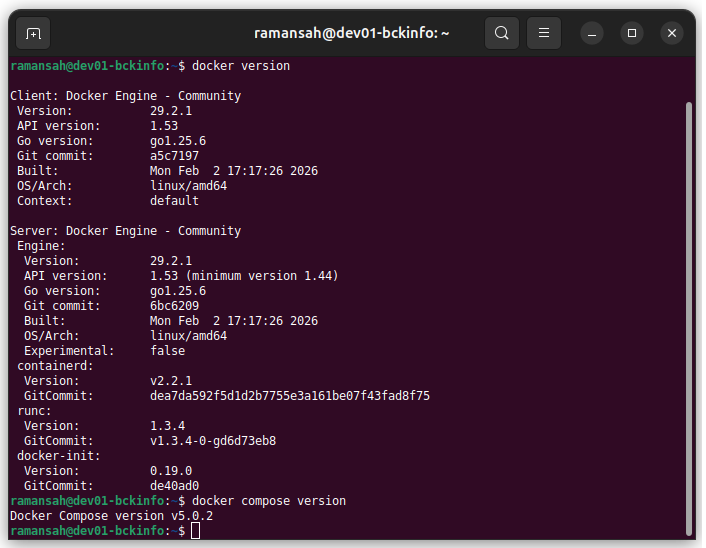
docker --versionTo see detailed system info:
docker infoThis helps in troubleshooting and environment validation.
Common Troubleshooting
Docker Service Not Starting
If Docker fails to start:
sudo journalctl -xeu docker.serviceCheck logs for permission or dependency issues.
Permission Denied Error
If you see:
permission denied while trying to connect to the Docker daemon socketEnsure your user is added to the docker group and re-login.
Optional: Install Docker Compose Standalone (Legacy)
Ubuntu 24.04 installs Docker Compose as a plugin. To use it:
docker compose versionNote the space between docker and compose.
Avoid installing old docker-compose binaries unless required for legacy systems.
Security Best Practices After Installation
As an IT Operations professional, consider these hardening steps:
- Configure firewall rules (UFW)
- Avoid exposing Docker daemon on public IP
- Regularly update Docker
- Use minimal base images
- Scan images for vulnerabilities
- Implement logging and monitoring
Docker is powerful — but production environments require proper governance.
How to Uninstall Docker (If Needed)
To remove Docker completely:
sudo apt remove docker-ce docker-ce-cli containerd.io docker-buildx-plugin docker-compose-pluginTo remove all images and volumes:
sudo rm -rf /var/lib/docker
sudo rm -rf /var/lib/containerd
Be careful — this deletes all containers and data.
Final Thoughts
Installing Docker on Ubuntu 24.04 LTS is straightforward when following official best practices. By using Docker’s official repository, you ensure stability, security updates, and long-term compatibility.
For IT Operations teams, Docker is no longer optional — it’s a foundational skill for modern infrastructure management.
Once Docker is installed, your next steps might include:
- Running Nginx containers
- Deploying PostgreSQL with Docker
- Building custom application images
- Implementing CI/CD pipelines
- Managing multi-container environments with Docker Compose
Mastering Docker opens the door to container orchestration platforms like Kubernetes and enterprise DevOps workflows.
Related posts:
 How To Install Docker On Ubuntu 22.04
Setting Up an Ubuntu Docker Container with SSH Access
How To Install Docker On Ubuntu 22.04
Setting Up an Ubuntu Docker Container with SSH Access
 How To Install Docker CE On Ubuntu 24.04 LTS
 How To Install Docker On CentOS 7
How To Install Docker On Fedora 38
How To Install Docker On CentOS 7
How To Install Docker On Fedora 38
 How to Containerize a Spring Boot Application Using Docker