How To Install Docker CE On Ubuntu 24.04 LTS

On this article we will learn how to install Docker Community Edition (CE) on Ubuntu 24.04 (Noble Numbat) Linux operating system. Docker is an open-source platform that enables developers to automate the deployment of applications in lightweight, portable containers. This guide will walk you through the installation of Docker on Ubuntu 24.04 LTS.
The Docker installation on Ubuntu 24.04 (Noble Numbat) will be consist of several steps as mentioned below :
- Prerequisites
- Step 1: Update System Packages
- Step 2: Install Required Dependencies
- Step 3: Add Docker’s Official GPG Key
- Step 4: Add the Docker Repository
- Step 5: Install Docker Engine
- Step 6: Verify the Installation
- Step 7: Run Docker Without Sudo (Optional)
Prerequisites
Before installing Docker, ensure that you have:
- A system running Ubuntu 24.04 LTS Linux operating system.
- A user account with sudo privileges.
- An updated package index.
Step 1: Update System Packages
It is always recommended to update your system before installing new software. Run the following command:
sudo apt update && sudo apt upgrade -y
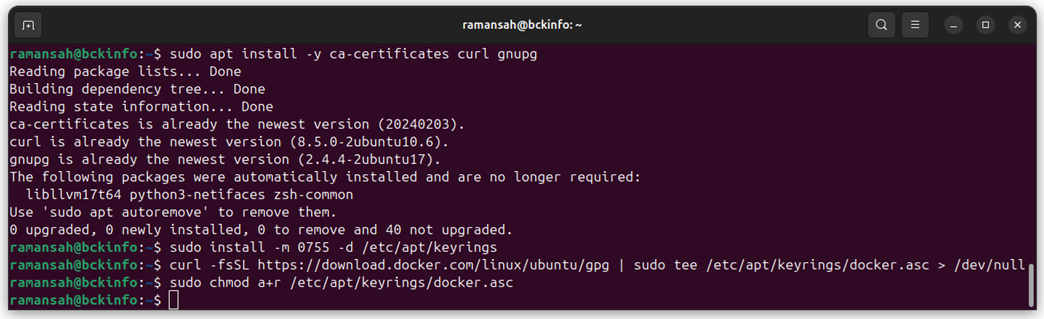
Step 2: Install Required Dependencies
To ensure smooth installation, install the necessary dependencies:
sudo apt install -y ca-certificates curl gnupg
Step 3: Add Docker’s Official GPG Key
To verify the authenticity of the Docker package, add its GPG key:
sudo install -m 0755 -d /etc/apt/keyrings
curl -fsSL https://download.docker.com/linux/ubuntu/gpg | sudo tee /etc/apt/keyrings/docker.asc > /dev/null
sudo chmod a+r /etc/apt/keyrings/docker.asc
Step 4: Add the Docker Repository
Run the following command to add the official Docker repository:
echo "deb [arch=$(dpkg --print-architecture) signed-by=/etc/apt/keyrings/docker.asc] https://download.docker.com/linux/ubuntu $(lsb_release -cs) stable" | sudo tee /etc/apt/sources.list.d/docker.list > /dev/null
Now update the package list to include Docker’s repository:
sudo apt update
![echo "deb [arch=$(dpkg --print-architecture) signed-by=/etc/apt/keyrings/docker.asc] https://download.docker.com/linux/ubuntu $(lsb_release -cs) stable" | sudo tee /etc/apt/sources.list.d/docker.list > /dev/null](https://bckinfo.com/wp-content/uploads/2025/03/docker_02-1024x253.png)
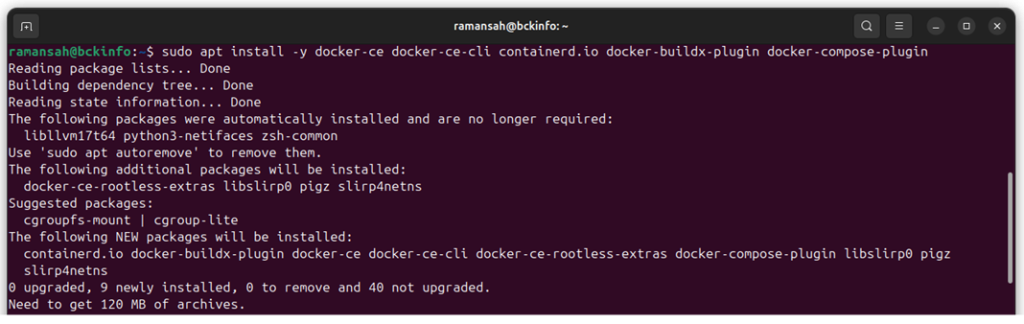
Step 5: Install Docker Engine
Now install Docker with:
sudo apt install -y docker-ce docker-ce-cli containerd.io docker-buildx-plugin docker-compose-plugin
Step 6: Verify the Installation
After installation, check if Docker is running:
sudo systemctl start docker
sudo systemctl enable docker
Confirm the installed version:
docker --version
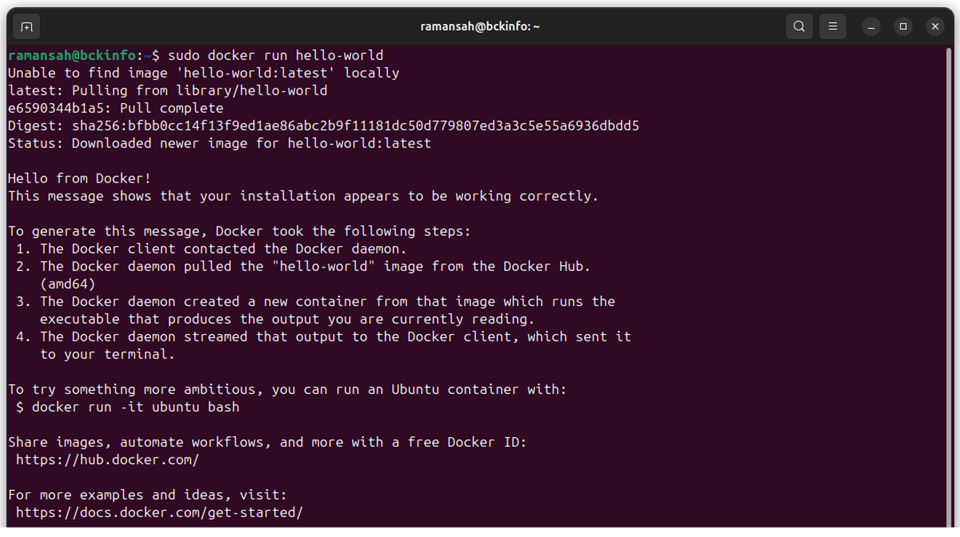
Run a test container to verify Docker is working correctly:
sudo docker run hello-world
If you see a message confirming successful installation, Docker is working properly.
Step 7: Run Docker Without Sudo (Optional)
By default, Docker requires root privileges. To run Docker as a non-root user, add your user to the Docker group:
sudo usermod -aG docker $USER
Apply the changes without logging out:
newgrp docker
Now, you can run Docker commands without sudo.
docker ps
Step 8: Enable Docker to Start on Boot
To ensure Docker starts automatically at boot, enable the service:
sudo systemctl enable docker
Conclusion
You have successfully installed Docker on Ubuntu. You can now start using Docker to deploy and manage containers efficiently. If you encounter any issues, check the official Docker documentation for further guidance.
Happy containerizing! 🚀
Related posts:
 How To Install Docker On Ubuntu 22.04
Setting Up an Ubuntu Docker Container with SSH Access
How To Install Docker On Ubuntu 22.04
Setting Up an Ubuntu Docker Container with SSH Access
 How To Install Docker On CentOS 7
 Install and Configure K3s with NVIDIA GPU Operator on Ubuntu 22.04
 How To Run Commands Inside Docker Containers: A Step-by-Step Guide
 How to Set Up a Local DNS Server Using Docker: A Practical Guide for Developers