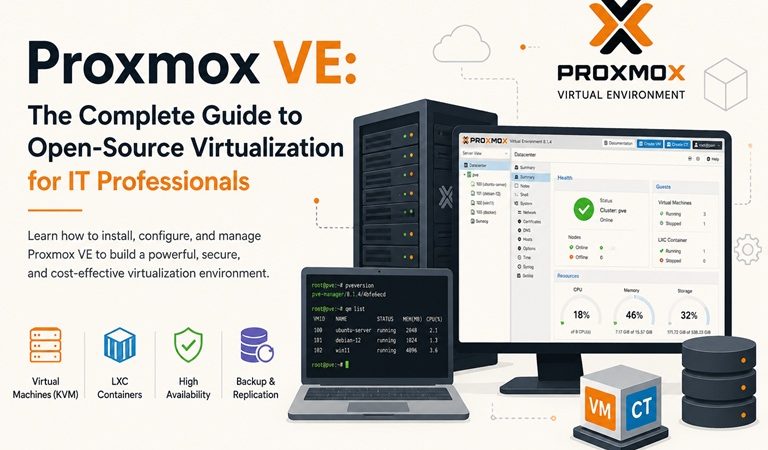
Proxmox VE: The Complete Guide to Open-Source Virtualization for IT Professionals
Introduction: Why Proxmox VE Is Changing the Virtualization Game
In today’s data-driven world, virtualization has become the backbone of modern IT infrastructure. Whether you are running a home lab, managing a mid-sized business, or architecting an enterprise-grade datacenter, the ability to create and manage virtual machines efficiently is no longer optional — it is essential.
Among the growing list of virtualization platforms, Proxmox Virtual Environment (Proxmox VE) has carved out a reputation as one of the most powerful, flexible, and cost-effective solutions available. Unlike proprietary platforms that come with hefty licensing fees, Proxmox VE is built on open-source principles, giving IT administrators full control over their infrastructure without being locked into a vendor’s pricing model.
This comprehensive guide covers everything you need to know about Proxmox VE — from its core architecture and key features to installation, configuration, and real-world best practices.
What Is Proxmox VE?
Proxmox Virtual Environment (Proxmox VE) is a free, open-source server virtualization management platform developed by Proxmox Server Solutions GmbH, an Austrian company. It is built on top of Debian Linux and integrates two powerful virtualization technologies:
- KVM (Kernel-based Virtual Machine) — for full hardware virtualization, allowing you to run any operating system including Windows, Linux, and BSD.
- LXC (Linux Containers) — for lightweight, OS-level virtualization, ideal for running Linux workloads with minimal overhead.
By combining both technologies within a single, web-based management interface, Proxmox VE provides a unified platform that covers the full virtualization lifecycle — from creation and deployment to monitoring and backup.
Key Fact: Proxmox VE is used by thousands of organizations worldwide, from home labs and small businesses to large enterprises and research institutions.
A Brief History of Proxmox
Proxmox VE was first released in 2008 by Proxmox Server Solutions GmbH. The platform was built to address a growing demand for an enterprise-grade, open-source alternative to VMware and Microsoft Hyper-V.
Over the years, Proxmox has evolved significantly:
| Version | Year | Notable Feature |
| Proxmox VE 1.0 | 2008 | Initial release with KVM and OpenVZ |
| Proxmox VE 4.0 | 2015 | Replaced OpenVZ with LXC |
| Proxmox VE 6.0 | 2019 | Improved Ceph integration, 2FA |
| Proxmox VE 7.0 | 2021 | Debian 11 base, updated ZFS |
| Proxmox VE 8.x | 2023+ | Debian 12, improved SDN, modern UI |
Each major release has brought meaningful improvements in stability, security, and feature depth — making Proxmox an increasingly mature enterprise solution.
Core Architecture: How Proxmox VE Works
Understanding how Proxmox is structured helps you make better decisions about deployment and configuration.
Hypervisor Layer
Proxmox uses the Linux kernel itself as the hypervisor foundation. KVM is integrated directly into the kernel as a loadable module, which means virtual machines operate at near-native performance with minimal overhead compared to Type 2 (hosted) hypervisors.
Management Layer
The entire platform is managed through a clean, intuitive web-based GUI accessible via HTTPS on port 8006. There is no need to install additional management software — everything is built in.
Storage Subsystem
Proxmox supports a wide range of storage backends:
- Local storage: Directory, LVM, LVM-thin, ZFS
- Network storage: NFS, CIFS/SMB, iSCSI, GlusterFS
- Distributed storage: Ceph RBD (fully integrated)
Networking
Proxmox uses Linux bridges, Open vSwitch (OVS), VLANs, and its own Software-Defined Networking (SDN) module for flexible, scalable network topology management.
Key Features of Proxmox VE
1. Unified Virtualization (KVM + LXC)
One of Proxmox’s greatest strengths is its ability to manage both full virtual machines and lightweight containers from a single interface. This gives administrators the flexibility to choose the right tool for each workload — full isolation with KVM or resource efficiency with LXC.
2. Web-Based Management Console
The Proxmox web UI is one of the most feature-rich browser-based interfaces in the virtualization space. It provides:
- Real-time resource monitoring (CPU, RAM, disk, network)
- VM console access (VNC and SPICE protocols)
- Snapshot and backup management
- User and permission management
- Cluster overview and node health
3. High Availability (HA) Clustering
Proxmox includes built-in High Availability support through its cluster manager. When a physical node fails, VMs can automatically migrate to healthy nodes with minimal downtime, making it suitable for production environments that require continuous uptime.
4. Live Migration
VMs can be migrated between cluster nodes without interruption, ensuring zero downtime during maintenance windows. Proxmox supports both online (live) migration and offline migration depending on the storage configuration.
5. Integrated Backup and Restore
Proxmox includes Proxmox Backup Server (PBS) integration, allowing:
- Scheduled, incremental backups
- Deduplication and compression for storage efficiency
- Quick and reliable restores
- Off-site backup targets
6. ZFS Support
Proxmox has deep integration with ZFS, a next-generation file system known for its data integrity, RAID-Z support, and built-in snapshotting. ZFS is particularly popular in home labs and production environments that prioritize data protection.
7. Ceph Integration
For large-scale distributed storage, Proxmox integrates directly with Ceph, allowing administrators to build a shared, fault-tolerant storage pool across multiple nodes — directly from the Proxmox web interface.
8. Role-Based Access Control (RBAC)
Proxmox includes a comprehensive permission system that allows fine-grained access control. Organizations can define roles, assign users or groups to specific resources, and enforce the principle of least privilege.
9. API and Automation
Proxmox exposes a full-featured REST API, enabling integration with CI/CD pipelines, automation tools (Ansible, Terraform), and custom scripts for DevOps workflows.
10. Proxmox Backup Server (PBS)
PBS is a separate, dedicated backup solution designed to work seamlessly with Proxmox VE. It supports incremental backups, client-side encryption, and efficient deduplication, making it an ideal companion for any Proxmox deployment.
Proxmox VE vs. The Competition
Proxmox vs. VMware ESXi
| Feature | Proxmox VE | VMware ESXi |
| License Cost | Free (open-source) | Paid licensing required |
| Web UI | Included | Requires vCenter for full features |
| KVM/LXC Support | Yes | No (uses proprietary hypervisor) |
| Ceph Integration | Built-in | Third-party |
| Community Support | Strong forums & docs | Enterprise support contracts |
| Home Lab Friendly | Excellent | Limited after free tier changes |
Proxmox vs. Microsoft Hyper-V
| Feature | Proxmox VE | Hyper-V |
| Platform | Linux (Debian) | Windows Server |
| Container Support | LXC (native Linux) | Windows Containers only |
| Cost | Free | Requires Windows license |
| Cluster Features | Built-in HA, Ceph, ZFS | Requires WSFC, additional licenses |
Proxmox vs. XCP-ng
Both Proxmox and XCP-ng are strong open-source contenders. Proxmox typically wins on ease of use, container support, and storage flexibility, while XCP-ng appeals to teams migrating from Citrix XenServer environments.
How to Install Proxmox VE: Step-by-Step Overview
Prerequisites
Before installing Proxmox VE, ensure you have:
- A physical server or compatible hardware (64-bit CPU with virtualization support — Intel VT-x or AMD-V)
- Minimum 4 GB RAM (8–16 GB recommended for production)
- At least one SSD or HDD (SSD strongly recommended)
- A USB drive (at least 2 GB) for the installer
- Stable network connection
Installation Steps
Step 1: Download the ISO
Visit the official Proxmox website at proxmox.com and download the latest Proxmox VE ISO installer.
Step 2: Create a Bootable USB
Use a tool like Rufus (Windows) or Balena Etcher (cross-platform) to write the ISO to a USB drive.
Step 3: Boot from USB
Configure your server’s BIOS/UEFI to boot from the USB drive and launch the Proxmox installer.
Step 4: Run the Installer
The graphical installer guides you through:
- Target disk selection
- Country, timezone, and keyboard layout
- Network configuration (IP, gateway, DNS)
- Admin password and email setup
Step 5: First Login
Once installed, access the Proxmox web interface by navigating to https://[your-server-ip]:8006 in a browser. Log in with the root credentials you set during installation.
Step 6: Post-Installation Tasks
- Update the system via the shell or web UI
- Configure storage repositories
- Set up network bridges
- (Optional) Configure a cluster
Creating Your First Virtual Machine in Proxmox
After logging in, creating a VM is straightforward:
- Click “Create VM” in the top-right of the web UI.
- Set a VM ID and Name.
- Select an ISO image (uploaded to local storage beforehand).
- Configure OS type and version.
- Set CPU cores and RAM.
- Create a virtual disk on your preferred storage.
- Configure network adapter (attach to a bridge).
- Review and finish — your VM is ready to start.
The same intuitive wizard applies to LXC containers, with the added option of using pre-built container templates from Proxmox’s official repository.
Proxmox Clustering: Building a High-Availability Infrastructure
One of Proxmox’s most powerful enterprise features is its native clustering capability. A Proxmox cluster allows multiple physical nodes to share resources, manage VMs collectively, and provide automatic failover.
Setting Up a Basic Cluster
- Install Proxmox on at least three nodes (three-node minimum is recommended for quorum).
- On the first node, create the cluster via the web UI: Datacenter → Cluster → Create Cluster.
- On subsequent nodes, join the cluster using the join token provided by the primary node.
- Once clustered, all nodes appear in the same web interface tree.
Quorum and Fencing
Proxmox clusters use Corosync for cluster communication and require a quorum to prevent split-brain scenarios. Hardware fencing (IPMI/iDRAC) is strongly recommended in production to ensure safe automatic failover.
Storage Configuration Best Practices
Storage is one of the most critical — and complex — aspects of a Proxmox deployment. Here are the recommended best practices:
- Use ZFS on local disks for data integrity, snapshots, and RAID-Z protection without a dedicated RAID controller.
- Deploy Ceph for shared storage in multi-node clusters — it eliminates the need for expensive SAN equipment.
- Separate OS and VM storage on different disks or pools for better performance and easier maintenance.
- Enable thin provisioning (LVM-thin or ZFS thin) to allocate storage dynamically and avoid wasting disk space.
- Configure regular backups to PBS with deduplication enabled to minimize storage consumption.
Security Best Practices for Proxmox
Securing your Proxmox environment is non-negotiable, especially for production deployments:
- Change the default root password immediately after installation.
- Enable two-factor authentication (2FA) via TOTP for all admin accounts.
- Restrict web UI access using a firewall — limit port 8006 to trusted IP ranges only.
- Keep Proxmox updated — apply security patches promptly through the repository manager.
- Use RBAC to limit user access to only the resources they need.
- Isolate management traffic from VM traffic using separate network interfaces or VLANs.
- Regularly audit logs and enable Proxmox’s built-in firewall for VM-level traffic filtering.
Proxmox for Home Labs: Why It’s the Top Choice
Proxmox has become the go-to hypervisor for home lab enthusiasts — and for good reason:
- Zero licensing cost — run enterprise-grade virtualization for free.
- Runs on consumer hardware — from repurposed old desktops to mini PCs like Intel NUC.
- Active community — extensive forums, Reddit communities, and YouTube tutorials.
- Great learning platform — mirrors real enterprise environments for learning DevOps, networking, and systems administration.
- Supports popular templates — deploy TrueNAS, pfSense, Ubuntu Server, and hundreds of other systems in minutes.
Many IT professionals credit Proxmox home lab experience as directly translating into workplace skills and job opportunities.
Proxmox in Enterprise Environments
Beyond home labs, Proxmox is increasingly deployed in enterprise settings. Key advantages for organizations include:
- Significant cost savings over VMware, especially following Broadcom’s acquisition and licensing changes.
- Full source code access — organizations can audit, customize, and extend the platform.
- Enterprise subscription available for commercial support, stable repositories, and SLAs.
- Seamless migration paths from VMware (via OVF/OVA import tools).
- Compliance-friendly with robust audit logging, RBAC, and network isolation capabilities.
Common Use Cases for Proxmox VE
| Use Case | How Proxmox Helps |
| Development & Testing | Spin up isolated VMs/containers quickly for dev environments |
| Web Hosting | Run multiple web servers on a single physical host |
| Network Lab | Simulate complex networks using VMs and virtual switches |
| Database Clusters | Host HA database clusters with live migration support |
| Disaster Recovery | Automated backups with PBS and rapid VM restoration |
| Edge Computing | Deploy lightweight LXC containers at the edge |
| VoIP / PBX Hosting | Virtualize communication servers with dedicated resources |
Troubleshooting Common Proxmox Issues
Issue 1: Web UI Not Accessible After Installation
- Verify the IP address and ensure the management network is active.
- Check if the
pve-managerservice is running:systemctl status pve-manager
Issue 2: VM Won’t Start — KVM Not Available
- Confirm that hardware virtualization is enabled in BIOS/UEFI (Intel VT-x / AMD-V).
- Run
egrep -c '(vmx|svm)' /proc/cpuinfo— a non-zero result confirms KVM support.
Issue 3: Cluster Quorum Lost
- Check Corosync status:
systemctl status corosync - Review cluster logs:
journalctl -u corosync - Do not force quorum unless you are certain about the cluster state.
Issue 4: Storage Not Showing in Web UI
- Ensure the storage device is properly mounted and accessible.
- Verify storage configuration in
/etc/pve/storage.cfg.
The Future of Proxmox VE
The Proxmox development team continues to actively evolve the platform. Key areas of ongoing development include:
- Improved SDN capabilities for more complex enterprise network topologies.
- Better Windows guest integration through enhanced VirtIO driver support.
- Expanded Proxmox Backup Server features including better cloud storage gateway support.
- Enhanced automation and API features to support Infrastructure-as-Code workflows.
- Growing enterprise adoption — particularly as organizations reassess VMware costs following Broadcom’s 2024 licensing restructuring.
The community around Proxmox continues to grow rapidly, with more contributors, integrations, and deployment guides than ever before.
Conclusion: Is Proxmox VE Right for You?
Proxmox VE is one of those rare platforms that genuinely delivers enterprise-grade capabilities without enterprise-grade price tags. Whether you are a student building your first home lab, a small business owner looking to reduce infrastructure costs, or an enterprise architect evaluating open-source virtualization, Proxmox VE deserves serious consideration.
Its combination of KVM and LXC virtualization, integrated clustering and HA, flexible storage options, robust backup capabilities, and a clean web interface makes it a comprehensive, production-ready solution that competes head-to-head with the world’s most expensive virtualization platforms.
The fact that it is open source, community-supported, and continuously improving is simply the cherry on top.
Ready to get started? Visit proxmox.com to download the latest Proxmox VE ISO and join a global community of tens of thousands of administrators who have already made the switch.
Frequently Asked Questions (FAQ)
Q: Is Proxmox VE completely free?
A: Yes, the core Proxmox VE software is free and open-source. An optional enterprise subscription is available for organizations that need commercial support and access to stable update repositories.
Q: Can I run Proxmox on a laptop or consumer PC?
A: Yes, as long as the hardware supports 64-bit virtualization extensions (Intel VT-x or AMD-V) and has sufficient RAM, Proxmox can run on consumer hardware.
Q: What is the difference between Proxmox VE and Proxmox Backup Server?
A: Proxmox VE is the hypervisor and virtualization management platform. Proxmox Backup Server (PBS) is a dedicated backup solution designed to work alongside Proxmox VE for storing and managing VM and container backups.
Q: How many VMs can Proxmox handle?
A: The number of VMs is limited by your hardware resources (CPU, RAM, storage) rather than by software limits. Large deployments can run hundreds of VMs across a multi-node cluster.
Q: Is Proxmox suitable for production use?
A: Absolutely. Many enterprises and service providers run Proxmox in production, especially following the growing trend of VMware-to-Proxmox migrations.
Related posts:
 How to Install Proxmox VE on CentOS Stream 10: A Complete Step-by-Step Guide
Proxmox Backup Server: Automated VM Backups Made Easy
How to Install Proxmox VE on CentOS Stream 10: A Complete Step-by-Step Guide
Proxmox Backup Server: Automated VM Backups Made Easy
 What is VMware? Complete Guide to Virtualization, vSphere, ESXi, and Cloud Solutions
 How To Install KVM On CentOS Stream 10
 How to Install VMware ESXi: Step-by-Step Bare-Metal Setup Guide