How To Install CockroachDB On Ubuntu 24.04 LTS : Beginner Guide
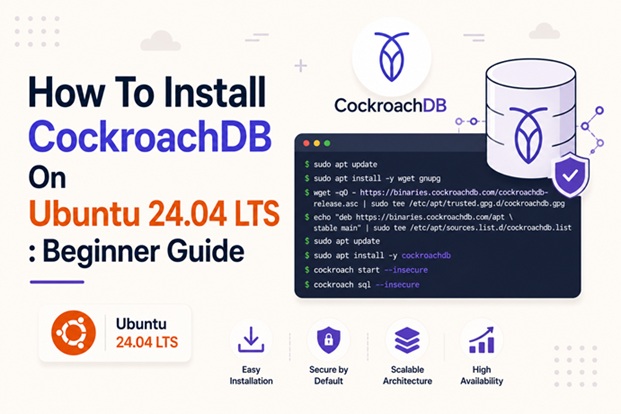
CockroachDB is a modern, distributed SQL database designed for scalability, high availability, and strong consistency. Inspired by Google Spanner, it provides horizontal scaling, automatic replication, and resilience against node failures — all while supporting familiar SQL semantics.
In this guide, you’ll learn how to install CockroachDB on Ubuntu 24.04 LTS step by step. The tutorial is suitable for system administrators, DevOps engineers, and developers who want to deploy CockroachDB for testing, development, or even production-ready clusters.
By the end of this article, you will have CockroachDB installed, secured, and running on Ubuntu 24.04.
Prerequisites
Before starting, make sure you have:
- Ubuntu 24.04 LTS (server or desktop)
- A user account with
sudoprivileges - At least 2 GB RAM (4 GB recommended)
- Internet connectivity
Optional but recommended:
- Basic knowledge of Linux command-line operations
- Understanding of SQL databases
Step 1: Update the System
Always start by updating your system packages to ensure compatibility and security.
sudo apt update && sudo apt upgrade -yOnce the update completes, reboot the system if kernel updates were applied.
Step 2: Download and Extract CockroachDB Binary
CockroachDB provides precompiled binaries that work well on Ubuntu 24.04.
Download the latest stable release:
wget -qO- https://binaries.cockroachdb.com/cockroach-v24.1.1.linux-amd64.tgz | tar xvzTip: Always check the official CockroachDB website for the latest version before deploying to production.
Extract the downloaded archive:
Move the CockroachDB binary to a system-wide path:
sudo cp -i cockroach-v24.1.1.linux-amd64/cockroach /usr/local/bin/Verify the installation:
cockroach versionIf installed correctly, you should see version and build information.
Step 3: Create CockroachDB User and Directories
For security and best practices, run CockroachDB under a dedicated system user.
sudo useradd -r -s /bin/false cockroachCreate required directories:
sudo mkdir -p /usr/local/lib/cockroach
sudo cp -i cockroach-v24.1.1.linux-amd64/lib/libgeos.so /usr/local/lib/cockroach/
sudo cp -i cockroach-v24.1.1.linux-amd64/lib/libgeos_c.so /usr/local/lib/cockroach/
Set ownership:
sudo chown -R cockroach:cockroach /var/lib/cockroach /etc/cockroachStep 5: Initialize a Single-Node Cluster
For development or testing, we will deploy a single-node CockroachDB cluster, I think its is sufficient to have a single cluster for testing only.
Initialize the database:
cockroach start-single-node \
  --background \
  --store=/var/lib/cockroach \
  --listen-addr=localhost:26257 \
  --http-addr=localhost:8080
This command:
- Starts CockroachDB in the background
- Stores data in
/var/lib/cockroach - Exposes SQL on port
26257 - Enables the web UI on port
8080

Step 6: Access CockroachDB SQL Shell
To access the CockroachDB SQL shell, first ensure that CockroachDB is installed and the node is running on your system. Open a terminal and navigate to the directory where the CockroachDB binary is located, or confirm that it has been added to your system’s PATH.
Then, run the command cockroach sql --insecure for a local, non-production setup, or use cockroach sql --certs-dir=<cert-directory> when connecting to a secure cluster.
If your cluster is hosted remotely, include the --host=<hostname> and --port=<port> parameters as needed. Once connected, you can begin executing SQL statements, manage databases, create tables, and perform queries directly from the interactive shell.
On this short tutorial we will use the unsecure node on a local , to connect to CockroachDB SQL shell:
cockroach sql -- insecure --host=localhost:26257

After successfully connecting to the SQL shell, you can create a new database using the CREATE DATABASE statement. For example, type create database DATABASEKU01; and press Enter to generate a database that can store your application data.
CockroachDB will confirm the operation once it has been completed. To verify that the database was created, run the show databases; command.
This will display a list of all databases available in the cluster, allowing you to confirm that your new database appears in the results. Before creating tables or adding data, you can switch to the newly created database by executing USE company_db;, ensuring that all subsequent commands are applied to the correct database.
SHOW DATABASES;
If the command executes successfully, your CockroachDB installation is working.
Step 7: Access the Web UI
CockroachDB includes a powerful built-in admin dashboard.
Open your browser and navigate to:
http://localhost:8080From the dashboard, you can:
- Monitor node health
- Inspect SQL queries
- View storage usage
- Track cluster performance

Step 8: Secure CockroachDB with TLS (Recommended)
Running CockroachDB in insecure mode is not recommended for production.
Generate certificates:
cockroach cert create-ca --certs-dir=/etc/cockroach --ca-key=/etc/cockroach/ca.key
cockroach cert create-node localhost $(hostname) \
  --certs-dir=/etc/cockroach \
  --ca-key=/etc/cockroach/ca.key
Restart CockroachDB securely:
cockroach start-single-node \
  --certs-dir=/etc/cockroach \
  --store=/var/lib/cockroach \
  --listen-addr=localhost:26257 \
  --http-addr=localhost:8080 \
  --background
Step 9: Create a Systemd Service (Optional)
To ensure CockroachDB starts automatically on boot, create a systemd service.
Create the service file:
svi /etc/systemd/system/cockroach.serviceAdd the following configuration:
[Unit]
Description=CockroachDB
After=network.target

[Service]
User=cockroach
ExecStart=/usr/local/bin/cockroach start-single-node \
  --store=/var/lib/cockroach \
  --listen-addr=0.0.0.0:26257 \
  --http-addr=0.0.0.0:8080
Restart=always
LimitNOFILE=35000

[Install]
WantedBy=multi-user.target
Enable and start the service:
sudo systemctl daemon-reload
sudo systemctl start cockroachdb
sudo systemctl enable cockroachdb
Step 10: Verify CockroachDB Status
Check the service status:
sudo systemctl status cockroachdbYou should see the service running without errors.

Common Troubleshooting Tips
- Port already in use: Ensure ports
26257and8080are not blocked or used by another service. - Permission issues: Verify ownership of
/var/lib/cockroach. - Firewall: Allow CockroachDB ports if using UFW or cloud firewalls.
Conclusion
Installing CockroachDB on Ubuntu 24.04 is straightforward and provides a powerful foundation for building resilient, distributed applications. Whether you’re testing locally or preparing a production environment, CockroachDB offers strong consistency, fault tolerance, and horizontal scalability out of the box.
With the steps in this guide, you now have CockroachDB installed, running, and ready to support modern cloud-native workloads.
Frequently Asked Questions (FAQ)
1. Is CockroachDB free to use on Ubuntu 24.04?
Yes. CockroachDB Community Edition is free and open-source, suitable for development and many production use cases. Enterprise features require a commercial license.
2. Can I run CockroachDB as a multi-node cluster on Ubuntu?
Absolutely. CockroachDB is designed for distributed environments. You can deploy multiple nodes across servers and join them into a single resilient cluster.
3. What ports does CockroachDB use by default?
CockroachDB uses port 26257 for SQL connections and 8080 for the Admin Web UI. These ports must be open if accessed remotely.
4. Is CockroachDB compatible with PostgreSQL tools?
CockroachDB is PostgreSQL-compatible at the SQL layer, so many PostgreSQL tools and drivers work seamlessly, although some advanced PostgreSQL features may differ.
5. Should I run CockroachDB in insecure mode?
Insecure mode is intended only for local testing or learning. For production deployments, TLS certificates and secure mode are strongly recommended.
6. How do I check CockroachDB performance and health?
You can monitor cluster health, query latency, and storage usage using the built-in Admin UI available on port 8080.
Related posts:
 How To Install PostgreSQL 13 on Ubuntu 20.04 LTS
 How To Install MySQL 8 Database on Ubuntu 20.04 LTS Server
 How To Install SQL Server 2019 Command Line Tools On Ubuntu 22.04
 How To Install MySQL Server Database On OpenSUSE Tumbleweed
 Installing MySQL 8.0 On Ubuntu 24.04 : Step by step guide
 NewSQL: Combining SQL Reliability with NoSQL Scalability
 CockroachDB: A Cloud-Native Distributed SQL Database Built for Global Scale