How to Install MongoDB 8.0 on Rocky Linux 10.2: Complete Setup Guide with SELinux & Authentication

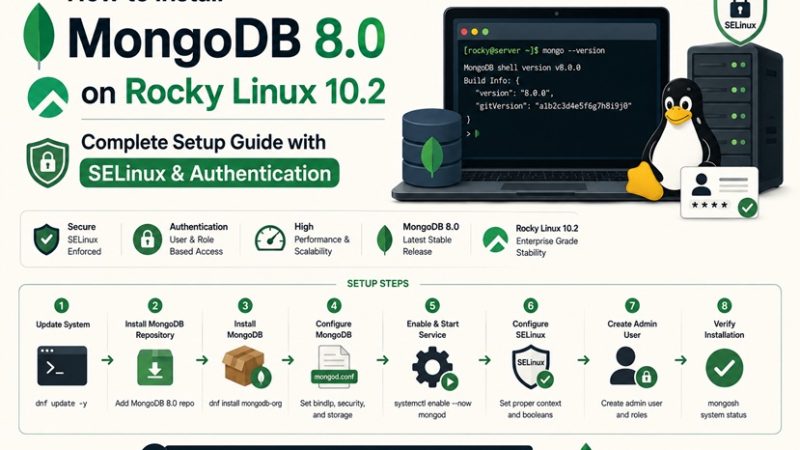
MongoDB is a document-oriented NoSQL database widely used for content management systems, real-time analytics, and applications where schema flexibility matters more than rigid relational structure. This guide installs MongoDB 8.0 Community Edition on Rocky Linux 10.2 from the official yum repository, then locks it down with SELinux contexts, authentication, and a firewalld rule — the steps a production deployment actually needs, not just a bare dnf install.
Table of Contents
- Prerequisites
- Installation Method Comparison
- Architecture Overview
- Step 1 — Add the MongoDB 8.0 Yum Repository
- Step 2 — Install MongoDB
- Step 3 — Start and Enable the mongod Service
- Step 4 — Configure SELinux
- Step 5 — Configure firewalld
- Step 6 — Enable Authentication and Create an Admin User
- Step 7 — Configure Remote Access
- Step 8 — Basic CRUD Verification with mongosh
- Backing Up MongoDB
- Docker Alternative
- Troubleshooting
- FAQ
- Related Articles
Prerequisites
- A Rocky Linux 10.2 server with at least 2 GB RAM and 10 GB free disk space
- A non-root user with
sudoprivileges - Basic familiarity with
dnf,systemctl, andfirewall-cmd
Installation Method Comparison
| Method | Setup Complexity | Update Path | Isolation | Best For |
|---|---|---|---|---|
| Native yum repo (this guide) | Moderate | dnf update mongodb-org | Shares host OS | Production servers, teams standardized on systemd/SELinux tooling |
| Docker / Docker Compose | Low | docker pull + recreate container | Full container isolation | Quick evaluation, local development, disposable environments |
| MongoDB Atlas (managed cloud) | Lowest | Fully managed | N/A | Teams that don’t want to operate the database themselves |
This guide focuses on the native yum repository install, which matches how the rest of the Rocky Linux 10 series on this site is documented, and includes a Docker section as the container-based alternative.
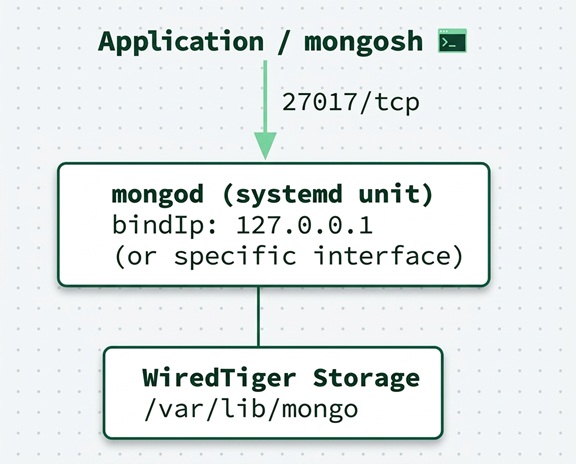
Architecture Overview
Step 1 — Add the MongoDB 8.0 Yum Repository
MongoDB is not part of Rocky Linux’s AppStream or BaseOS repositories, so it has to be added manually. As of this writing, MongoDB’s official RHEL 10 packages are still published under the RHEL 9 path, which is fully compatible with Rocky Linux 10:
sudo tee /etc/yum.repos.d/mongodb-org-8.0.repo << 'EOF'
[mongodb-org-8.0]
name=MongoDB Repository
baseurl=https://repo.mongodb.org/yum/redhat/9/mongodb-org/8.0/x86_64/
gpgcheck=1
enabled=1
gpgkey=https://pgp.mongodb.com/server-8.0.asc
EOF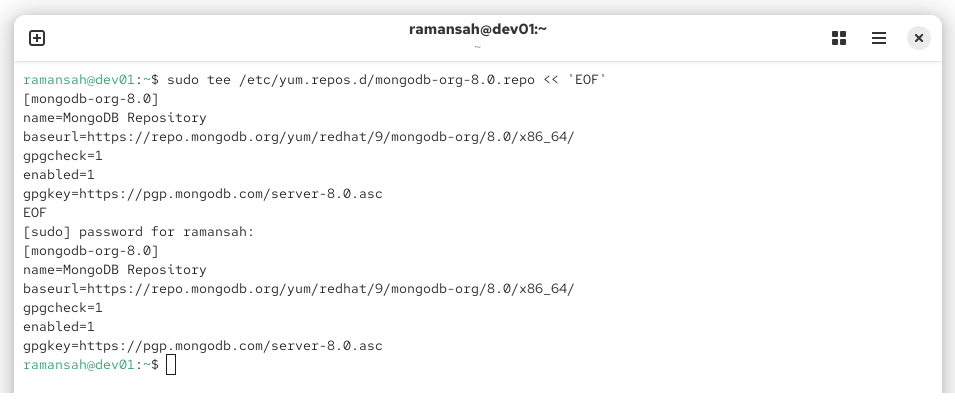
Check the MongoDB installation manual before deploying — MongoDB periodically publishes a dedicated el10 path, at which point switching the
baseurlto it is preferable.
Step 2 — Install MongoDB
Install the meta-package, which pulls in the server, shell, tools, and router components:
sudo dnf install -y mongodb-org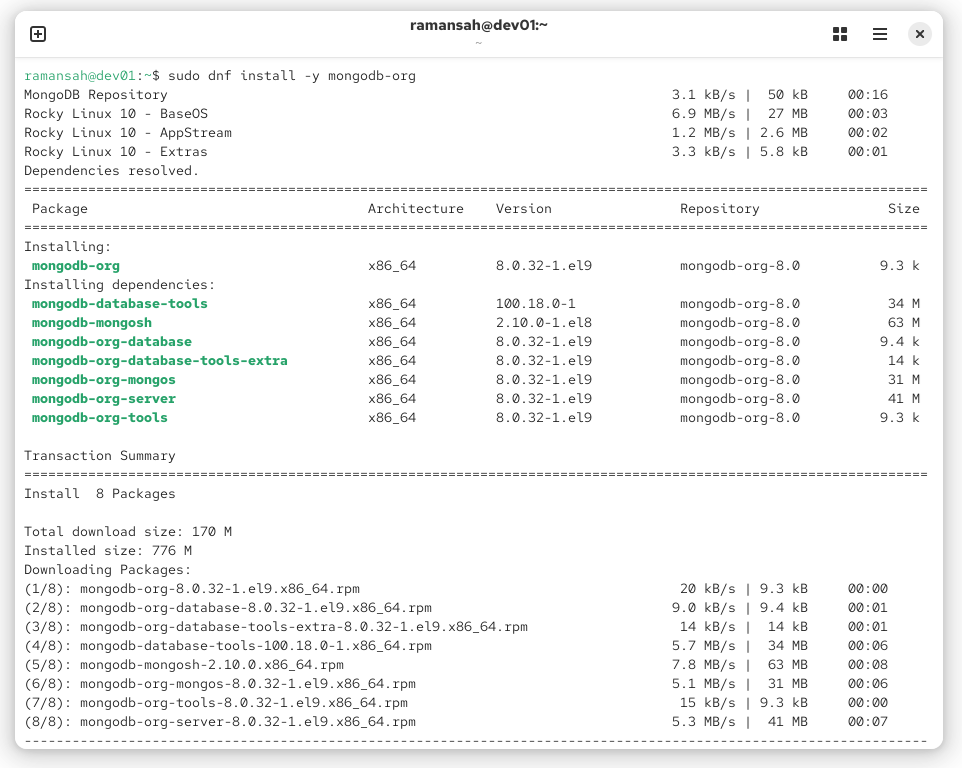
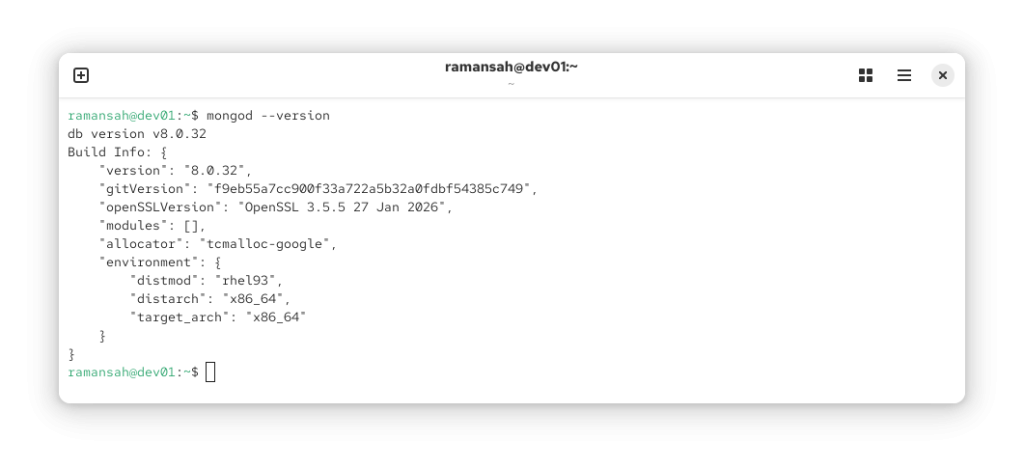
This installs mongodb-org-server, mongodb-org-mongos, mongodb-mongosh, and mongodb-org-tools together. Confirm the installed version:
mongod --versionExpect output showing db version v8.0.x.
Step 3 — Start and Enable the mongod Service
sudo systemctl enable --now mongod
sudo systemctl status mongod
Verify it’s listening locally:
mongosh --eval "db.runCommand({ ping: 1 })"A response containing ok: 1 confirms the server is reachable.
Step 4 — Configure SELinux
Rocky Linux 10.2 runs SELinux in Enforcing mode by default. The stock configuration — port 27017, data directory /var/lib/mongo, log directory /var/log/mongodb — already matches SELinux’s expected contexts, so a default install typically needs no SELinux changes at all. Changes are only needed when customizing the port or data directory:
Custom port:
sudo semanage port -a -t mongod_port_t -p tcp 27018Custom data directory:
sudo semanage fcontext -a -t mongod_var_lib_t "/data/mongodb(/.*)?"
sudo restorecon -Rv /data/mongodb
Confirm SELinux is enforcing and check for any denials if mongod fails to start after a configuration change:
getenforce
sudo ausearch -m avc -ts recent | grep mongod
Step 5 — Configure firewalld
Only open 27017 to the networks that actually need it — never to the public internet:
# Open to a specific trusted subnet (recommended)
sudo firewall-cmd --permanent --zone=public --add-rich-rule='rule family="ipv4" source address="10.0.0.0/24" port protocol="tcp" port="27017" accept'
sudo firewall-cmd --reload
If MongoDB only needs to be reachable from applications running on the same host, skip opening the port entirely and leave bindIp set to 127.0.0.1.
| Port | Protocol | Exposure | Purpose |
|---|---|---|---|
| 27017 | tcp | Trusted subnet only, or localhost | MongoDB client connections |
Step 6 — Enable Authentication and Create an Admin User
A fresh install allows unauthenticated local access by default — this must be closed before any production use.
mongoshuse admin
db.createUser({
user: "admin",
pwd: passwordPrompt(),
roles: [ { role: "userAdminAnyDatabase", db: "admin" }, "readWriteAnyDatabase" ]
})
exitNow enable authorization in the configuration file:
sudo nano /etc/mongod.confsecurity:
authorization: enabledsudo systemctl restart mongodFrom this point on, every connection must authenticate:
mongosh -u admin -p --authenticationDatabase adminStep 7 — Configure Remote Access
By default MongoDB binds only to 127.0.0.1. To accept connections from other hosts, edit the net section of /etc/mongod.conf:
net:
  port: 27017
  bindIp: 127.0.0.1,10.0.0.5
Restart the service after editing:
sudo systemctl restart mongodOnly bind to a private/internal interface address, never
0.0.0.0, unless the firewalld rule from Step 5 already restricts source addresses tightly and TLS is configured for the connection.
Step 8 — Basic CRUD Verification with mongosh
use testdb
db.items.insertOne({ name: "sample", qty: 10 })
db.items.find()
db.items.updateOne({ name: "sample" }, { $set: { qty: 20 } })
db.items.deleteOne({ name: "sample" })
If all four operations return without error, the installation is functioning correctly end to end.
Backing Up MongoDB
A working install is only half the job — backups need to run before anything depends on this data. mongodump is the standard starting point:
mongodump --uri="mongodb://admin:yourpassword@127.0.0.1:27017" --out=/backup/mongodb/$(date +%F)For a full backup strategy — retention policy, automated scheduling with cron, restoring with mongorestore, and offsite storage — see the dedicated MongoDB Backup guide already published on this site.
Docker Alternative
If the host already runs Docker — see the Docker on Rocky Linux 10 with SELinux guide for the SELinux-aware setup — running MongoDB in a container is faster to spin up for development or evaluation:
# docker-compose.yml
services:
  mongodb:
    image: mongo:8.0
    restart: always
    ports:
      - "127.0.0.1:27017:27017"
    environment:
      MONGO_INITDB_ROOT_USERNAME: admin
      MONGO_INITDB_ROOT_PASSWORD: change_me
    volumes:
      - mongo_data:/data/db

volumes:
  mongo_data:
docker compose up -dThe same firewalld and remote-access considerations from Steps 5 and 7 apply unchanged — only publish the port to interfaces and subnets that genuinely need it.
Troubleshooting
| Symptom | Likely Cause | Fix |
|---|---|---|
dnf install mongodb-org fails with “No package found” | Repo file missing or baseurl typo | Re-check /etc/yum.repos.d/mongodb-org-8.0.repo matches Step 1 exactly |
mongod fails to start after changing the port | SELinux blocking the new port | sudo semanage port -a -t mongod_port_t -p tcp <port> |
mongod fails to start after changing the data directory | SELinux context not applied to the new path | semanage fcontext + restorecon -Rv on the new directory |
| Connection refused from another host | bindIp still set to 127.0.0.1 only | Add the host’s private IP to bindIp in /etc/mongod.conf, then restart |
| Connection times out from another host | firewalld not allowing the source subnet | Add the rich rule from Step 5 for that specific subnet |
mongosh prompts for auth unexpectedly after enabling authorization | Expected behavior | Connect with -u <user> -p --authenticationDatabase admin |
Unauthorized error even with correct password | User created in the wrong database, or role mismatch | Confirm --authenticationDatabase admin matches where the user was created |
FAQ
Is MongoDB included in the Rocky Linux 10 default repositories?
No. MongoDB is not part of the AppStream or BaseOS repositories on Rocky Linux 10. It must be installed from MongoDB’s official yum repository, which needs to be added manually before running dnf install.
Why does MongoDB fail to bind to a custom port on Rocky Linux with SELinux enabled?
SELinux only allows mongod to bind to ports labeled mongod_port_t, and 27017 is labeled that way by default. Binding to any other port requires adding that port to the mongod_port_t context with semanage port, or mongod will fail to start with a permission-denied error even though the systemd service itself looks fine.
Does MongoDB have authentication enabled by default after installation?
No. A fresh MongoDB installation allows unauthenticated local access by default. An administrator user must be created first, then authorization needs to be explicitly enabled in mongod.conf before MongoDB will require credentials.
Related Articles
- How to Install Docker on Rocky Linux 10 with SELinux
- MongoDB Backup: Strategy, Automation, and Restore
- How to Install n8n on Rocky Linux 10.2: Native, Docker & Systemd Setup Guide
- Rocky Linux vs Ubuntu: Command Cheat Sheet for Sysadmins
Related posts:
 How To Install MongoDB 5.0 On Rocky Linux 8
 MongoDB Backup: Complete Guide to Backing Up and Restoring Your Database in 2026
 How to Install n8n on Rocky Linux 10.2: Native, Docker & Systemd Setup Guide
 How To Install MongoDB Community Edition on Linux CentOS 7
 Apache CouchDB vs MongoDB: Which NoSQL Database is Right for You?
 How To Drop Database on MongoDB: A Complete Beginner’s Guide
 How To Install Apache HBase on Docker (Complete Step-by-Step Guide)
 How to Fix Common MongoDB Issues (Connection, Query, Locking)
