How to Deploy a Highly Available Kubernetes Cluster with Keepalived and HAProxy (2026 Guide)

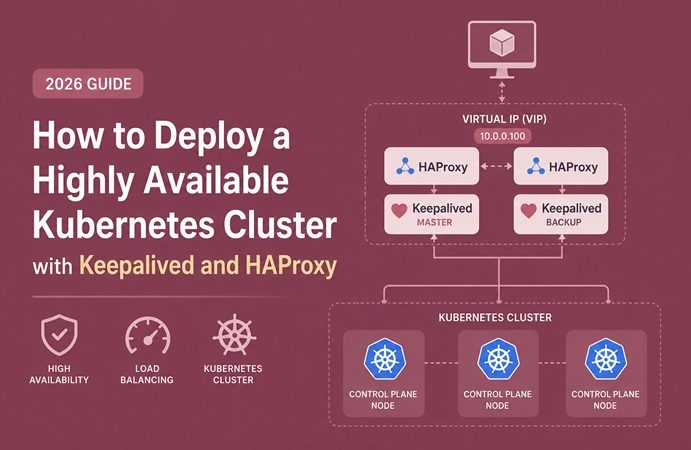
A Kubernetes cluster with a single control plane node has a single point of failure hiding in plain sight: if that one node goes down, kubectl stops working, the scheduler stops scheduling, and while already-running pods keep serving traffic for a while, nothing about the cluster can heal, scale, or update itself until the control plane comes back. For production environments — especially bare-metal or on-premises deployments without a cloud provider’s managed load balancer — building genuine control plane redundancy requires two pieces of infrastructure most cloud users never think about: a load balancer in front of multiple API servers, and a floating virtual IP that survives the failure of that load balancer itself.
This is exactly what HAProxy and Keepalived provide together. This guide walks through building a three-node highly available control plane from scratch: HAProxy load-balancing traffic across API servers, Keepalived managing a VRRP-based virtual IP so clients never need to know which physical node is currently active, and kubeadm bootstrapping the cluster against that virtual IP from day one.
Table of Contents
- Why a Single Control Plane Node Isn’t Enough
- How Keepalived and HAProxy Work Together
- Architecture Overview
- Prerequisites
- Step 1 — Prepare the Nodes
- Step 2 — Install and Configure HAProxy
- Step 3 — Install and Configure Keepalived
- Step 4 — Verify VIP Failover
- Step 5 — Bootstrap the First Control Plane Node
- Step 6 — Join Additional Control Plane Nodes
- Step 7 — Join Worker Nodes
- Step 8 — Verify Cluster High Availability
- Comparing HA Load Balancing Approaches
- etcd Quorum and Why Node Count Matters
- Testing Real Failover Scenarios
- Security Best Practices
- Performance and Sizing Considerations
- Troubleshooting Guide
- Conclusion
- FAQ
Why a Single Control Plane Node Isn’t Enough
The Kubernetes control plane consists of the API server, scheduler, controller manager, and etcd. On a single-node control plane, all four run on one machine. Lose that machine — a hardware fault, an OS crash, a bad kernel update — and:
- No new pods can be scheduled, even onto perfectly healthy worker nodes.
- No
kubectlcommand of any kind works, because there is no API server to talk to. - Controllers stop reconciling, so a crashed pod on a worker node will not be replaced.
- Existing Services and running pods generally keep working in the short term, since kube-proxy rules and running containers don’t depend on a live control plane — but the cluster is effectively frozen and cannot self-heal.
Cloud-managed Kubernetes (EKS, GKE, AKS) hides this problem by running a fully managed, multi-node control plane behind the scenes. Self-managed clusters — the common case for bare-metal, on-premises, or cost-sensitive deployments — have to build that redundancy explicitly, and that is exactly what this guide does.
How Keepalived and HAProxy Work Together
These two tools solve two different halves of the same problem:
- HAProxy runs on each control plane node (or a dedicated pair of load balancer nodes) and load-balances incoming API server traffic across all healthy control plane nodes on port 6443. If one node’s API server goes down, HAProxy’s health checks detect it and stop routing traffic there.
- Keepalived implements VRRP (Virtual Router Redundancy Protocol) to maintain a single floating virtual IP (VIP) shared across the nodes running HAProxy. Only one node holds the VIP at a time (the “MASTER”); if that node fails, Keepalived detects the loss of VRRP heartbeats and moves the VIP to a healthy “BACKUP” node within seconds.
Together, clients — including kubectl, kubeadm join, and every kubelet in the cluster — only ever need to know one address: the VIP. Neither the identity of the currently active HAProxy node nor the identity of the currently reachable API server needs to be known ahead of time, and both can change transparently during a failure.
Architecture Overview
                         ┌─────────────────────────────────────────────┐
                         │           Virtual IP: 192.168.10.100        │
                         │     (floats between LB nodes via VRRP)      │
                         └─────────────┬─────────────┬─────────────────┘
                                       │             │
                     ┌────────────────────▼──┐   ┌──────▼─────────────────┐
                     │  b-node-1 (MASTER)    │   │ lb-node-2 (BACKUP)     │
                     │ ┌───────────────────┐ │   │  ┌───────────────────┐ │
                     │ │  Keepalived       │ │   │  │ Keepalived        │ │
                     │ │  (holds VIP)      │ │   │  │ (standby)         │ │
                     │ └───────────────────┘ │   │  └───────────────────┘ │
                     │ ┌───────────────────┐ │   │  ┌───────────────────┐ │
                     │ │  HAProxy :6443    │ │   │  │ HAProxy :6443     │ │
                     │ └─────────┬─────────┘ │   │  └──── ────┬─────────┘ │
                     └───────────┼───────────┘   └──────────────┼─────────┘
                                 │ round-robin / health-checked │
                                 └────────────────┬─────────────┘
                                                  │
              ┌───────────────────────────────────┼─────────────────────────────────────┐
              │                                   │                                     │
    ┌─────────▼─────────┐               ┌─────────▼─────────┐                  ┌─────────▼─────────┐
    │  control-plane-1  │               │ control-plane-2   │                  │ control-plane-3   │
    │  kube-apiserver   │               │ kube-apiserver    │                  │ kube-apiserver    │
    │  etcd member      │               │ etcd member       │                  │ etcd member       │
    └───────────────────┘               └───────────────────┘                  └───────────────────┘
In smaller deployments, HAProxy and Keepalived can run directly on each control plane node instead of dedicated load balancer nodes — the pattern this guide follows, since it avoids needing extra machines for a typical 3-node HA cluster.
Prerequisites
- Three (or more, always odd-numbered) machines for control plane nodes — physical or VM, minimum 2 vCPU / 4 GB RAM each.
- At least one worker node, though for testing purposes the control plane nodes can also be tainted to accept workloads.
- All nodes on the same Layer 2 network segment (VRRP relies on multicast/broadcast ARP, so the VIP cannot float across separate subnets without additional routing configuration).
- Root or sudo access on every node.
- A free, unused IP address on the same subnet to serve as the VIP — this guide uses
192.168.10.100as an example. kubeadm,kubelet, andkubectlinstalled on all nodes (any recent stable version), plus a container runtime such ascontainerd.
Step 1 — Prepare the Nodes
On every control plane node, disable swap and load the required kernel modules — both mandatory for kubelet to start correctly.
sudo swapoff -a
sudo sed -i '/ swap / s/^/#/' /etc/fstab

cat <<EOF | sudo tee /etc/modules-load.d/k8s.conf
overlay
br_netfilter
EOF
sudo modprobe overlay
sudo modprobe br_netfilter

cat <<EOF | sudo tee /etc/sysctl.d/k8s.conf
net.bridge.bridge-nf-call-iptables  = 1
net.bridge.bridge-nf-call-ip6tables = 1
net.ipv4.ip_forward                 = 1
EOF
sudo sysctl --system
Step 2 — Install and Configure HAProxy
Install HAProxy on each control plane node:
sudo apt update && sudo apt install -y haproxyConfigure it to load-balance across all three API servers on port 6443, using a separate frontend port (6444) so HAProxy doesn’t conflict with the local kubelet or, once bootstrapped, the local API server itself:
# /etc/haproxy/haproxy.cfg
frontend kubernetes-api
    bind *:6444
    mode tcp
    option tcplog
    default_backend kubernetes-api-backend

backend kubernetes-api-backend
    mode tcp
    balance roundrobin
    option tcp-check
    default-server inter 10s downinter 5s rise 2 fall 3 slowstart 60s maxconn 250 maxqueue 256 weight 100

    server control-plane-1 192.168.10.11:6443 check
    server control-plane-2 192.168.10.12:6443 check
    server control-plane-3 192.168.10.13:6443 check
sudo systemctl restart haproxy
sudo systemctl enable haproxyoption tcp-check performs a basic TCP-level health check; the inter/downinter/rise/fall values control how quickly HAProxy detects and reacts to a failed API server without flapping on transient network blips.
Step 3 — Install and Configure Keepalived
Install Keepalived on the same three nodes:
sudo apt install -y keepalivedConfigure the first node as MASTER with the highest priority, and the remaining nodes as BACKUP with progressively lower priority values. A check_script monitors HAProxy locally, so Keepalived only advertises the VIP from a node whose HAProxy is actually healthy.
cat <<'EOF' | sudo tee /etc/keepalived/check_haproxy.sh
#!/bin/bash
if ! systemctl is-active --quiet haproxy; then
    exit 1
fi
exit 0
EOF
sudo chmod +x /etc/keepalived/check_haproxy.sh
On control-plane-1:
# /etc/keepalived/keepalived.conf
vrrp_script check_haproxy {
    script "/etc/keepalived/check_haproxy.sh"
    interval 2
    weight -20
    fall 3
    rise 2
}

vrrp_instance VI_1 {
    state MASTER
    interface eth0
    virtual_router_id 51
    priority 150
    advert_int 1
    authentication {
        auth_type PASS
        auth_pass K8sHaVip2026
    }
    virtual_ipaddress {
        192.168.10.100/24
    }
    track_script {
        check_haproxy
    }
}
On control-plane-2 and control-plane-3, use the same config with state BACKUP and priority 140 / priority 130 respectively — lower priority values on backups, and matching virtual_router_id and auth_pass across all three nodes so they recognize each other as part of the same VRRP group.
sudo systemctl restart keepalived
sudo systemctl enable keepalived
The weight -20 on the health-check script means that if HAProxy on the current MASTER dies, its effective priority drops by 20, falling below the BACKUP nodes’ priority and triggering an automatic VIP handover — without that hook, Keepalived would keep advertising the VIP from a node whose HAProxy is dead but whose network interface is still up.
Step 4 — Verify VIP Failover
Confirm the VIP is active on control-plane-1:
ip addr show eth0 | grep 192.168.10.100Simulate a failure by stopping HAProxy on the current MASTER:
sudo systemctl stop haproxy # run on control-plane-1Within a couple of seconds, the VIP should appear on control-plane-2:
ip addr show eth0 | grep 192.168.10.100 # run on control-plane-2Restart HAProxy on control-plane-1 before proceeding, and confirm normal operation resumes.
sudo systemctl start haproxy # run on control-plane-1Step 5 — Bootstrap the First Control Plane Node
With the VIP confirmed working, initialize the cluster against the VIP and HAProxy frontend port — never against a single node’s own IP, or the cluster’s control plane endpoint will silently lose its high availability property from day one.
sudo kubeadm init \
  --control-plane-endpoint "192.168.10.100:6444" \
  --upload-certs \
  --pod-network-cidr=10.244.0.0/16
kubeadm init prints two join commands at the end — save both:
- A control plane join command, including
--certificate-key, for adding additional control plane nodes. - A worker join command, without the certificate key, for adding worker nodes.
Set up kubectl access on this node:
mkdir -p $HOME/.kube
sudo cp -i /etc/kubernetes/admin.conf $HOME/.kube/config
sudo chown $(id -u):$(id -g) $HOME/.kube/config
Install a CNI plugin (this guide uses Flannel as a simple example; use Calico or Cilium if Network Policy support is needed):
kubectl apply -f https://github.com/flannel-io/flannel/releases/latest/download/kube-flannel.ymlStep 6 — Join Additional Control Plane Nodes
Run the saved control plane join command on control-plane-2 and control-plane-3:
sudo kubeadm join 192.168.10.100:6444 \
  --token <token> \
  --discovery-token-ca-cert-hash sha256:<hash> \
  --control-plane \
  --certificate-key <certificate-key>
The --certificate-key is time-limited (two hours by default). If it expires before you join every node, regenerate it from the first control plane node:
sudo kubeadm init phase upload-certs --upload-certsStep 7 — Join Worker Nodes
Run the saved worker join command on every worker node:
sudo kubeadm join 192.168.10.100:6444 \
  --token <token> \
  --discovery-token-ca-cert-hash sha256:<hash>
Step 8 — Verify Cluster High Availability
kubectl get nodes -o wide
kubectl get pods -n kube-system -o wide
All three control plane nodes should show Ready with the control-plane role. Confirm etcd has a healthy quorum across all three members:
kubectl exec -n kube-system etcd-control-plane-1 -- etcdctl \
  --endpoints=https://127.0.0.1:2379 \
  --cacert=/etc/kubernetes/pki/etcd/ca.crt \
  --cert=/etc/kubernetes/pki/etcd/server.crt \
  --key=/etc/kubernetes/pki/etcd/server.key \
  endpoint health --cluster
Expected output shows all three etcd endpoints reporting healthy.
Comparing HA Load Balancing Approaches
| Approach | Extra Infrastructure | Failover Speed | Cloud-Native Fit | Best For |
|---|---|---|---|---|
| Keepalived + HAProxy (this guide) | None beyond existing nodes | ~1–3 seconds (VRRP) | Poor — bare metal/on-prem only | Self-managed, on-premises clusters |
| Cloud load balancer (NLB/ALB, GCP LB, Azure LB) | Managed service, no extra nodes to run | Seconds, provider-managed | Native | Any cloud-hosted cluster |
| External DNS round-robin | None | Slow — depends on DNS TTL/caching | Poor for HA (stale records) | Non-critical, low-traffic setups only |
| kube-vip | None beyond existing nodes (runs as a static pod) | Comparable to Keepalived | Works on bare metal and cloud | Simpler single-binary alternative to Keepalived + HAProxy |
kube-vip deserves a specific mention: it is a newer, Kubernetes-native alternative that combines VIP management and load balancing into a single static pod running on control plane nodes, removing the need to separately install and tune Keepalived and HAProxy. It’s worth evaluating for new clusters, while the Keepalived/HAProxy combination remains the more battle-tested, widely documented option for teams that want each component’s behavior to be independently transparent and tunable.
etcd Quorum and Why Node Count Matters
etcd, the key-value store backing all Kubernetes cluster state, uses the Raft consensus algorithm and requires a strict majority of members to be reachable to accept writes. This is why control plane node count must always be odd:
| Total Nodes | Quorum Required | Failures Tolerated |
|---|---|---|
| 1 | 1 | 0 |
| 3 | 2 | 1 |
| 5 | 3 | 2 |
| 4 (even — avoid) | 3 | 1 (same as 3, wastes a node) |
An even number of nodes never improves fault tolerance over the next-lowest odd number — a 4-node cluster tolerates exactly as many failures as a 3-node cluster while consuming an extra machine and adding extra replication overhead. Three nodes is the standard, cost-effective baseline for most production clusters; five is reserved for environments needing to survive two simultaneous node failures.
Testing Real Failover Scenarios
Beyond the basic HAProxy-stop test in Step 4, validate the full stack under realistic failure conditions before trusting it in production:
- Hard power-off a control plane node (not just stopping a service) and confirm the VIP migrates and
kubectlagainst the VIP keeps working. - Disconnect network on the current VIP holder to confirm VRRP correctly detects the partition rather than causing a split-brain where two nodes briefly both believe they hold the VIP.
- Kill the etcd process on one node specifically, independent of the API server, to confirm the remaining two-node quorum keeps serving writes.
- Simulate a rolling OS patch across all three control plane nodes one at a time, confirming
kubectlnever experiences more than a brief blip during any single node’s reboot.
Security Best Practices
- Restrict which source IPs can reach the HAProxy frontend port with host-level firewall rules — only worker nodes, admin workstations, and CI/CD systems should reach
6444. - Change the Keepalived
auth_passfrom any example value before production use, and keep it out of version control by templating it via a secrets manager or Ansible Vault. - Enable HAProxy’s stats page only on a private interface, or disable it entirely if not actively used for monitoring.
- Rotate the
kubeadmjoin token regularly; by default it expires after 24 hours, which is appropriate — avoid generating a non-expiring token unless justified. - Keep etcd traffic on a dedicated, firewalled network segment separate from general application traffic where the underlying infrastructure allows it.
Performance and Sizing Considerations
- HAProxy’s TCP mode passthrough (as configured above) adds negligible latency compared to Layer 7 proxying, since it does not inspect or terminate TLS — the API server itself still handles TLS termination.
- Keepalived’s VRRP
advert_intof 1 second is a reasonable default; lowering it further speeds up failure detection at the cost of slightly higher network chatter, and is rarely necessary outside sub-second failover requirements. - Size control plane nodes for etcd’s disk I/O sensitivity — etcd is highly sensitive to write latency, so use SSD-backed storage and avoid co-locating etcd with disk-heavy workloads, consistent with the storage guidance in bckinfo.com’s PostgreSQL on Kubernetes deployment guide regarding latency-sensitive stateful workloads.
Troubleshooting Guide
| Symptom | Likely Cause | Fix |
|---|---|---|
| VIP never appears on any node | VRRP multicast blocked by firewall or switch | Allow VRRP protocol (112) and ensure all nodes are on the same L2 segment |
| VIP appears on two nodes simultaneously (split-brain) | Mismatched virtual_router_id or auth_pass, or a network partition | Confirm identical virtual_router_id/auth_pass across all nodes; investigate network segmentation |
kubeadm join fails with a certificate error | --certificate-key expired (2-hour default) | Regenerate with kubeadm init phase upload-certs --upload-certs on an existing control plane node |
kubectl hangs intermittently | HAProxy health check interval too slow to detect a dead API server | Lower inter/fall values in the HAProxy backend config |
| etcd cluster reports unhealthy with 2 of 3 members down | Lost quorum — cluster is now read-only or fully unavailable | Restore the failed node(s) immediately; etcd cannot accept writes below majority quorum |
| Keepalived fails to start | Missing NOPASSWD sudo rights for the health-check script, or wrong interface name | Verify the interface value matches ip addr output on that specific node |
| Worker nodes can’t join after control plane failover | Worker joined using a specific node’s IP instead of the VIP | Always join using the VIP and HAProxy frontend port, never an individual node’s address |
Conclusion
A highly available Kubernetes control plane is not just “three control plane nodes” — it is three control plane nodes reachable through infrastructure that itself has no single point of failure. Keepalived and HAProxy solve exactly that layer: HAProxy spreads API server load and detects unhealthy nodes, while Keepalived ensures the floating VIP clients depend on survives the loss of whichever node currently holds it.
The pattern in this guide — prepare, load-balance, float the VIP, then bootstrap kubeadm against that VIP from the very first init command — applies whether you’re running three nodes in a home lab or a dozen across multiple racks. The one detail worth internalizing above all others: quorum math, not raw node count, is what determines actual fault tolerance, which is why an odd number of control plane nodes is non-negotiable for any cluster claiming to be highly available.
For related reading on bckinfo.com, see the guides on deploying PostgreSQL on Kubernetes with persistent storage, Kubernetes Network Policies for pod-to-pod security, and Docker network security best practices for hardening the infrastructure layer underneath a cluster like this one.
FAQ
Why do I need both Keepalived and HAProxy for a Kubernetes HA cluster?
HAProxy load-balances traffic across the control plane nodes’ API servers, and Keepalived provides a floating virtual IP that automatically moves to a healthy HAProxy instance if the active one fails. Together they eliminate both the API server and the load balancer as single points of failure.
How many control plane nodes do I need for Kubernetes high availability?
An odd number of at least three, since etcd relies on Raft consensus and requires a majority quorum to stay available. Three nodes tolerate one failure; five tolerate two.
Can I use this Keepalived and HAProxy setup on a cloud provider instead of bare metal?
Yes, technically, but it’s normally unnecessary — cloud providers offer managed load balancers (AWS NLB, GCP Load Balancer, Azure Load Balancer) that serve the same role more simply. This pattern is primarily valuable for bare-metal or on-premises clusters without an external managed load balancer.
What’s the difference between Keepalived/HAProxy and kube-vip?
Keepalived and HAProxy are two independently configured, general-purpose tools combined for this use case. kube-vip is a newer, Kubernetes-native alternative that runs as a single static pod and handles VIP management and load balancing together, trading some configurability for simpler setup.
Does this setup also make my applications highly available, or just the control plane?
This setup specifically protects the control plane (API server, scheduler, controller manager, etcd). Application-level high availability still depends on separate practices — running multiple pod replicas, PodDisruptionBudgets, and spreading workloads across multiple worker nodes.
Related posts:
 How to Install MetalLB on Bare Metal Kubernetes Cluster (L2 and BGP Guide)
 How to Deploy PostgreSQL on Kubernetes with Persistent Storage (2026 Guide)
 Kubernetes Network Policies Explained: Secure Pod-to-Pod Communication (2026 Guide)
 Top 15 Kubernetes Interview Questions and Answers for Beginners (2025)
 What Is KubeKey? Complete Explanation for DevOps Beginners
 Kubernetes Deployment vs StatefulSet vs DaemonSet: Complete Comparison with Examples
 How to Back Up and Restore Kubernetes Cluster Using Velero (2026 Guide)
 How to Run Redis on Kubernetes Using StatefulSet
