How to Install TensorFlow on Ubuntu 26.04 LTS (CPU & GPU/CUDA Setup)

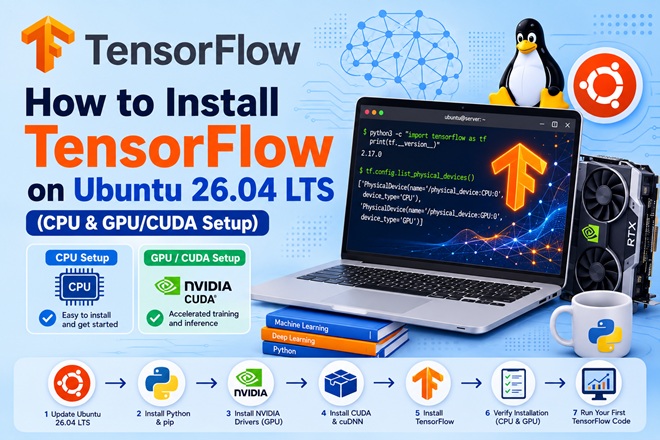
TensorFlow remains one of the most widely deployed deep learning frameworks in production, powering everything from recommendation systems to computer vision pipelines. This guide covers a complete, production-oriented TensorFlow installation on Ubuntu 26.04 LTS: CPU-only setup via a Python virtual environment, full GPU acceleration with NVIDIA drivers, CUDA, and cuDNN, a Docker-based alternative, and verification/troubleshooting steps for common installation issues.
Table of Contents
- What Is TensorFlow
- Prerequisites
- TensorFlow Architecture Overview
- Installation Method Comparison
- Step 1: Update System and Install Python Tooling
- Step 2: Install TensorFlow (CPU-Only, venv)
- Step 3: Verify the CPU Installation
- Step 4: Install NVIDIA Driver for GPU Support
- Step 5: Install CUDA Toolkit and cuDNN
- Step 6: Install TensorFlow with GPU Support
- Step 7: Verify GPU Acceleration
- Step 8: Alternative — Run TensorFlow via Docker
- Step 9: Run a Sample Training Job
- TensorFlow vs PyTorch vs JAX
- Performance Tuning Notes
- Troubleshooting
- FAQ
- Conclusion
- Related Articles
What is TensorFlow>
TensorFlow is an open-source machine learning framework developed by Google, used for building and training neural networks across CPUs, GPUs, and TPUs. It exposes both a high-level API (Keras, bundled as tf.keras) for rapid model development and a low-level graph-execution API for custom operations and performance-critical workloads. TensorFlow supports eager execution by default since version 2.x, which makes debugging and iterative development considerably more straightforward than the original static-graph model.
Prerequisites
| Requirement | Minimum Spec | Recommended |
|---|---|---|
| OS | Ubuntu 26.04 LTS (server or desktop) | Ubuntu 26.04 LTS, updated |
| CPU | 4 vCPU | 8+ vCPU |
| RAM | 8 GB | 32 GB+ for large datasets |
| Disk | 15 GB free | SSD, 50 GB+ (datasets/checkpoints) |
| GPU (optional) | NVIDIA GPU, Compute Capability 6.0+ | NVIDIA RTX/A-series, 12 GB+ VRAM |
| Python | 3.10–3.12 | 3.11 |
| Access | sudo/root privileges | sudo/root privileges |
GPU acceleration is optional — TensorFlow runs entirely on CPU, just at a much lower training throughput for large models.
TensorFlow Architecture Overview
                +-------------------------------+
                |         Python Frontend        |
                |     tf.keras / tf.function      |
                +----------------+----------------+
                                 |
                                 v
                +-------------------------------+
                |         TensorFlow Core         |
                |   Graph Construction & Eager Exec|
                +----------------+----------------+
                                 |
                 +---------------+---------------+
                 |                               |
                 v                               v
        +----------------+             +--------------------+
        |   CPU Backend   |             |    GPU Backend      |
        |   (Eigen/XLA)   |             | (CUDA / cuDNN / XLA) |
        +----------------+             +--------------------+
                 |                               |
                 v                               v
        +----------------+             +--------------------+
        | Local Execution |             |  NVIDIA GPU Device  |
        +----------------+             +--------------------+
The Python frontend builds a computation graph (or runs eagerly), which TensorFlow Core dispatches to whichever backend device is available and configured — CPU by default, or GPU when CUDA/cuDNN are correctly installed and detected.
Installation Method Comparison
| Method | Best For | Isolation | Setup Complexity |
|---|---|---|---|
| pip + venv (CPU) | Development, small models, CI | Per-project | Very low |
| pip + venv (GPU) | Local GPU training | Per-project | Medium (driver/CUDA dependent) |
| Docker (official image) | Reproducible environments, avoiding driver conflicts | Full container isolation | Low-Medium (needs NVIDIA Container Toolkit for GPU) |
| conda | Multi-package data science stacks | Per-environment | Medium |
This guide focuses on venv for both CPU and GPU paths since it keeps dependencies transparent and version-pinned, plus a Docker alternative for teams that want to avoid managing CUDA versions directly on the host.
Step 1: Update System and Install Python Tooling
sudo apt update && sudo apt upgrade -y
sudo apt install -y python3 python3-venv python3-pip python3-dev build-essential

python3 --version
Ubuntu 26.04 LTS ships Python 3.12 by default, which is compatible with current TensorFlow releases.
Step 2: Install TensorFlow (CPU-Only, venv)
mkdir -p ~/tf-project && cd ~/tf-project
python3 -m venv tf-env
source tf-env/bin/activate

pip install --upgrade pip
pip install tensorflow
This installs the latest stable TensorFlow release along with its CPU-optimized dependencies (NumPy, protobuf, absl-py, etc.).
Step 3: Verify the CPU Installation
python3 -c "import tensorflow as tf; print(tf.__version__); print(tf.reduce_sum(tf.random.normal([1000, 1000])))"A successful run prints the installed version followed by a scalar tensor result, confirming TensorFlow can build and execute a computation graph.
Step 4: Install NVIDIA Driver for GPU Support
Skip to Step 8 if you don’t have a compatible NVIDIA GPU.
sudo apt install -y ubuntu-drivers-common
ubuntu-drivers devices
sudo ubuntu-drivers autoinstall
sudo reboot
After reboot, verify the driver is loaded:
nvidia-smiThis should display the GPU model, driver version, and current memory usage. If the command isn’t found, the driver installation did not complete successfully.
Step 5: Install CUDA Toolkit and cuDNN
Check the TensorFlow GPU support matrix for the exact CUDA/cuDNN version pairing required by your target TensorFlow release before installing, since mismatched versions are the most common cause of GPU detection failures.
wget https://developer.download.nvidia.com/compute/cuda/repos/ubuntu2604/x86_64/cuda-keyring_1.1-1_all.deb
sudo dpkg -i cuda-keyring_1.1-1_all.deb
sudo apt update
sudo apt install -y cuda-toolkit-12-4
Add CUDA to your PATH:
echo 'export PATH=/usr/local/cuda-12.4/bin:$PATH' >> ~/.bashrc
echo 'export LD_LIBRARY_PATH=/usr/local/cuda-12.4/lib64:$LD_LIBRARY_PATH' >> ~/.bashrc
source ~/.bashrc
Install cuDNN (requires an NVIDIA Developer account for direct download, or via apt if the CUDA keyring repo provides it):
sudo apt install -y libcudnn9-cuda-12Step 6: Install TensorFlow with GPU Support
Recent TensorFlow releases bundle GPU support in the standard package, provided CUDA/cuDNN are correctly installed on the host:
source ~/tf-project/tf-env/bin/activate
pip install --upgrade pip
pip install tensorflow[and-cuda]
The [and-cuda] extra pulls in the matching CUDA Python wheels so you don’t need a perfectly hand-tuned system CUDA installation for basic use, though the system-level driver from Step 4 is still required.
Step 7: Verify GPU Acceleration
python3 -c "import tensorflow as tf; print('GPUs:', tf.config.list_physical_devices('GPU'))"Expected output lists at least one PhysicalDevice of type GPU. If the list is empty, jump to the Troubleshooting section.
Run a quick GPU vs CPU benchmark:
import tensorflow as tf
import time

with tf.device('/GPU:0'):
    a = tf.random.normal([5000, 5000])
    b = tf.random.normal([5000, 5000])
    start = time.time()
    c = tf.matmul(a, b)
    print("GPU matmul time:", time.time() - start)
“>tep 8: Alternative — Run TensorFlow via Docker
For teams that prefer not to manage CUDA versions directly on the host, the official TensorFlow Docker images bundle a matched CUDA/cuDNN stack.
# CPU-only
docker run -it --rm tensorflow/tensorflow:latest python3 -c "import tensorflow as tf; print(tf.__version__)"

# GPU (requires NVIDIA Container Toolkit)
sudo apt install -y nvidia-container-toolkit
sudo nvidia-ctk runtime configure --runtime=docker
sudo systemctl restart docker

docker run -it --rm --gpus all tensorflow/tensorflow:latest-gpu \
  python3 -c "import tensorflow as tf; print(tf.config.list_physical_devices('GPU'))"
Step 9: Run a Sample Training Job
A minimal MNIST classifier to confirm the full training loop works end-to-end:
import tensorflow as tf

(x_train, y_train), (x_test, y_test) = tf.keras.datasets.mnist.load_data()
x_train, x_test = x_train / 255.0, x_test / 255.0

model = tf.keras.Sequential([
    tf.keras.layers.Flatten(input_shape=(28, 28)),
    tf.keras.layers.Dense(128, activation='relu'),
    tf.keras.layers.Dropout(0.2),
    tf.keras.layers.Dense(10)
])

model.compile(
    optimizer='adam',
    loss=tf.keras.losses.SparseCategoricalCrossentropy(from_logits=True),
    metrics=['accuracy']
)

model.fit(x_train, y_train, epochs=5)
model.evaluate(x_test, y_test, verbose=2)
python3 mnist_train.pyTraining should complete in well under a minute on GPU, or a few minutes on CPU depending on core count.
TensorFlow vs PyTorch vs JAX
| Feature | TensorFlow | PyTorch | JAX |
|---|---|---|---|
| Execution model | Eager (default) + graph via tf.function | Eager-first (dynamic graph) | Functional, JIT-compiled via XLA |
| Production deployment | TF Serving, TFLite, TF.js — mature ecosystem | TorchServe, ONNX export | Growing, less mature tooling |
| Learning curve | Moderate (Keras simplifies a lot) | Considered more Pythonic/intuitive | Steeper, functional paradigm |
| GPU/TPU support | Strong on both | Strong GPU, improving TPU | Strong on both, XLA-native |
| Best fit | Production pipelines, mobile/edge deployment | Research, rapid prototyping | High-performance numerical computing, research |
Performance Tuning Notes
- Use
tf.data.Datasetpipelines with.prefetch(tf.data.AUTOTUNE)to avoid I/O bottlenecks during training. - Enable mixed precision (
tf.keras.mixed_precision.set_global_policy('mixed_float16')) on compatible GPUs for significant throughput gains with minimal accuracy impact. - Pin
TF_GPU_ALLOCATOR=cuda_malloc_asyncas an environment variable to reduce GPU memory fragmentation on long-running training jobs. - For multi-GPU nodes, use
tf.distribute.MirroredStrategyrather than manually splitting batches across devices.
Troubleshooting
| Symptom | Likely Cause | Fix |
|---|---|---|
tf.config.list_physical_devices('GPU') returns empty list | CUDA/cuDNN version mismatch, or driver not loaded | Confirm nvidia-smi works, verify CUDA version matches TensorFlow’s support matrix |
Could not load dynamic library 'libcudnn.so' | cuDNN not installed or not on LD_LIBRARY_PATH | Reinstall cuDNN, confirm LD_LIBRARY_PATH includes the CUDA lib64 directory |
ImportError: numpy.core.multiarray failed to import | NumPy version incompatible with installed TensorFlow build | pip install --upgrade numpy matching the TF release’s supported range |
| Training extremely slow despite GPU present | Falling back to CPU ops due to unsupported op or dtype | Check logs for Executing op ... on CPU warnings; verify mixed precision policy is set correctly |
RuntimeError: CUDA out of memory | Batch size too large for available VRAM | Reduce batch size, or enable tf.config.experimental.set_memory_growth |
docker: Error response from daemon: could not select device driver | NVIDIA Container Toolkit not installed/configured | Run nvidia-ctk runtime configure and restart the Docker daemon |
Segmentation fault on import | Conflicting system-level BLAS libraries or corrupted venv | Recreate the virtual environment from scratch, avoid mixing conda and pip installs |
FAQ
Do I need CUDA installed to run TensorFlow at all?
No. TensorFlow runs entirely on CPU without any NVIDIA software installed. CUDA and cuDNN are only required for GPU acceleration.
Which TensorFlow version should I install on Ubuntu 26.04 LTS?
Install the latest stable release via pip install tensorflow unless a specific project pins an older version. Always cross-check the CUDA/cuDNN compatibility matrix before targeting GPU support with an older TensorFlow release.
Can I use conda instead of venv for this setup?
Yes — conda environments work equally well and are common in data science teams that also need non-Python dependencies (e.g., specific BLAS backends), but venv keeps the dependency tree smaller and more transparent for production deployment.
Why does Docker’s GPU image work but my host venv installation doesn’t detect the GPU?
The Docker image bundles a CUDA/cuDNN stack that’s pre-matched to the TensorFlow build. A host venv installation depends on the system-level CUDA/cuDNN versions you installed manually, so any mismatch there will cause GPU detection to silently fail.
Conclusion
TensorFlow on Ubuntu 26.04 LTS can be installed as a lightweight CPU-only setup for development and CI, or extended with NVIDIA drivers, CUDA, and cuDNN for full GPU-accelerated training. The Docker-based path is worth considering for teams that want to avoid the most common source of installation issues — mismatched CUDA/cuDNN/driver versions — at the cost of slightly less flexibility than a native venv setup.
Related posts:
 How To Install Tensorflow On Ubuntu 20.04 LTS
 How To Install Apache Spark On Ubuntu 20.04
 How To Install Laravel 8 On Ubuntu 20.04 LTS
 How To Install Swift On Ubuntu 20.04 LTS
 How To Install Wireshark On Ubuntu 20.04 LTS
 How To Install Zint, A Barcode Generator On Ubuntu 24.04
 How to Install OpenClaw on Ubuntu 24.04 LTS (Step-by-Step Guide)
 The Agentic AI Revolution: How Autonomous Machines Are Reshaping Industries in 2025
