How to Create and Configure a Virtual Machine in VMware ESXi On Rocky Linux 10 (Step-by-Step)

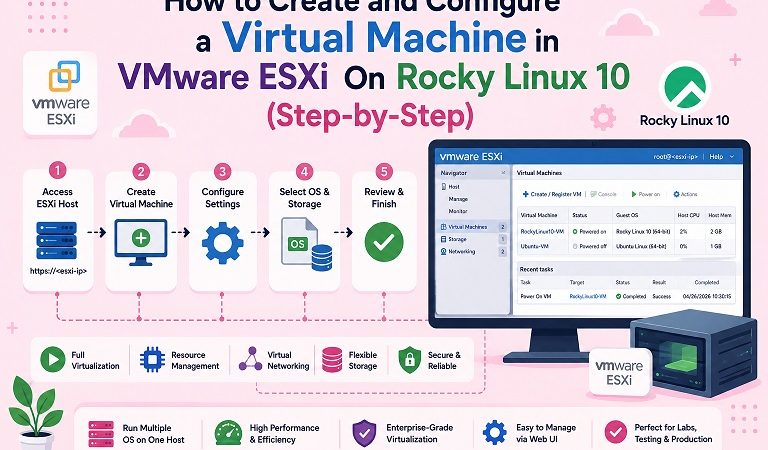
Once ESXi is installed on a server, the next job is creating virtual machines. You can do that entirely from the ESXi Host Client, the web interface built into every ESXi host, without vCenter.
This guide walks through the full workflow on ESXi 8.0: uploading an installation ISO, creating the VM with sensible CPU, memory, disk, and network settings, installing the guest operating system, adding VMware Tools, configuring autostart, and fixing the errors people hit most often. A CLI alternative using vim-cmd is included.
Table of Contents
- Before you start: versions and free-license limits
- Prerequisites
- What a VM is made of
- Step 1: Log in to the Host Client
- Step 2: Upload the installation ISO
- Step 3: Create the virtual machine
- Step 4: Recommended hardware settings
- Step 5: Power on and install the OS
- Step 6: Install VMware Tools or open-vm-tools
- Step 7: Autostart, snapshots and housekeeping
- Create a VM from the command line
- Troubleshooting
- FAQ
- Related guides
1. Before you start
Which ESXi version? The steps below use the ESXi 8.0 Host Client. With version 9.0, Broadcom renamed the hypervisor from ESXi back to ESX, and 9.0 shipped with the paid VMware Cloud Foundation and vSphere Foundation products. A separate free 9.0 edition was not offered at launch, while the free ESXi 8.0 Update 3 hypervisor became available again in 2025. Check the Broadcom support portal for the current download and licensing status before you plan a deployment.
Free hypervisor license limits (the stand-alone “vSphere Hypervisor” license):
| Limit | Detail |
|---|---|
| vCPUs per VM | Maximum 8 |
| Management | Single host through the Host Client; no vCenter management |
| APIs | Write access to the vSphere APIs is restricted, so most image-level backup products cannot protect VMs on a free host |
| Support | None from VMware/Broadcom |
If you need clustering, vMotion, or API-based backups, you need a paid license, or you could evaluate alternatives. We compare them in Best VMware ESXi Alternatives in 2026.
2. Prerequisites
| Requirement | Detail |
|---|---|
| ESXi host | Installed, reachable on your network, with a management IP |
| Datastore | At least one VMFS or NFS datastore with free space |
| ISO file | Installer for your guest OS (for example Rocky Linux 10, Ubuntu Server, or Windows Server) |
| Browser | Current Chrome, Firefox, or Edge |
| Credentials | root and the password set during ESXi installation |
| License | A valid or free license assigned (an expired evaluation prevents powering on VMs) |
New to ESXi? Start with our VMware ESXi bare-metal installation guide, then return here.
3. What a VM is made of
A VM is a folder on a datastore containing a handful of files. Knowing them helps when you troubleshoot or move VMs.
 ESXi host
 +------------------------------------------------------------+
 |  Datastore: datastore1                                     |
 |   |                                                        |
 |   +-- iso/                                                 |
 |   |     Rocky-10.2-x86_64-dvd.iso                          |
 |   |                                                        |
 |   +-- rocky-web01/                                         |
 |         rocky-web01.vmx        <- VM configuration         |
 |         rocky-web01.vmdk       <- virtual disk descriptor  |
 |         rocky-web01-flat.vmdk  <- virtual disk data        |
 |         rocky-web01.nvram      <- virtual BIOS/UEFI state  |
 |         vmware.log             <- VM log                   |
 +------------------------------------------------------------+
4. Step 1: Log in to the Host Client
- Open a browser and go to
https://<esxi-ip-or-hostname>/ui. - Accept the self-signed certificate warning (you can install a proper certificate later).
- Log in as
root.
Check Manage > Licensing first. If the host shows an expired evaluation, assign your license key before continuing.
5. Step 2: Upload the installation ISO
- In the left navigator, click Storage, then select your datastore.
- Click Datastore browser.
- Click Create directory, name it
iso, and open it. - Click Upload and choose your ISO file. Wait until the transfer completes; large ISOs can take several minutes.
Keeping ISOs in one folder makes them easy to find in the VM wizard later.
6. Step 3: Create the virtual machine
- Click Virtual Machines in the navigator, then Create / Register VM.
- Choose Create a new virtual machine and click Next.
- Name and guest OS:
- Name: for example
rocky-web01 - Compatibility: keep the default (the latest your host supports) unless you must move the VM to older hosts
- Guest OS family: Linux or Windows
- Guest OS version: pick the closest match
- Name: for example
- Select storage: choose the datastore for the VM files.
- Customize settings: use the recommendations in the next section.
- Review the summary and click Finish.
7. Step 4: Recommended hardware settings
On the Customize settings page, configure the hardware as follows.
| Setting | Recommended value | Notes |
|---|---|---|
| CPU | 2 vCPUs to start | Add more only if monitoring shows a need. Over-allocating hurts scheduling. Max 8 on the free license. |
| Memory | 4 GB for a small Linux server | Avoid “Reserve all guest memory” unless the workload needs it |
| Hard disk 1 | 40 GB, Thin provisioned | Thin saves space; use Thick Eager Zeroed for latency-sensitive databases |
| SCSI controller | VMware Paravirtual (PVSCSI) | Best performance on modern Linux and Windows; use LSI Logic SAS if the installer lacks a driver |
| Network adapter | VMXNET3 | Fast paravirtual NIC; needs open-vm-tools or VMware Tools drivers on older guests |
| CD/DVD drive | Datastore ISO file, Connect at power on checked | Browse to the ISO you uploaded |
| VM Options > Boot | Firmware: EFI | Enable Secure Boot only if your guest supports it |
Disk provisioning compared:
| Type | Space use | Speed | Best for |
|---|---|---|---|
| Thin | Grows on demand | Slight overhead when growing | Labs, general servers |
| Thick Lazy Zeroed | Full size reserved up front | Zeroes blocks on first write | General production |
| Thick Eager Zeroed | Full size reserved and pre-zeroed | Fastest first write | Databases, fault-tolerance features |
Make sure the CD/DVD drive is set to your ISO and that Connect at power on is ticked. Forgetting this is the most common reason for “no operating system found”.
8. Step 5: Power on and install the OS
- Select the VM in the list and click Power on.
- Click the VM’s console thumbnail, then Console > Open browser console (or use VMware Remote Console for better input handling).
- Complete the guest operating system installer as you would on physical hardware.
- After installation, remove the ISO: edit the VM, set the CD/DVD drive to Client Device, and untick Connect at power on.
9. Step 6: Install VMware Tools or open-vm-tools
Guest tools improve performance and add features such as clean shutdown from the Host Client, accurate time sync, guest IP reporting, and better mouse and display handling.
Linux (RHEL family, including Rocky Linux and AlmaLinux):
sudo dnf install -y open-vm-tools
sudo systemctl enable --now vmtoolsd
systemctl status vmtoolsd --no-pager
Debian / Ubuntu:
sudo apt update && sudo apt install -y open-vm-tools
sudo systemctl enable --now open-vm-tools
Windows: In the Host Client, select the VM and choose Actions > Guest OS > Install VMware Tools, then run the installer from the mounted drive inside Windows.
After installation, the VM summary in the Host Client shows the guest IP address and “VMware Tools is running”.
10. Step 7: Autostart, snapshots and housekeeping
Autostart: by default VMs do not power on after the host reboots.
- Click Host > Manage > System > Autostart.
- Click Edit settings, set Enabled to Yes, and set start delay and stop action (for example, Shut down).
- Back in Virtual Machines, select the VM and choose Actions > Autostart > Enable.
Snapshots are useful before upgrades, but they are not backups:
- They live on the same datastore as the VM.
- Long-lived snapshots grow and slow the VM.
- Delete a snapshot once the change is verified.
Other good habits:
| Habit | Why |
|---|---|
| Name VMs and datastores consistently | Easier automation and troubleshooting |
| Keep ISOs in a dedicated folder | Cleaner datastore |
| Document the root password and NTP settings | ESXi time drift breaks authentication in some guests |
| Plan real backups | With the free license, API-based backup tools may not work, so use in-guest backup agents or export OVF files |
11. Create a VM from the command line
You can manage VMs over SSH on the ESXi host (enable SSH under Host > Manage > Services). Useful vim-cmd commands:
# List registered VMs and their IDs
vim-cmd vmsvc/getallvms

# Check power state
vim-cmd vmsvc/power.getstate <vmid>

# Power on, shut down gracefully (needs tools), or power off hard
vim-cmd vmsvc/power.on <vmid>
vim-cmd vmsvc/power.shutdown <vmid>
vim-cmd vmsvc/power.off <vmid>

# Register an existing VM (for example, one you copied to the datastore)
vim-cmd solo/registervm /vmfs/volumes/datastore1/rocky-web01/rocky-web01.vmx

# See datastore free space
df -h | grep vmfs
Creating a VM from scratch is far easier in the Host Client. Use the CLI for registering, power control, and automation.
12. Troubleshooting
| Symptom | Likely cause | Fix |
|---|---|---|
| “No operating system found” / boots to firmware | ISO not attached or not connected at power on | Edit VM, set CD/DVD to the ISO and tick Connect at power on |
| VM will not power on, license error | Expired evaluation or no license | Manage > Licensing > Assign license |
| Error about more than 8 virtual CPUs | Free license limit | Reduce vCPUs to 8 or fewer (sockets x cores per socket) |
| “Insufficient resources” or memory reservation failure | Reserved memory exceeds free host RAM | Remove “Reserve all guest memory” or lower VM memory |
| “Failed to lock the file” | Another VM or process holds the disk | Make sure the disk is not attached to another running VM; check for stale snapshots |
| Datastore full, VM suspends | Thin disks and snapshots filled the datastore | Free space, delete snapshots, move VMs; monitor datastore usage |
| No network in guest | Wrong port group, missing driver, or NIC disconnected | Verify the port group, “Connected” checkbox, and install tools/drivers |
| Installer cannot see the disk | Guest lacks PVSCSI driver | Switch the controller to LSI Logic SAS for installation |
| Console keyboard or mouse problems | Browser console limits | Use VMware Remote Console |
| Time drifts in the guest | NTP not configured on host or guest | Enable NTP on the ESXi host and configure chrony or the Windows time service in the guest |
| Cannot upload large ISO | Browser timeout or datastore full | Retry, use a wired connection, or copy with scp to /vmfs/volumes/<datastore>/iso/ |
| Backup software cannot connect | Free license blocks write APIs | Use a paid license or in-guest backup |
13. FAQ
Can I create VMs without vCenter?
Yes. The ESXi Host Client manages a single host and is enough for creating, powering, and monitoring VMs.
Is the free ESXi good for production?
It suits labs and small environments. The 8-vCPU limit, lack of vCenter management, and restricted backup APIs make it a poor fit for critical production workloads.
Thin or thick disks?
Use thin for labs and general servers and thick eager zeroed for latency-sensitive databases. Monitor datastore capacity either way.
What if my guest OS version is missing from the list?
Choose the closest family entry. The guest OS setting only picks default virtual hardware, and you can install any compatible OS.
How do I move VMs off ESXi?
Export the VM as OVF and import it into another hypervisor. We cover this in How to Migrate VMware ESXi VMs to Proxmox VE.
Can I run a cluster with high availability?
ESXi clusters need vCenter and paid licensing. For an open-source alternative with clustering, see Proxmox VE Cluster Setup with High Availability.
Related posts:
 How to Install VMware ESXi: Step-by-Step Bare-Metal Setup Guide
 What is VMware? Complete Guide to Virtualization, vSphere, ESXi, and Cloud Solutions
 Rocky Linux vs Ubuntu: Command Cheat Sheet for Sysadmins
 NGINX Ingress on Rocky Linux 10 Kubernetes (kubeadm)
 Longhorn Persistent Storage on Rocky Linux 10 Kubernetes
 How to Install Buildah and Podman on Rocky Linux 10 (Rootless Containers & SELinux)
 How To Install MongoDB 5.0 On Rocky Linux 8
 How To Remove Users on Linux
