How to Install Harbor Private Container Registry

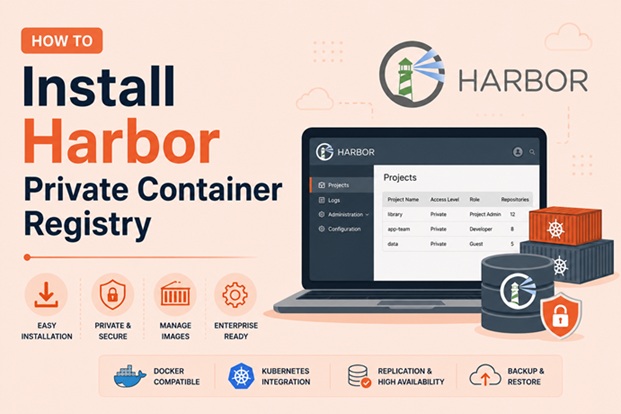
Harbor is a CNCF-graduated, open-source container registry that extends the base OCI Distribution spec with vulnerability scanning, image signing, role-based access control, replication, and a full web UI. It’s the go-to choice for teams that need a private, self-hosted alternative to Docker Hub or a managed cloud registry. This guide walks through installing Harbor v2.15.2 — the current stable release — on Ubuntu 26.04 LTS using the official offline installer, with HTTPS, Trivy vulnerability scanning, and a working docker push/pull flow by the end.
By the end of this tutorial you’ll have Harbor running behind TLS, an admin account you can log into, a project created, and a locally built image successfully pushed to your own registry.
Table of Contents
- Prerequisites
- Installation Methods Compared
- Architecture: How Harbor’s Components Fit Together
- Step 1: Install Docker and Docker Compose
- Step 2: Download the Harbor Installer
- Step 3: Generate TLS Certificates
- Step 4: Configure harbor.yml
- Step 5: Run the Installer
- Verifying the Installation
- Logging Into the Harbor UI
- Creating a Project and Pushing Your First Image
- Enabling Vulnerability Scanning with Trivy
- Managing Harbor as a systemd Service
- Troubleshooting
- Uninstalling Harbor
- FAQ
- Related Reads on bckinfo.com
Prerequisites
Before installing Harbor, make sure your Ubuntu 26.04 LTS host meets the following requirements:
- A user account with
sudoprivileges - Docker Engine 20.10.10-ce or newer and Docker Compose 1.18.0 or newer (the
docker composeplugin satisfies this) - Minimum 2 CPU / 4 GB RAM / 40 GB disk for evaluation; 4 CPU / 8 GB RAM / 160 GB disk recommended for production use
- A resolvable hostname or static IP for the registry (used in TLS certificates and Docker daemon configuration)
opensslfor generating self-signed certificates, or an existing certificate from your organization’s CA- The following ports open on the host: 443 (HTTPS), 4443 (Notary, if enabled), and 80 (HTTP redirect, optional)
Installation Methods Compared
| Method | Best For | Version Freshness | GitOps Friendly | Best Suited To |
||||||
| Offline Installer (this guide) | Single-host production or evaluation deployments | Pinned to the release you download | Partial (via harbor.yml) | VMs, bare-metal, air-gapped environments |
| Online Installer | Fast setup with a live internet connection | Pulls latest matching images at install time | Partial | Standard internet-connected hosts |
| Harbor Helm Chart | Clusters already running Kubernetes | Latest, via chart versioning | Yes | Production Kubernetes environments |
This guide uses the offline installer, which bundles all required container images into a single archive — it’s the most predictable method and works identically whether or not the host has outbound internet access after the initial download.
Architecture: How Harbor’s Components Fit Together
Harbor is deployed as a set of Docker containers orchestrated by Docker Compose, sitting in front of the standard OCI Distribution registry.
                    ┌───────────────────────────────────────────────────┐
                    │                Ubuntu 26.04 LTS Host              │
                    │                                                   │
                    │   ┌───────────────┐        ┌────────────────────┐  │
                    │   │  Nginx Proxy  │◄───────┤  docker push/pull   │  │
                    │   │  (TLS :443)   │        │  (client)           │  │
                    │   └───────┬───────┘        └────────────────────┘  │
                    │           │                                        │
                    │  ┌────────┼─────────────────────────────────────┐  │
                    │  ▼        ▼             ▼             ▼         │  │
                    │ ┌────────┐ ┌──────────┐ ┌──────────┐ ┌────────┐ │  │
                    │ │  Core  │ │ Registry │ │  Portal  │ │  Trivy │ │  │
                    │ │(API/   │ │(OCI      │ │  (Web UI)│ │(scanner) │  │
                    │ │ Auth)  │ │ storage) │ │          │ │        │ │  │
                    │ └───┬────┘ └────┬─────┘ └──────────┘ └────────┘ │  │
                    │     │           │                                 │
                    │     ▼           ▼                                 │
                    │ ┌────────┐ ┌────────────┐  ┌───────────────────┐  │
                    │ │Postgres│ │ Job Service│  │  Redis / Valkey    │  │
                    │ │ (DB)   │ │ (async jobs)│  │  (cache & queue)   │  │
                    │ └────────┘ └───────────┘  └───────────────────┘  │
                    │                                                   │
                    │           /data/harbor (persistent volume)        │
                    └───────────────────────────────────────────────────┘
The Nginx proxy container terminates TLS and routes traffic to Core (API and auth), the Registry service (actual blob/image storage), the Portal (Vue-based web UI), and Trivy for scanning — all backed by PostgreSQL for metadata and Redis (Valkey, as of Harbor 2.15.2) for caching and job queues.
Step 1: Install Docker and Docker Compose
sudo apt update
sudo apt install -y ca-certificates curl gnupg
sudo install -m 0755 -d /etc/apt/keyrings
curl -fsSL https://download.docker.com/linux/ubuntu/gpg | sudo gpg --dearmor -o /etc/apt/keyrings/docker.gpg
sudo chmod a+r /etc/apt/keyrings/docker.gpg

echo \
  "deb [arch=$(dpkg --print-architecture) signed-by=/etc/apt/keyrings/docker.gpg] https://download.docker.com/linux/ubuntu \
  $(. /etc/os-release && echo "$VERSION_CODENAME") stable" | \
  sudo tee /etc/apt/sources.list.d/docker.list > /dev/null

sudo apt update
sudo apt install -y docker-ce docker-ce-cli containerd.io docker-compose-plugin
Verify both are installed and meet the minimum versions:
docker version
docker compose version
Add your user to the docker group so you don’t need sudo for every Docker command (log out and back in afterward):
sudo usermod -aG docker $USERStep 2: Download the Harbor Installer
cd /tmp
curl -L https://github.com/goharbor/harbor/releases/download/v2.15.2/harbor-offline-installer-v2.15.2.tgz \
  -o harbor-offline-installer-v2.15.2.tgz
Extract it to /opt:
sudo tar xzf harbor-offline-installer-v2.15.2.tgz -C /opt/
sudo chown -R "$(id -u):$(id -g)" /opt/harbor
cd /opt/harbor
Step 3: Generate TLS Certificates
Running Harbor without TLS causes Docker clients to reject the registry by default, so set up certificates before configuring harbor.yml. For internal/lab use, a self-signed certificate is sufficient:
sudo mkdir -p /etc/harbor/certs
cd /etc/harbor/certs

openssl req -x509 -nodes -sha512 -days 3650 \
  -newkey rsa:4096 \
  -keyout harbor.key \
  -out harbor.crt \
  -subj "/CN=registry.example.com/O=bckinfo/C=ID"
Replace registry.example.com with your actual hostname or IP. For a certificate trusted without client-side workarounds, request one from your organization’s internal CA or a public CA like Let’s Encrypt instead.
Step 4: Configure harbor.yml
Copy the template and edit it:
cd /opt/harbor
cp harbor.yml.tmpl harbor.yml
nano harbor.yml
Key settings to update:
hostname: registry.example.com

https:
  port: 443
  certificate: /etc/harbor/certs/harbor.crt
  private_key: /etc/harbor/certs/harbor.key

harbor_admin_password: ChangeThisStrongPassword123!

database:
  password: ChangeThisDbPassword123!

data_volume: /data/harbor

trivy:
  ignore_unfixed: false
  skip_update: false
Never leave harbor_admin_password or database.password at their template defaults — Harbor’s default admin credentials are widely known and actively targeted by internet-wide scanners against exposed registries.
Step 5: Run the Installer
Run the preparation and installation script, including the --with-trivy flag to enable vulnerability scanning:
sudo ./install.sh --with-trivyThe script validates your Docker/Compose versions, generates the internal Compose file from harbor.yml, pulls the bundled images, and starts all containers. This typically takes 2–5 minutes depending on disk speed.
Verifying the Installation
Confirm every Harbor container is Up (or healthy):
sudo docker compose -f /opt/harbor/docker-compose.yml psExpected containers include nginx, harbor-core, harbor-db, harbor-portal, registry, registryctl, harbor-jobservice, redis, and trivy-adapter (when --with-trivy was used).
Check that HTTPS responds correctly:
curl -k https://registry.example.com/api/v2.0/systeminfoA JSON response containing Harbor’s version and configuration confirms the API is reachable.
Logging Into the Harbor UI
Open a browser and navigate to:
https://registry.example.comLog in with:
- Username:
admin - Password: the value you set for
harbor_admin_passwordinharbor.yml
Immediately change the admin password from User Profile → Change Password if you plan to keep this instance running beyond initial testing.
Creating a Project and Pushing Your First Image
Step 1 — Create a project in the UI
In the Harbor UI, go to Projects → New Project, name it (e.g., library), and choose Private or Public access.
Step 2 — Trust the certificate on the Docker client (self-signed only)
sudo mkdir -p /etc/docker/certs.d/registry.example.com
sudo cp /etc/harbor/certs/harbor.crt /etc/docker/certs.d/registry.example.com/ca.crt
sudo systemctl restart docker
Step 3 — Log in from the Docker CLI
docker login registry.example.com -u adminStep 4 — Tag and push an image
docker pull nginx:stable-alpine
docker tag nginx:stable-alpine registry.example.com/library/nginx:stable-alpine
docker push registry.example.com/library/nginx:stable-alpine
Step 5 — Confirm it appears in the UI
Navigate to Projects → library → Repositories — the pushed image, its tags, size, and (if scanning is enabled) vulnerability summary should be listed.
Enabling Vulnerability Scanning with Trivy
If you installed with --with-trivy, scanning is available immediately:
- In the Harbor UI, go to your project’s Repositories tab
- Select an image tag and click Scan
- Once complete, the UI shows a severity breakdown (Critical/High/Medium/Low)
To scan automatically on every push, enable Automatically scan images on push under Project → Configuration. You can also enforce a Prevent vulnerable images from running policy that blocks pulls of images above a chosen severity threshold.
Managing Harbor as a systemd Service
Docker Compose doesn’t automatically restart Harbor’s containers on host reboot unless configured to. Create a systemd unit that wraps docker compose up/down:
sudo nano /etc/systemd/system/harbor.service[Unit]
Description=Harbor Container Registry
After=docker.service
Requires=docker.service
[Service]
Type=oneshot
RemainAfterExit=true
WorkingDirectory=/opt/harbor
ExecStart=/usr/bin/docker compose -f /opt/harbor/docker-compose.yml up -d
ExecStop=/usr/bin/docker compose -f /opt/harbor/docker-compose.yml down
[Install]
WantedBy=multi-user.targetEnable it:
sudo systemctl daemon-reload
sudo systemctl enable --now harbor
sudo systemctl status harbor
Troubleshooting
| Symptom | Likely Cause | Fix |
||||
| x509: certificate signed by unknown authority on docker push | Docker client doesn’t trust the self-signed certificate | Copy harbor.crt into /etc/docker/certs.d/<hostname>/ca.crt and restart Docker |
| install.sh fails with a Docker/Compose version error | Docker or Compose below the minimum required version | Upgrade to Docker 20.10.10+ and Compose 1.18.0+, then re-run ./install.sh |
| Harbor UI loads but login fails with correct password | Stale browser session or clock skew between client and server | Clear cookies for the Harbor domain, or verify NTP sync with timedatectl status |
| harbor-db container repeatedly restarting | database.password mismatch after editing harbor.yml post-install | Stop Harbor, restore the original password used at first install, or follow Harbor’s documented DB password-reset procedure |
| Push fails with blob upload unknown | Registry storage volume ran out of disk space | Check df -h on the data_volume path and expand storage |
| Trivy scans stuck in Pending | trivy-adapter container not running (installed without --with-trivy) | Re-run install.sh --with-trivy, or enable it separately per Harbor’s scanner configuration docs |
| Can’t reach Harbor after host reboot | Containers didn’t restart automatically | Set up the systemd unit shown above, or run docker compose -f /opt/harbor/docker-compose.yml up -d manually |
| 502 Bad Gateway from Nginx | harbor-core container still starting or crashed | Run sudo docker compose -f /opt/harbor/docker-compose.yml logs core to check for errors |
Uninstalling Harbor
cd /opt/harbor
sudo docker compose down -v
sudo systemctl disable --now harbor 2>/dev/null
sudo rm -rf /opt/harbor
sudo rm -rf /data/harbor
sudo rm /etc/systemd/system/harbor.service
This removes all Harbor containers, associated volumes, and stored images — back up /data/harbor first if you need to retain any pushed images.
FAQ
Does Harbor require Kubernetes to run?
No. The offline installer used in this guide runs entirely on Docker Compose on a single host. Kubernetes is only needed if you choose the Harbor Helm chart deployment method instead.
What’s the minimum Docker version Harbor supports?
Docker Engine 20.10.10-ce or newer, with Docker Compose 1.18.0 or newer (the docker compose plugin satisfies this requirement).
Can I use Harbor without TLS?
Technically yes, but Docker clients treat non-TLS registries as insecure by default and require an insecure-registries override in daemon.json on every client — TLS (even self-signed) is strongly recommended.
Does Harbor replace Docker Hub entirely?
For private, self-hosted image storage, yes. Harbor also supports replication rules to sync images to or from Docker Hub, another Harbor instance, or other OCI-compliant registries, so many teams use it alongside public registries rather than as a full replacement.
What changed in Harbor 2.15.x regarding caching?
As of Harbor 2.15.2, Redis was replaced with Valkey as the default cache and job queue backend — functionally compatible, but worth noting if you have monitoring or tooling that specifically expects a Redis process name.
Related posts:
 How To Install Podman On Ubuntu 20.04 LTS
 Top 15 Kubernetes Interview Questions and Answers for Beginners (2025)
 What Is KubeKey? Complete Explanation for DevOps Beginners
 Docker Container Security Best Practices: A Comprehensive Guide
 Redis with Docker Compose: Persistence, Security, and Production-Ready Configuration
 How to Install MetalLB on Bare Metal Kubernetes Cluster (L2 and BGP Guide)
 Kubernetes Deployment vs StatefulSet vs DaemonSet: Complete Comparison with Examples
 How to Deploy a Highly Available Kubernetes Cluster with Keepalived and HAProxy (2026 Guide)
