How to Install Apache Maven on Ubuntu 26.04 LTS (Step-by-Step Guide)

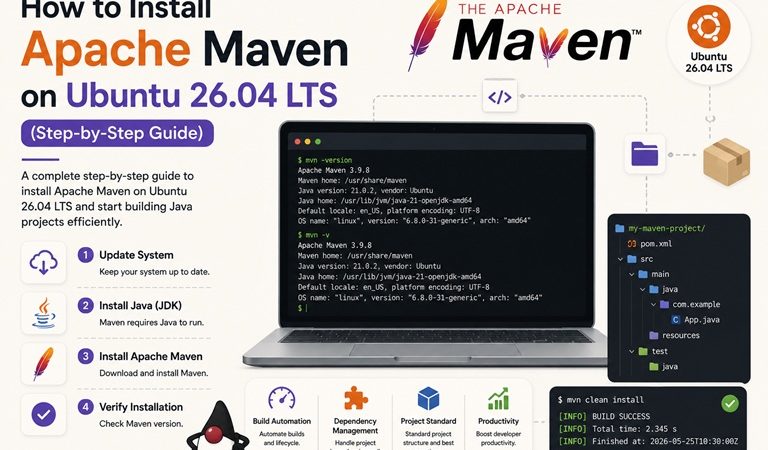
Table of Contents
- What is Apache Maven and Why Java Developers Need It
- APT Method vs Manual Install: Which One to Choose
- Prerequisites
- Method 1: Install Maven via APT (Simple)
- Method 2: Install Maven Manually from Apache (Recommended)
- Step: Configure Environment Variables
- Verify the Installation
- Create and Build Your First Maven Project
- Understanding the Maven Build Lifecycle
- Configuring Maven: settings.xml
- Using Maven with Apache Tomcat for WAR Deployment
- Maven in CI/CD with GitHub Actions
- Maven vs Gradle: Which Build Tool to Choose
- Common Issues and Quick Fixes
- Next Steps
Every Java project eventually faces the same set of problems: where do dependencies come from, how does the code get compiled into a runnable artifact, how are tests executed consistently across different machines, and how does the output get packaged for deployment? Apache Maven solves all of these with a single, standardized approach — a pom.xml file that describes your project, and a build lifecycle that knows what to do with it.
This guide covers two installation methods for Maven 3.9.16 on Ubuntu 26.04 LTS — the quick APT method and the recommended manual install that gives you the latest upstream version — along with environment setup, your first project, and CI/CD integration.
What is Apache Maven and Why Java Developers Need It
Maven is a build automation and dependency management tool for Java projects (and other JVM languages). At its core, it does three things:
1. Dependency management — Instead of manually downloading JAR files and adding them to your classpath, you declare dependencies in pom.xml and Maven fetches them from Maven Central (or a private repository) automatically. Transitive dependencies (dependencies of your dependencies) are resolved the same way.
2. Standardized build lifecycle — Maven defines a fixed sequence of phases: validate → compile → test → package → verify → install → deploy. Every Maven project follows the same lifecycle, so any developer on the team (or any CI/CD system) knows exactly how to build it without reading setup docs.
3. Project structure convention — Maven enforces a standard directory layout (src/main/java, src/test/java, src/main/resources) that every Maven project shares. Tools, IDEs, and CI systems understand this layout without configuration.
The result: mvn clean package is all it takes to compile, test, and package a Maven project — regardless of how complex the project is.
APT Method vs Manual Install: Which One to Choose
| APT Method | Manual Install | |
|---|---|---|
| Maven version on Ubuntu 26.04 | 3.9.12 (slightly behind upstream) | 3.9.16 (latest stable) |
| Setup time | ~2 minutes | ~5 minutes |
| System updates | Managed by apt upgrade | Manual update needed |
| Multiple versions | No | Yes (via SDKMAN or manual symlinks) |
| Best for | Quick dev setup, CI/CD containers | Production servers, teams needing specific versions |
For most use cases on Ubuntu 26.04, the version difference between APT and manual is minor — both are on the Maven 3.9.x branch. Choose APT for simplicity, manual when you need the exact latest upstream version or want full control.
Prerequisites
- Ubuntu 26.04 LTS (Resolute Raccoon)
- Java 8 or higher installed (Java 21 recommended — see our Apache Tomcat guide for Java 21 setup steps)
sudoaccess- Internet connection
Verify Java is installed before proceeding:
java -version
# openjdk version "21.x.x" ...

echo $JAVA_HOME
# /usr/lib/jvm/java-21-openjdk-amd64
If Java is not installed:
sudo apt update
sudo apt install -y openjdk-21-jdk-headless

echo 'export JAVA_HOME=/usr/lib/jvm/java-21-openjdk-amd64' | \
  sudo tee /etc/profile.d/java.sh
source /etc/profile.d/java.sh
Method 1: Install Maven via APT (Simple)
The fastest way to get Maven running on Ubuntu 26.04:
sudo apt update
sudo apt install -y maven
Verify:
mvn -versionExpected output:
Apache Maven 3.9.12 (...)
Maven home: /usr/share/maven
Java version: 21.x.x, vendor: Ubuntu
That’s it for APT install — Maven is immediately available system-wide. Skip to the Verify the Installation section.
Method 2: Install Maven Manually from Apache (Recommended)
The manual method installs the latest upstream release (3.9.16 at time of writing) directly from Apache, giving you full control over the version:
Download Maven 3.9.16:
MAVEN_VERSION="3.9.16"

wget https://downloads.apache.org/maven/maven-3/${MAVEN_VERSION}/binaries/apache-maven-${MAVEN_VERSION}-bin.tar.gz \
  -O /tmp/maven.tar.gz
Verify the download checksum (recommended — protects against corrupted downloads):
wget https://downloads.apache.org/maven/maven-3/${MAVEN_VERSION}/binaries/apache-maven-${MAVEN_VERSION}-bin.tar.gz.sha512 \
  -O /tmp/maven.tar.gz.sha512

sha512sum -c /tmp/maven.tar.gz.sha512
# Expected: /tmp/maven.tar.gz: OK
Extract to /opt/maven:
sudo mkdir -p /opt/maven
sudo tar -xzf /tmp/maven.tar.gz -C /opt/maven --strip-components=1

# Verify
ls /opt/maven
# bin  boot  conf  lib  LICENSE  NOTICE  README.txt
Clean up:
rm /tmp/maven.tar.gz /tmp/maven.tar.gz.sha512Step: Configure Environment Variables
Whether you used APT or manual install, setting JAVA_HOME, M2_HOME, and MAVEN_HOME in a profile script ensures they’re available for all users, login shells, and CI/CD processes:
sudo nano /etc/profile.d/maven.sh# Apache Maven environment variables
export JAVA_HOME=/usr/lib/jvm/java-21-openjdk-amd64
export M2_HOME=/opt/maven
export MAVEN_HOME=/opt/maven
export PATH=${M2_HOME}/bin:${PATH}Note for APT users: If you installed via APT, Maven is already on your PATH at
/usr/bin/mvn. You still benefit from settingJAVA_HOMEexplicitly — Maven uses it to find the JDK whenJAVA_HOMEisn’t set, which can cause issues in non-interactive shells (like CI/CD runners).
Apply the changes:
sudo chmod +x /etc/profile.d/maven.sh
source /etc/profile.d/maven.sh
Verify the Installation
mvn -versionExpected output (manual install):
Apache Maven 3.9.16 (...)
Maven home: /opt/maven
Java version: 21.x.x, vendor: Ubuntu, runtime: /usr/lib/jvm/java-21-openjdk-amd64
Default locale: en_US, platform encoding: UTF-8
OS name: "linux", version: "7.x.x-generic", arch: "amd64", family: "unix"
Confirm the correct Java is being used — the Java version line should match your intended JDK (21.x.x), not an older version that might be installed alongside it.
Create and Build Your First Maven Project
Maven’s archetype:generate command scaffolds a complete project structure:
mvn archetype:generate \
  -DgroupId=com.bckinfo \
  -DartifactId=my-first-app \
  -DarchetypeArtifactId=maven-archetype-quickstart \
  -DarchetypeVersion=1.5 \
  -DinteractiveMode=false
This creates the following structure:
my-first-app/
├── pom.xml                          ← Project descriptor
└── src/
    ├── main/
    │   └── java/
    │       └── com/bckinfo/
    │           └── App.java         ← Main class
    └── test/
        └── java/
            └── com/bckinfo/
                └── AppTest.java     ← Unit test
Build the project:
cd my-first-app
mvn clean package
Maven executes the build lifecycle — downloads dependencies, compiles the source, runs tests, and packages everything into a JAR:
[INFO] --- maven-compiler-plugin:3.13.0:compile ---
[INFO] Compiling 1 source file with javac [debug release 8]
[INFO] --- maven-surefire-plugin:3.3.1:test ---
[INFO] Tests run: 1, Failures: 0, Errors: 0, Skipped: 0
[INFO] --- maven-jar-plugin:3.4.2:jar ---
[INFO] Building jar: target/my-first-app-1.0-SNAPSHOT.jar
[INFO] BUILD SUCCESS
Run the packaged JAR:
java -cp target/my-first-app-1.0-SNAPSHOT.jar com.bckinfo.App
# Hello World!
The pom.xml file — the heart of every Maven project:
<?xml version="1.0" encoding="UTF-8"?>
<project xmlns="http://maven.apache.org/POM/4.0.0"
         xmlns:xsi="http://www.w3.org/2001/XMLSchema-instance"
         xsi:schemaLocation="http://maven.apache.org/POM/4.0.0
         http://maven.apache.org/xsd/maven-4.0.0.xsd">
  <modelVersion>4.0.0</modelVersion>

  <groupId>com.bckinfo</groupId>
  <artifactId>my-first-app</artifactId>
  <version>1.0-SNAPSHOT</version>
  <packaging>jar</packaging>

  <properties>
    <maven.compiler.source>21</maven.compiler.source>
    <maven.compiler.target>21</maven.compiler.target>
    <project.build.sourceEncoding>UTF-8</project.build.sourceEncoding>
  </properties>

  <dependencies>
    <!-- JUnit 5 for unit testing -->
    <dependency>
      <groupId>org.junit.jupiter</groupId>
      <artifactId>junit-jupiter</artifactId>
      <version>5.11.4</version>
      <scope>test</scope>
    </dependency>
  </dependencies>

  <build>
    <plugins>
      <plugin>
        <groupId>org.apache.maven.plugins</groupId>
        <artifactId>maven-surefire-plugin</artifactId>
        <version>3.5.2</version>
      </plugin>
    </plugins>
  </build>
</project>
Understanding the Maven Build Lifecycle
Maven’s lifecycle phases run in order — each phase includes all previous phases:
| Phase | What it does |
|---|---|
mvn validate | Validates project structure and POM |
mvn compile | Compiles source code to target/classes |
mvn test | Runs unit tests (doesn’t package) |
mvn package | Packages compiled code into JAR/WAR |
mvn verify | Runs integration tests on packaged artifact |
mvn install | Installs artifact to local repository (~/.m2) |
mvn deploy | Copies artifact to remote repository (Nexus, Artifactory) |
Most frequently used commands:
# Clean build (removes target/ directory first — recommended for CI)
mvn clean package

# Skip tests (useful during development, not in CI)
mvn clean package -DskipTests

# Run only tests without packaging
mvn test

# Show dependency tree (debug classpath issues)
mvn dependency:tree

# Check for dependency updates
mvn versions:display-dependency-updates

# Parallel build (faster on multi-core machines — 1 thread per core)
mvn clean package -T 1C
Configuring Maven: settings.xml
Maven’s global configuration lives at /opt/maven/conf/settings.xml (system-wide) or ~/.m2/settings.xml (per-user). The most common things to configure:
Corporate proxy setup (if Maven needs to download dependencies through a proxy):
<!-- ~/.m2/settings.xml -->
<settings>
  <proxies>
    <proxy>
      <id>corporate-proxy</id>
      <active>true</active>
      <protocol>http</protocol>
      <host>proxy.yourcompany.com</host>
      <port>8080</port>
      <username>proxyuser</username>
      <password>proxypass</password>
      <nonProxyHosts>localhost|127.0.0.1|*.yourcompany.com</nonProxyHosts>
    </proxy>
  </proxies>
</settings>
Mirror configuration (use a faster regional Maven Central mirror):
<settings>
  <mirrors>
    <mirror>
      <id>central-asia</id>
      <mirrorOf>central</mirrorOf>
      <url>https://repo1.maven.org/maven2</url>
    </mirror>
  </mirrors>
</settings>
Server credentials (for deploying to a private repository):
<settings>
  <servers>
    <server>
      <id>nexus-releases</id>
      <username>deploy-user</username>
      <password>${env.NEXUS_PASSWORD}</password>
    </server>
  </servers>
</settings>
Using ${env.NEXUS_PASSWORD} pulls the password from an environment variable rather than storing it in plain text — the correct approach for CI/CD environments and shared machines.
Using Maven with Apache Tomcat for WAR Deployment
Maven and Tomcat work together naturally — Maven packages the WAR, Tomcat deploys it. Add the Tomcat Maven Plugin to your pom.xml for direct deployment from the command line:
<build>
  <plugins>
    <!-- Change packaging from jar to war -->
    <plugin>
      <groupId>org.apache.maven.plugins</groupId>
      <artifactId>maven-war-plugin</artifactId>
      <version>3.4.0</version>
    </plugin>

    <!-- Tomcat 10/11 deployment plugin -->
    <plugin>
      <groupId>org.apache.tomcat.maven</groupId>
      <artifactId>tomcat10-maven-plugin</artifactId>
      <version>2.0-beta-1</version>
      <configuration>
        <url>http://localhost:8080/manager/text</url>
        <serverId>tomcat-local</serverId>
        <path>/my-app</path>
      </configuration>
    </plugin>
  </plugins>
</build>
Add Tomcat credentials to ~/.m2/settings.xml:
<servers>
  <server>
    <id>tomcat-local</id>
    <username>manager</username>
    <password>YOUR_TOMCAT_MANAGER_PASSWORD</password>
  </server>
</servers>
Deploy directly to Tomcat:
# Package and deploy in one command
mvn clean package tomcat10:deploy

# Redeploy (update existing deployment)
mvn clean package tomcat10:redeploy

# Undeploy
mvn tomcat10:undeploy
For a complete Tomcat 11 setup to deploy to, see our Apache Tomcat 11 on Ubuntu 26.04 guide.
Maven in CI/CD with GitHub Actions
A complete GitHub Actions workflow that builds and tests a Maven project on every push:
# .github/workflows/build.yml
name: Java CI with Maven

on:
  push:
    branches: [ main, develop ]
  pull_request:
    branches: [ main ]

jobs:
  build:
    runs-on: ubuntu-latest

    steps:
      - name: Checkout source code
        uses: actions/checkout@v4

      - name: Set up Java 21
        uses: actions/setup-java@v4
        with:
          java-version: '21'
          distribution: 'temurin'
          cache: maven        # Cache ~/.m2 between runs

      - name: Build with Maven
        run: mvn clean verify --batch-mode --no-transfer-progress

      - name: Upload test results
        if: always()
        uses: actions/upload-artifact@v4
        with:
          name: test-results
          path: target/surefire-reports/

      - name: Upload JAR artifact
        uses: actions/upload-artifact@v4
        with:
          name: application-jar
          path: target/*.jar
Key flags for CI environments:
--batch-mode— disables interactive prompts and uses non-colorized output suitable for logs--no-transfer-progress— suppresses the download progress bars that flood CI logscache: maven— caches~/.m2/repositorybetween workflow runs, dramatically speeding up builds once dependencies are cached
Maven vs Gradle: Which Build Tool to Choose
| Apache Maven | Gradle | |
|---|---|---|
| Configuration | XML (pom.xml) | Groovy/Kotlin DSL (build.gradle) |
| Build speed | Moderate | Faster (incremental builds, build cache) |
| Learning curve | Moderate (XML is verbose) | Higher (DSL requires learning) |
| Convention | Strong (opinionated, standardized) | Flexible (more configuration needed) |
| Ecosystem | Largest (Maven Central, widest plugin support) | Large (compatible with Maven repos) |
| IDE support | Excellent (IntelliJ, Eclipse, VS Code) | Excellent |
| Android | Not used | Android’s official build tool |
| Spring Boot default | Maven | Both supported |
| Enterprise adoption | Very high | High and growing |
Choose Maven when:
- Your team is already familiar with it
- You’re working on a Spring Boot or Java EE project (Maven is the default)
- You want convention over configuration and a highly standardized build
- You need the widest plugin ecosystem
Choose Gradle when:
- You’re building Android apps (Gradle is mandatory)
- Build speed is critical (Gradle’s incremental builds and build cache are significantly faster for large projects)
- You prefer a concise build file over XML
- You need highly customized build logic
Common Issues and Quick Fixes
| Symptom | Likely Cause | Fix |
|---|---|---|
mvn: command not found | PATH not set, or new shell not sourced | Run source /etc/profile.d/maven.sh or open a new terminal |
JAVA_HOME not set error | JAVA_HOME not exported before running Maven | Set JAVA_HOME in /etc/profile.d/maven.sh and source it |
| Wrong Maven version shown | APT and manual Maven both installed, wrong one on PATH | Run which mvn to see which binary is active; check PATH order |
| Downloads fail / connection timeout | Corporate proxy not configured | Add proxy settings to ~/.m2/settings.xml |
BUILD FAILURE — test failures | Unit tests failing | Run mvn test and read target/surefire-reports/ for details |
| Slow builds downloading dependencies | No dependency cache, or slow Maven Central | Add a mirror in settings.xml; use -o (offline mode) if all deps are already cached |
Permission denied on /opt/maven | Wrong ownership after manual install | sudo chown -R $USER:$USER /opt/maven |
Next Steps
With Maven installed and working, you have the complete Java build toolchain on Ubuntu 26.04:
- Deploy WAR files to Tomcat — use the Tomcat Maven plugin to go from
pom.xmlto a running application in one command. See our Apache Tomcat 11 on Ubuntu 26.04 guide for the server setup. - Integrate with Apache Kafka — build a Java Kafka producer/consumer application using the
kafka-clientsdependency, deploy it to Tomcat or as a standalone JAR. See our Apache Kafka on Ubuntu 26.04 guide. - Containerize with Docker — package your Maven-built JAR or WAR into a Docker image for consistent deployment. See our Docker on Ubuntu 26.04 guide for the Docker setup.
- Monitor your Java apps — expose JVM metrics (heap usage, GC, thread count) to Prometheus via JMX Exporter and visualize them in Grafana. See our Prometheus + Grafana monitoring stack guide.
Related posts:
 How To Install Apache Maven On Ubuntu 22.04 LTS
 How To Install Apache Spark On Ubuntu 20.04
 How To Install Apache Web Server on Ubuntu 18.04 LTS
 Installing Apache Groovy On Ubuntu 20.04 LTS Step by Step
 How To Install Apache Maven on CentOS 8
 How To Uninstall Apache Web Server from Ubuntu 22.04 (A Step-by-Step Guide)
 How To Install Apache Solr 8.9 On Ubuntu 20.04 LTS Step by Step
 How to Install Apache Atlas on Ubuntu 24.04 LTS — A Complete Guide
