How to Install Docker and Docker Compose on Ubuntu 26.04 LTS

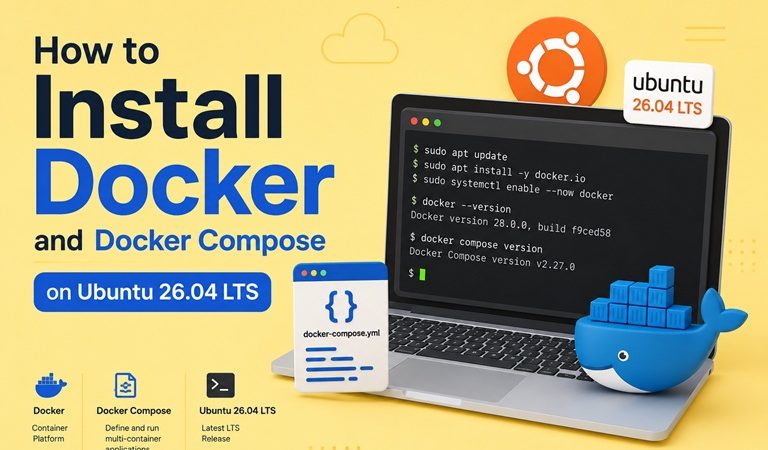
Table of Contents
- What’s Different About Docker on Ubuntu 26.04
- Prerequisites
- Step 1: Remove Conflicting Packages
- Step 2: Add Docker’s Official Repository
- Step 3: Install Docker Engine and Docker Compose
- Step 4: Verify the Installation
- Step 5: Post-Installation Configuration
- Step 6: Configure Docker to Start on Boot
- Running Your First Container
- Running Your First Docker Compose Stack
- Important Notes for Ubuntu 26.04 Specifically
- Common Issues and Quick Fixes
- Next Steps
Ubuntu 26.04 LTS, codenamed Resolute Raccoon, was released on April 23, 2026 and brings Linux kernel 7.0, GNOME 50, and one significant change that affects every Docker user: cgroup v1 is completely removed. If you’re migrating from Ubuntu 22.04 or 24.04 and have older Docker configurations, this matters. If you’re starting fresh on 26.04, Docker CE from the official repository handles everything correctly out of the box.
This guide covers a clean Docker CE installation on Ubuntu 26.04 LTS using Docker’s official repository — the only method that gives you current versions, security updates, and proper support.
What’s Different About Docker on Ubuntu 26.04
Before the steps, three things worth knowing if you’re coming from an older Ubuntu release:
1. cgroup v1 is gone — cgroup v2 only. Ubuntu 26.04 removes the legacy cgroup v1 hierarchy entirely. Docker CE from the official repository fully supports cgroup v2 and handles this transparently. The older docker.io package from Ubuntu’s default repository may not — another reason to always use Docker’s official repo.
2. containerd 2.x is now the default. Previous Ubuntu LTS releases shipped containerd 1.x. Ubuntu 26.04 moves to containerd 2.x, which Docker CE 29.4.0 supports natively.
3. Don’t use docker.io from Ubuntu’s default repository. Ubuntu’s own repository includes a package called docker.io, but it consistently lags behind official Docker CE releases. Always install from download.docker.com.
Prerequisites
- Ubuntu 26.04 LTS (Resolute Raccoon) — fresh install or existing server
- A user account with
sudoprivileges - Internet access to reach Docker’s package repository
- 64-bit architecture (x86_64 or arm64)
Step 1: Remove Conflicting Packages
Ubuntu 26.04 may have older or unofficial Docker-related packages pre-installed. Remove them first to avoid conflicts:
for pkg in docker.io docker-doc docker-compose docker-compose-v2 \
            podman-docker containerd runc; do
  sudo apt remove -y $pkg 2>/dev/null
done
It’s fine if some of these are not found — the command skips them silently.
Step 2: Add Docker’s Official Repository
Docker does not use Ubuntu’s default repository. You need to add Docker’s own APT source and its GPG signing key first.
Update the package index and install required tools:
sudo apt update
sudo apt install -y ca-certificates curl gnupg
Add Docker’s GPG key:
sudo install -m 0755 -d /etc/apt/keyrings
sudo curl -fsSL https://download.docker.com/linux/ubuntu/gpg \
  -o /etc/apt/keyrings/docker.asc
sudo chmod a+r /etc/apt/keyrings/docker.asc
Add the Docker repository:
echo \
  "Types: deb
URIs: https://download.docker.com/linux/ubuntu
Suites: $(. /etc/os-release && echo "${UBUNTU_CODENAME:-$VERSION_CODENAME}")
Components: stable
Architectures: $(dpkg --print-architecture)
Signed-By: /etc/apt/keyrings/docker.asc" | \
  sudo tee /etc/apt/sources.list.d/docker.sources > /dev/null
The key part here is $(. /etc/os-release && echo "${UBUNTU_CODENAME:-$VERSION_CODENAME}") — this reads your Ubuntu codename directly from the system. On Ubuntu 26.04, it returns resolute. The same command works on 24.04 (noble) or 22.04 (jammy) without any editing, making it safe to copy paste without worrying about the version.
Verify the repository was added correctly:
cat /etc/apt/sources.list.d/docker.sourcesYou should see resolute in the Suites: line. If it shows something else, re-run the repository add command above.
Update the package index to include Docker’s repository:
sudo apt updateStep 3: Install Docker Engine and Docker Compose
Install Docker CE, the CLI, the container runtime, and the Compose plugin in a single command:
sudo apt install -y \
  docker-ce \
  docker-ce-cli \
  containerd.io \
  docker-buildx-plugin \
  docker-compose-plugin
What each package does:
| Package | Purpose |
|---|---|
docker-ce | Docker Engine daemon (dockerd) |
docker-ce-cli | Docker CLI (docker command) |
containerd.io | Container runtime (containerd 2.x on Ubuntu 26.04) |
docker-buildx-plugin | Extended image build capabilities (multi-platform builds) |
docker-compose-plugin | Docker Compose v2 — invoked as docker compose |
Note: Docker Compose v2 is installed as a Docker CLI plugin, not a standalone binary. The command is docker compose (with a space), not docker-compose (with a hyphen). The old standalone docker-compose v1 reached end-of-life in 2023.
Step 4: Verify the Installation
Check that Docker Engine and containerd are running:
sudo systemctl status docker
sudo systemctl status containerd
Both should show Active: active (running).
Check the installed versions:
docker --version
docker compose version
Expected output on Ubuntu 26.04 at time of writing:
Docker version 29.4.0, build ...
Docker Compose version v2.x.x
Run the official test image to confirm end-to-end functionality:
sudo docker run hello-worldIf you see Hello from Docker! in the output, the installation is working correctly.
Step 5: Post-Installation Configuration
By default, the Docker daemon socket (/var/run/docker.sock) is owned by root, which means every docker command requires sudo. For day-to-day use, add your user to the docker group:
sudo usermod -aG docker $USERApply the group change without logging out:
newgrp dockerVerify you can now run Docker without sudo:
docker run hello-worldSecurity note: Adding a user to the
dockergroup effectively grants root-equivalent access to the host, since containers can be used to mount and modify the host filesystem. Only add trusted users to this group. For shared or multi-user servers, running Docker commands withsudois the safer default — see our Docker Container Security Best Practices guide for a full discussion.
Step 6: Configure Docker to Start on Boot
Docker and containerd are configured to start automatically on boot by default after installation on Ubuntu 26.04. Confirm this:
sudo systemctl is-enabled docker
sudo systemctl is-enabled containerd
Both should return enabled. If either returns disabled, enable them:
sudo systemctl enable docker
sudo systemctl enable containerd
Running Your First Container
Run an Nginx web server container to confirm everything works end-to-end:
docker run -d \
  --name my-nginx \
  -p 8080:80 \
  --restart unless-stopped \
  nginx:alpine
Open http://localhost:8080 (or http://<your-server-ip>:8080) — you should see the Nginx welcome page.
Manage the container:
# Check running containers
docker ps

# View logs
docker logs my-nginx

# Stop the container
docker stop my-nginx

# Remove the container
docker rm my-nginx
Running Your First Docker Compose Stack
Docker Compose lets you define and run multi-container applications from a single YAML file. Create a working directory and a compose.yml file:
mkdir ~/my-stack && cd ~/my-stack# compose.yml
services:
web:
image: nginx:alpine
ports:
- "8080:80"
restart: unless-stopped
redis:
image: redis:7-alpine
restart: unless-stopped
volumes:
- redis-data:/data
volumes:
redis-data:Start the stack:
docker compose up -dCheck all services are running:
docker compose psStop and remove the stack:
docker compose downFor a full production-grade Redis configuration including persistence, authentication, and health checks, see our Redis with Docker Compose guide.
Important Notes for Ubuntu 26.04 Specifically
cgroup v2 is mandatory. If any of your existing Docker Compose files or container configurations reference cgroup v1-specific settings (like --cgroup-parent with legacy paths, or monitoring agents that read from /sys/fs/cgroup/cpu,cpuacct/), these need to be updated before migrating a workload to Ubuntu 26.04. Docker CE handles the cgroup v2 transition transparently for standard container workloads — the issue only appears with custom cgroup configurations or older monitoring tools.
UFW and Docker networking. Ubuntu’s default firewall (UFW) can conflict with Docker’s iptables rules, causing containers to lose outbound internet access even when UFW is set to allow traffic. If containers can’t reach the internet after installation, check that IP forwarding is enabled:
sysctl net.ipv4.ip_forwardIf it returns 0, enable it:
echo "net.ipv4.ip_forward=1" | sudo tee -a /etc/sysctl.conf
sudo sysctl -p
sudo systemctl restart docker
The docker.io package vs Docker CE. Ubuntu 26.04’s default repository includes docker.io, which at the time of writing ships an older Docker version than Docker CE 29.4.0 from the official repository. Always install from download.docker.com for production use.
Common Issues and Quick Fixes
| Symptom | Likely Cause | Fix |
|---|---|---|
apt update fails after adding Docker repo | Codename resolved incorrectly (not resolute) | Re-run the repository add command; verify /etc/apt/sources.list.d/docker.sources shows resolute |
docker: command not found after install | PATH not updated in current shell | Run source ~/.bashrc or open a new terminal |
Permission denied running docker without sudo | User not in docker group, or group change not applied | Run sudo usermod -aG docker $USER then newgrp docker |
| Container has no internet access | UFW/iptables conflict | Enable IP forwarding and restart Docker (see above) |
docker compose command not found | Old standalone docker-compose v1 expected | Use docker compose (space) — the v2 plugin is installed, not the v1 binary |
| Containers fail with cgroup errors | Old cgroup v1 config in use | Update container or monitoring config to use cgroup v2 paths |
Next Steps
With Docker and Docker Compose installed on Ubuntu 26.04, you’re ready to run production-grade services. These guides build directly on this setup:
- Redis with Docker Compose — persistence, authentication, resource limits, and health checks.
- MongoDB with Docker Compose — replica set setup, keyfile authentication, and transactions support.
- How to Install Apache Superset with Docker Compose — full analytics stack with Postgres, Redis, and Celery workers.
- Docker Container Security Best Practices — hardening your Docker host and containers for production.
Related posts:
 How To Install Docker On Ubuntu 22.04
Setting Up an Ubuntu Docker Container with SSH Access
How To Install Docker On Ubuntu 22.04
Setting Up an Ubuntu Docker Container with SSH Access
 How To Install Docker On CentOS 7
 How To Install Docker On Fedora 38
How To Install Docker CE On Ubuntu 24.04 LTS
How To Install Docker On Fedora 38
How To Install Docker CE On Ubuntu 24.04 LTS
 Docker Compose Security: Complete Hardening Guide for 2026
 MongoDB with Docker Compose: Authentication, Replica Set, and Production-Ready Setup
 How to Install Apache Superset with Docker Compose
