How to Install Apache Tomcat 11 on Ubuntu 26.04 LTS (Step-by-Step Guide)

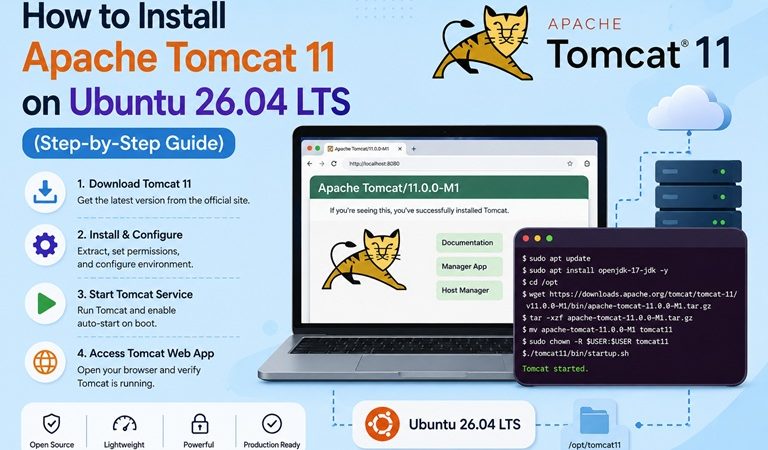
Table of Contents
- What is Apache Tomcat and Who Needs It
- Tomcat 11 vs Previous Versions: What Changed
- Prerequisites
- Step 1: Install Java 21
- Step 2: Create a Dedicated Tomcat User
- Step 3: Download and Install Tomcat 11
- Step 4: Configure Environment Variables
- Step 5: Create a systemd Service
- Step 6: Configure UFW Firewall
- Step 7: Configure Tomcat Users and Roles
- Step 8: Enable Remote Access to Manager GUI
- Step 9: Deploy a WAR Application
- Step 10: Put Tomcat Behind Nginx Reverse Proxy
- Security Hardening Checklist
- Tomcat vs Jetty vs Undertow: Which to Choose
- Common Issues and Quick Fixes
- Next Steps
Java web applications don’t run on their own — they need a servlet container to manage their lifecycle, handle HTTP requests, and translate the Jakarta Servlet specification into actual running code. Apache Tomcat has been doing exactly that since 1999, and it remains the most widely deployed open-source servlet container in the world.
Whether you’re deploying a Spring Boot WAR file, a legacy enterprise application, or building a Java-based REST API, this guide walks through a complete Tomcat 11 installation on Ubuntu 26.04 LTS — from Java setup through production hardening.
What is Apache Tomcat and Who Needs It
Tomcat is simultaneously a web server and a servlet container:
- As a web server, it handles HTTP and HTTPS requests directly (though in production it typically sits behind a dedicated reverse proxy like Nginx).
- As a servlet container (also called a web container), it implements the Jakarta Servlet, Jakarta Server Pages (JSP), and WebSocket specifications — the standard APIs that Java web applications are built against.
If your application is packaged as a WAR file (Web Application Archive), Tomcat is almost certainly the right deployment target. If your team is using Spring Boot and packaging as a standalone JAR with an embedded server, you may not need a standalone Tomcat installation at all — Spring Boot can embed Tomcat, Jetty, or Undertow inside the JAR itself.
Tomcat 11 vs Previous Versions: What Changed
| Feature | Tomcat 9 | Tomcat 10 | Tomcat 11 |
|---|---|---|---|
| Servlet spec | Servlet 4.0 | Servlet 5.0 | Servlet 6.1 |
| Java required | Java 8+ | Java 11+ | Java 17+ |
| Namespace | javax.* | jakarta.* | jakarta.* |
| HTTP/2 | Limited | Yes | Yes (improved) |
| Virtual threads (Java 21) | No | No | Yes |
| LTS status | EOL soon | Maintained | Current LTS |
The most important breaking change between Tomcat 9 and 10+: the Java package namespace changed from javax.* to jakarta.*. Applications written for Tomcat 9 (using javax.servlet) need a code change or migration tool (Eclipse Transformer) to run on Tomcat 10 or 11 — they’re not drop-in compatible.
Virtual thread support in Tomcat 11 with Java 21 is the headline feature of this combination: Java 21’s virtual threads (Project Loom) allow Tomcat to handle many more concurrent connections without the memory overhead of a large thread pool. For high-concurrency workloads, this combination delivers significantly better throughput per unit of memory compared to Tomcat 10 + Java 17.
Prerequisites
- Ubuntu 26.04 LTS (Resolute Raccoon)
- Minimum 2GB RAM (4GB+ recommended for production)
sudoaccess- A domain name (optional, needed for HTTPS via reverse proxy)
Step 1: Install Java 21
Tomcat 11 requires Java 17 or higher. Java 21 LTS is the recommended choice — it’s the current Long-Term Support release and unlocks virtual thread support:
sudo apt update
sudo apt install -y openjdk-21-jdk-headless
Verify:
java -versionExpected output:
openjdk version "21.x.x" ...
OpenJDK Runtime Environment (build 21.x.x+...)
Set JAVA_HOME system-wide:
echo 'export JAVA_HOME=/usr/lib/jvm/java-21-openjdk-amd64' | \
  sudo tee /etc/profile.d/java.sh
source /etc/profile.d/java.sh

echo $JAVA_HOME
# /usr/lib/jvm/java-21-openjdk-amd64
Step 2: Create a Dedicated Tomcat User
Running Tomcat as root is a serious security risk — if your application has a vulnerability, an attacker would immediately have root access to the host. Create a dedicated system user with no shell access:
sudo useradd -r -m -U -d /opt/tomcat -s /bin/false tomcatThis mirrors the same principle of least privilege used throughout our Docker Container Security Best Practices guide.
Step 3: Download and Install Tomcat 11
TOMCAT_VERSION="11.0.7"

wget https://dlcdn.apache.org/tomcat/tomcat-11/v${TOMCAT_VERSION}/bin/apache-tomcat-${TOMCAT_VERSION}.tar.gz \
  -O /tmp/tomcat.tar.gz

# Verify the download (recommended — check the SHA512 on the Apache download page)
sha512sum /tmp/tomcat.tar.gz

# Extract to /opt/tomcat
sudo tar -xzf /tmp/tomcat.tar.gz -C /opt/tomcat --strip-components=1

# Set ownership and permissions
sudo chown -R tomcat:tomcat /opt/tomcat
sudo chmod -R u=rwX,g=rX,o= /opt/tomcat
sudo chmod +x /opt/tomcat/bin/*.sh
Verify the directory structure:
ls /opt/tomcat
# bin  conf  lib  logs  temp  webapps  work
Key directories:
| Directory | Purpose |
|---|---|
bin/ | Startup and shutdown scripts |
conf/ | Configuration files (server.xml, tomcat-users.xml, web.xml) |
webapps/ | Deploy your WAR files here |
logs/ | Catalina log, access log, error log |
lib/ | Shared libraries available to all applications |
Step 4: Configure Environment Variables
Create a setenv.sh file in /opt/tomcat/bin/ — Tomcat automatically sources this at startup, the correct place for JVM tuning options:
sudo nano /opt/tomcat/bin/setenv.sh#!/bin/bash
# JVM heap size — adjust based on available RAM
# Rule of thumb: set -Xms and -Xmx to the same value to prevent heap resizing
export CATALINA_OPTS="-Xms512M -Xmx1024M -server"
# Java 21: enable virtual threads for Loom-based connector (Tomcat 11+)
export CATALINA_OPTS="$CATALINA_OPTS -Djava.util.concurrent.ForkJoinPool.common.parallelism=4"
# Security: use /dev/urandom instead of /dev/random to avoid blocking
export JAVA_OPTS="-Djava.awt.headless=true -Djava.security.egd=file:/dev/./urandom"
# JAVA_HOME
export JAVA_HOME=/usr/lib/jvm/java-21-openjdk-amd64Set the correct ownership and permissions:
sudo chown tomcat:tomcat /opt/tomcat/bin/setenv.sh
sudo chmod +x /opt/tomcat/bin/setenv.sh
Step 5: Create a systemd Service
sudo nano /etc/systemd/system/tomcat.service[Unit]
Description=Apache Tomcat 11 Web Application Server
Documentation=https://tomcat.apache.org/
After=network.target
[Service]
Type=forking
User=tomcat
Group=tomcat
Environment="JAVA_HOME=/usr/lib/jvm/java-21-openjdk-amd64"
Environment="CATALINA_HOME=/opt/tomcat"
Environment="CATALINA_BASE=/opt/tomcat"
Environment="CATALINA_PID=/opt/tomcat/temp/tomcat.pid"
Environment="CATALINA_OPTS=-Xms512M -Xmx1024M -server"
Environment="JAVA_OPTS=-Djava.awt.headless=true -Djava.security.egd=file:/dev/./urandom"
ExecStart=/opt/tomcat/bin/startup.sh
ExecStop=/opt/tomcat/bin/shutdown.sh
Restart=on-failure
RestartSec=10
SuccessExitStatus=143
LimitNOFILE=65536
StandardOutput=journal
StandardError=journal
SyslogIdentifier=tomcat
[Install]
WantedBy=multi-user.targetEnable and start:
sudo systemctl daemon-reload
sudo systemctl enable tomcat
sudo systemctl start tomcat
sudo systemctl status tomcat
Expected:
● tomcat.service - Apache Tomcat 11 Web Application Server
     Active: active (running) since ...
View live logs:
sudo journalctl -u tomcat -f
# Or directly from Catalina log:
sudo tail -f /opt/tomcat/logs/catalina.out
Open http://<your-server-ip>:8080 — you should see the Tomcat welcome page.
Step 6: Configure UFW Firewall
# Allow Tomcat HTTP port (8080)
sudo ufw allow 8080/tcp comment "Tomcat HTTP"

# If running HTTPS directly on Tomcat (8443)
# sudo ufw allow 8443/tcp comment "Tomcat HTTPS"

sudo ufw reload
sudo ufw status
Production note: In a proper production setup, Tomcat should not be directly accessible on port 8080. It should sit behind Nginx (or Nginx Proxy Manager) which handles HTTPS termination. Port 8080 should then only be accessible from
localhost. See Step 10 for the Nginx reverse proxy configuration.
Step 7: Configure Tomcat Users and Roles
Tomcat’s web-based Manager and Host Manager applications require user credentials defined in tomcat-users.xml. By default, no users are configured — the Manager UI is installed but inaccessible:
sudo nano /opt/tomcat/conf/tomcat-users.xmlAdd these lines inside the <tomcat-users> tag, just before </tomcat-users>:
<!-- Manager GUI user — for deploying/undeploying apps via the web interface -->
<role rolename="manager-gui"/>
<role rolename="manager-script"/>
<role rolename="admin-gui"/>

<user username="manager"
      password="STRONG_MANAGER_PASSWORD_HERE"
      roles="manager-gui,manager-script"/>

<user username="admin"
      password="STRONG_ADMIN_PASSWORD_HERE"
      roles="manager-gui,admin-gui"/>
Replace both passwords with strong, unique values. These credentials provide full application deployment access — treat them like root passwords.
Restart Tomcat to apply:
sudo systemctl restart tomcatStep 8: Enable Remote Access to Manager GUI
By default, the Manager and Host Manager apps only accept connections from localhost (127.0.0.1). This is a sensible security default — to access them from a remote browser, you need to explicitly allow your IP.
Edit the Manager’s context configuration:
sudo nano /opt/tomcat/webapps/manager/META-INF/context.xmlFind this block:
<Valve className="org.apache.catalina.valves.RemoteAddrValve"
       allow="127\.\d+\.\d+\.\d+|::1|0:0:0:0:0:0:0:1" />
Add your IP address to the allow pattern:
<Valve className="org.apache.catalina.valves.RemoteAddrValve"
       allow="127\.\d+\.\d+\.\d+|::1|0:0:0:0:0:0:0:1|YOUR\.IP\.ADDRESS\.HERE" />
Do the same for Host Manager:
sudo nano /opt/tomcat/webapps/host-manager/META-INF/context.xmlRestart Tomcat:
sudo systemctl restart tomcatAccess the Manager at http://<your-server-ip>:8080/manager/html and log in with the manager credentials from tomcat-users.xml.
Better alternative: Instead of opening up the RemoteAddrValve, put Tomcat behind Nginx Proxy Manager and restrict the
/managerpath to specific IPs via an access control list — this keeps the control in one place and doesn’t require editing Tomcat config files every time your IP changes.
Step 9: Deploy a WAR Application
Deploying a Java web application to Tomcat is straightforward — copy the WAR file to the webapps directory and Tomcat auto-deploys it:
# Copy your WAR file to webapps
sudo cp /path/to/your-application.war /opt/tomcat/webapps/
sudo chown tomcat:tomcat /opt/tomcat/webapps/your-application.war
Tomcat automatically extracts the WAR and deploys the application within seconds. The app becomes accessible at:
http://<your-server-ip>:8080/your-application/Watch the deployment in the logs:
sudo tail -f /opt/tomcat/logs/catalina.outDeploy to ROOT context (accessible at http://your-server/ with no path):
# Remove existing ROOT app first
sudo rm -rf /opt/tomcat/webapps/ROOT
sudo cp /path/to/your-application.war /opt/tomcat/webapps/ROOT.war
sudo chown tomcat:tomcat /opt/tomcat/webapps/ROOT.war
Undeploy an application:
# Remove the WAR and the extracted directory
sudo rm -f /opt/tomcat/webapps/your-application.war
sudo rm -rf /opt/tomcat/webapps/your-application
Tomcat detects the removal and undeploys the application automatically without a restart.
Step 10: Put Tomcat Behind Nginx Reverse Proxy
For production, Nginx handles HTTPS termination and forwards requests to Tomcat on localhost:8080. This keeps port 8080 off the internet entirely:
sudo nano /etc/nginx/sites-available/tomcat-appserver {
listen 80;
server_name app.yourdomain.com;
# Redirect HTTP to HTTPS
return 301 https://$host$request_uri;
}
server {
listen 443 ssl http2;
server_name app.yourdomain.com;
ssl_certificate /etc/letsencrypt/live/app.yourdomain.com/fullchain.pem;
ssl_certificate_key /etc/letsencrypt/live/app.yourdomain.com/privkey.pem;
# Security headers
add_header X-Frame-Options "SAMEORIGIN" always;
add_header X-Content-Type-Options "nosniff" always;
add_header X-XSS-Protection "1; mode=block" always;
add_header Strict-Transport-Security "max-age=31536000" always;
location / {
proxy_pass http://localhost:8080;
proxy_set_header Host $host;
proxy_set_header X-Real-IP $remote_addr;
proxy_set_header X-Forwarded-For $proxy_add_x_forwarded_for;
proxy_set_header X-Forwarded-Proto $scheme;
# WebSocket support
proxy_http_version 1.1;
proxy_set_header Upgrade $http_upgrade;
proxy_set_header Connection "upgrade";
# Timeouts for long-running requests
proxy_connect_timeout 60s;
proxy_read_timeout 300s;
proxy_send_timeout 300s;
}
}Enable the site and reload Nginx:
sudo ln -s /etc/nginx/sites-available/tomcat-app /etc/nginx/sites-enabled/
sudo nginx -t
sudo systemctl reload nginx
If you’re using Nginx Proxy Manager instead of manual Nginx config, the same setup takes 30 seconds in the GUI — Forward Hostname: localhost, Forward Port: 8080, enable Force SSL and Let’s Encrypt.
After setting up the reverse proxy, update Tomcat’s firewall rules to only allow port 8080 from localhost:
# Remove public access to port 8080
sudo ufw delete allow 8080/tcp

# Only allow from localhost (Nginx)
sudo ufw allow from 127.0.0.1 to any port 8080 comment "Tomcat from Nginx only"
sudo ufw reload
Security Hardening Checklist
A default Tomcat installation has several settings that should be changed before handling production traffic:
1. Remove default web applications:
sudo rm -rf /opt/tomcat/webapps/examples
sudo rm -rf /opt/tomcat/webapps/docs
# Keep manager and host-manager only if actively used
The examples app contains known vulnerabilities and has no place in production.
2. Disable the Tomcat shutdown port:
Edit /opt/tomcat/conf/server.xml, change:
<Server port="8005" shutdown="SHUTDOWN">to:
<Server port="-1" shutdown="SHUTDOWN">This disables the shutdown command port — a common attack vector where telnet localhost 8005 followed by “SHUTDOWN” would stop your Tomcat instance.
3. Remove the Server header:
In server.xml, inside the <Connector> element:
<Connector port="8080" protocol="HTTP/1.1"
           server=" "
           connectionTimeout="20000"
           redirectPort="8443" />
Setting server=" " prevents Tomcat from advertising its version in HTTP response headers.
4. Enable access logging:
Already enabled by default in server.xml (AccessLogValve) — confirm it’s not commented out.
5. Set secure cookie flags in web.xml:
<session-config>
  <cookie-config>
    <http-only>true</http-only>
    <secure>true</secure>
  </cookie-config>
</session-config>
Tomcat vs Jetty vs Undertow: Which to Choose
| Apache Tomcat | Jetty | Undertow | |
|---|---|---|---|
| Maturity | 25+ years | 25+ years | 2013+ |
| Primary use | Standalone WAR deployment | Embedded, microservices | Embedded, WildFly component |
| Memory footprint | Moderate | Light | Light |
| Virtual threads (Java 21) | Yes (Tomcat 11) | Yes | Yes |
| Jakarta EE compliance | Servlet/JSP only | Servlet/JSP only | Via WildFly |
| Embedded use | Yes (Spring Boot) | Yes (Spring Boot, Jetty) | Yes (Spring Boot) |
| Standalone deployment | ✅ Excellent | Good | Limited |
| Community/ecosystem | Largest | Large | Smaller |
Use Tomcat when: you’re deploying WAR files, need a proven standalone server, or are working with Spring Boot (which defaults to embedded Tomcat).
Use Jetty when: you need an extremely lightweight embedded server, or you’re building an application where startup speed matters (like AWS Lambda or serverless).
Use Undertow when: you’re already in the WildFly/JBoss ecosystem or need non-blocking I/O at the core level.
Common Issues and Quick Fixes
| Symptom | Likely Cause | Fix |
|---|---|---|
Tomcat fails to start — JAVA_HOME not set | JAVA_HOME not configured in systemd unit | Verify Environment="JAVA_HOME=..." in tomcat.service |
| Tomcat starts but shows blank page | Default ROOT app removed | Copy your WAR to webapps/ROOT.war or check webapps/ROOT/ |
| Manager UI shows 403 Forbidden | Remote IP not in RemoteAddrValve allow list | Edit webapps/manager/META-INF/context.xml to add your IP |
| 404 on Manager login | Wrong URL — include trailing path | URL must be http://ip:8080/manager/html, not http://ip:8080/manager |
| WAR deployed but app returns 404 | App context path differs from WAR filename | Access at http://ip:8080/<war-filename-without-extension>/ |
OutOfMemoryError: Java heap space | JVM heap too small | Increase -Xmx in setenv.sh or systemd unit |
| High CPU on first request | JIT compilation warming up | Normal for first few requests — use JVM warmup or AOT if critical |
Next Steps
With Tomcat 11 running on Ubuntu 26.04, the natural next steps for building a complete Java infrastructure:
- Apache Maven — automate the build-and-package process that produces the WAR files you deploy to Tomcat (coming next in this series).
- Apache Kafka — if your Java application produces or consumes events, our Kafka installation guide covers the full setup on Ubuntu 26.04.
- Nginx Proxy Manager — the fastest way to put Tomcat behind HTTPS with a free Let’s Encrypt certificate — see our Nginx Proxy Manager guide.
- Prometheus + Grafana — monitor Tomcat’s JVM heap, thread pool, and request throughput via JMX Exporter — see the monitoring stack guide.
Related posts:
 How to Install Apache Kafka on Ubuntu 26.04 LTS (KRaft Mode, No ZooKeeper)
 How To Install Apache Spark On Ubuntu 20.04
 How To Install Apache Web Server on Ubuntu 18.04 LTS
 How To Uninstall Apache Web Server from Ubuntu 22.04 (A Step-by-Step Guide)
 How to Install and Configure Apache2 on Ubuntu 24.04: A Comprehensive Guide
 How to Install Apache Doris on Ubuntu 24.04 LTS: Step-by-Step Guide
 How To Install Apache Solr 8.9 On Ubuntu 20.04 LTS Step by Step
 How to Install Apache Atlas on Ubuntu 24.04 LTS — A Complete Guide
