Nginx Proxy Manager with Docker Compose: Reverse Proxy and Free SSL Setup

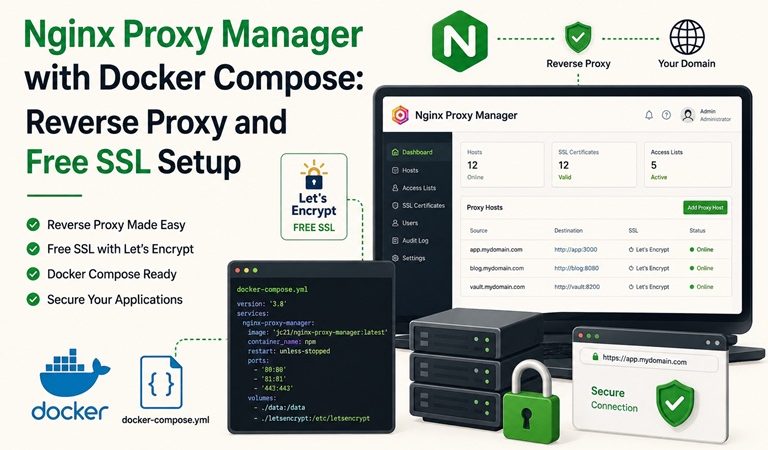
Table of Contents
- What is Nginx Proxy Manager and Why Use It
- How a Reverse Proxy Works
- NPM vs Writing Nginx Config by Hand
- Prerequisites
- Project Structure
- Step 1: Deploy Nginx Proxy Manager with Docker Compose
- Step 2: First Login and Credential Setup
- Step 3: Add Your First Proxy Host
- Step 4: Enable Free SSL with Let’s Encrypt
- Step 5: Integrate with Other Docker Containers
- Step 6: Access Control Lists
- Step 7: DNS Challenge for Internal Services (Cloudflare)
- Securing the Admin Panel (Port 81)
- Common Issues and Quick Fixes
- NPM vs Traefik: Which One to Choose
- Next Steps
Every Docker-based infrastructure eventually runs into the same problem: you have multiple services — a dashboard on port 3000, an API on port 8080, a database UI on port 8888 — and you need to expose them cleanly to the outside world without opening a dozen ports or manually writing Nginx server blocks every time something changes.
Nginx Proxy Manager (NPM) solves this with a web-based GUI built on top of the same Nginx engine that powers a significant share of the internet. Adding a new service behind a reverse proxy takes about 30 seconds. Getting a free SSL certificate from Let’s Encrypt is a single checkbox. No config files to edit by hand, no certbot commands to memorize, no manual certificate renewals.
What is Nginx Proxy Manager and Why Use It
NPM is an open-source Docker image that wraps Nginx in a point-and-click management interface. Under the hood it’s generating real Nginx server blocks — the same configuration you’d write by hand — but it handles:
- Reverse proxy routing — forward traffic by domain name to any backend (container, IP, hostname)
- Free SSL certificates — automated Let’s Encrypt issuance and renewal, no certbot needed
- HTTP to HTTPS redirect — one checkbox forces all traffic to SSL
- HSTS and HTTP/2 — toggleable in the GUI without touching config files
- Access control lists — restrict specific proxy hosts to IP ranges or require HTTP basic auth
- Stream proxying — TCP/UDP passthrough for non-HTTP services
If you’re already running Docker with Docker Compose, NPM fits into your existing stack without any additional dependencies beyond a shared Docker network.
How a Reverse Proxy Works
Understanding the traffic flow makes troubleshooting much easier:
Browser / Client
      │
      │ requests app.yourdomain.com:443
      ▼
Nginx Proxy Manager (:80, :443)
      │
      │ looks at the hostname in the request
      │ matches "app.yourdomain.com" → forwards to grafana:3000
      ▼
Backend Container (Grafana, Superset, etc.)
      │
      │ returns response to NPM
      ▼
Nginx Proxy Manager → returns response to browser
The key insight: your backend containers never need to be directly reachable from the internet. They don’t need their own ports exposed to the host. NPM sits in front of everything and routes by hostname, acting as the single public entry point for all services.
NPM vs Writing Nginx Config by Hand
| Nginx Proxy Manager | Hand-written Nginx config | |
|---|---|---|
| Setup time for new proxy host | ~30 seconds (GUI) | 5-15 minutes (config file + reload) |
| SSL certificate | Checkbox in UI | Manual certbot + renewal cron |
| Config errors | Validated before saving | Breaks nginx until fixed manually |
| Learning curve | Minimal | Requires Nginx knowledge |
| Flexibility/advanced config | Good (custom Nginx directives via “Advanced” tab) | Unlimited |
| Best for | Self-hosted, homelabs, small teams | Large-scale, custom requirements, infra-as-code |
NPM is not trying to replace hand-written Nginx for every use case. It is the right tool when you want a reverse proxy running in an hour, not a day — and when the team managing it may not have deep Nginx expertise.
Prerequisites
- Docker and Docker Compose installed — see our Install Docker on Ubuntu 26.04 LTS guide
- A domain name with DNS pointing to your server’s public IP (
Arecord for your domain or a wildcard*.yourdomain.com) - Ports 80 and 443 open on your server’s firewall (required for Let’s Encrypt HTTP challenge)
- Port 81 accessible from your local machine (admin panel — restrict this later)
Project Structure
npm-stack/
├── compose.yml
├── .env
├── data/          ← NPM config and proxy data (auto-created)
└── letsencrypt/   ← SSL certificates (auto-created)
mkdir -p ~/npm-stack && cd ~/npm-stackStep 1: Deploy Nginx Proxy Manager with Docker Compose
.env file:
NPM_ADMIN_EMAIL=your@email.com
NPM_INITIAL_ADMIN_PASSWORD=changeme123
TZ=Asia/Jakarta
# compose.yml
version: '3.8'
networks:
proxy:
name: proxy
driver: bridge
services:
npm:
image: jc21/nginx-proxy-manager:latest
container_name: nginx-proxy-manager
restart: unless-stopped
ports:
- '80:80' # HTTP - public, required for Let's Encrypt HTTP challenge
- '443:443' # HTTPS - public
- '81:81' # Admin UI - restrict this after setup
environment:
TZ: ${TZ}
# Optional: pre-configure first admin user (NPM 2.x+)
INITIAL_ADMIN_EMAIL: ${NPM_ADMIN_EMAIL}
INITIAL_ADMIN_PASSWORD: ${NPM_INITIAL_ADMIN_PASSWORD}
volumes:
- ./data:/data
- ./letsencrypt:/etc/letsencrypt
networks:
- proxy
healthcheck:
test: ["CMD", "curl", "-f", "http://localhost:81/api/"]
interval: 30s
timeout: 10s
retries: 5
start_period: 60sThe proxy network is created as an external named network (name: proxy). This means other Docker Compose stacks on the same host can join this network by name, putting their containers directly reachable by NPM using service names — without exposing ports to the host machine.
Start the stack:
docker compose up -d
docker compose logs -f npm
Wait until you see Server Listening on 0.0.0.0:81 in the logs (typically 30-60 seconds on first boot).
Step 2: First Login and Credential Setup
Open http://<your-server-ip>:81 in a browser.
Default credentials (if not pre-configured via environment variables):
- Email:
admin@example.com - Password:
changeme
NPM immediately prompts you to change both the email address and password on first login — do this before doing anything else. The admin panel has full control over every proxy rule and SSL certificate on the server; default credentials left in place have been exploited in the wild.
After changing credentials, you’ll see the NPM dashboard: Proxy Hosts, Redirection Hosts, Streams, SSL Certificates, and Access Lists.
Step 3: Add Your First Proxy Host
A Proxy Host is a rule that says: “when a request comes in for app.yourdomain.com, forward it to this backend.”
- Click Proxy Hosts → Add Proxy Host
- Fill in the Details tab:
- Domain Names:
app.yourdomain.com(the public-facing hostname) - Scheme:
http(NPM talks to your backend over HTTP internally; SSL termination happens at NPM) - Forward Hostname / IP: the container name (e.g.,
grafana) or an IP address - Forward Port: the port your service listens on internally (e.g.,
3000for Grafana) - ✅ Websockets Support — enable this for any service that uses WebSockets (Grafana alerts, chat apps, code editors)
- Click Save
Your service is now reachable at http://app.yourdomain.com (plain HTTP). SSL comes next.
Step 4: Enable Free SSL with Let’s Encrypt
- Edit the proxy host you just created → click the SSL tab
- SSL Certificate: select “Request a new SSL Certificate”
- ✅ Force SSL — redirects all HTTP traffic to HTTPS automatically
- ✅ HTTP/2 Support — improves performance for modern browsers
- ✅ HSTS Enabled — tells browsers to always use HTTPS (enable after confirming SSL works)
- Enter your email address for Let’s Encrypt expiry notifications
- ✅ Agree to Let’s Encrypt Terms of Service
- Click Save
NPM contacts Let’s Encrypt, completes the HTTP-01 challenge (Let’s Encrypt reaches your domain on port 80 to verify ownership), receives the certificate, and configures Nginx to use it — all automatically. The certificate renews itself before expiry; no cron jobs needed.
Rate limit warning: Let’s Encrypt allows 5 certificate requests per domain per week. Don’t request and delete certificates repeatedly during testing — use a staging certificate instead by checking “Use a staging Let’s Encrypt Server” while testing, then switch to production once everything works.
Step 5: Integrate with Other Docker Containers
This is where NPM becomes genuinely powerful. Instead of exposing ports for every container, join them to the same proxy network and let NPM route by container name.
Example: putting Grafana from your Prometheus + Grafana monitoring stack behind NPM with a real domain and SSL.
Add to your monitoring stack’s compose.yml:
# In your existing monitoring stack compose.yml
networks:
  monitoring:
    driver: bridge
  proxy:
    external: true    # ← Join the existing proxy network created by NPM

services:
  grafana:
    image: grafana/grafana:latest
    container_name: grafana
    networks:
      - monitoring    # Internal: Grafana talks to Prometheus
      - proxy         # External: NPM can reach Grafana
    # Remove the ports: section entirely — no direct port exposure needed
    environment:
      - GF_SECURITY_ADMIN_PASSWORD=${GRAFANA_ADMIN_PASSWORD}
Then in NPM, add a proxy host:
- Domain:
grafana.yourdomain.com - Forward Hostname:
grafana(Docker service name) - Forward Port:
3000 - SSL: Request certificate, enable Force SSL
Grafana is now reachable at https://grafana.yourdomain.com with a valid SSL certificate — and port 3000 is no longer exposed to the internet at all. The same pattern works for any Docker service: Apache Superset on port 8088, Portainer on port 9000, or any custom app you run.
The complete picture with multiple services behind NPM:
Internet
    │
    ▼
NPM (:80, :443)
    ├── grafana.yourdomain.com  →  grafana:3000   (monitoring)
    ├── superset.yourdomain.com →  superset:8088  (analytics)
    ├── portainer.yourdomain.com→  portainer:9000 (docker mgmt)
    └── app.yourdomain.com      →  myapp:5000     (your app)
All four services share the proxy network with NPM. None of them expose ports directly to the host or internet.
Step 6: Access Control Lists
Not every proxied service should be public. NPM’s Access Lists let you restrict a proxy host to specific IP ranges or require HTTP basic authentication.
To create an Access List:
- Go to Access Lists → Add Access List
- Name it (e.g., “Internal Only” or “Admin Services”)
- Under Allow: add your office/home IP range (e.g.,
192.168.1.0/24for local network only) - Optionally add Authorization — username + password for HTTP basic auth on top of IP filtering
- Save the list
Apply it to a proxy host:
- Edit any proxy host → Details tab
- Access List: select the list you created
- Save
This is the recommended approach for admin panels (Portainer, Grafana admin, NPM’s own port 81 if proxied) — restrict by IP so they’re never reachable from the open internet even if someone knows the URL.
Step 7: DNS Challenge for Internal Services (Cloudflare)
The HTTP-01 challenge (default Let’s Encrypt method) requires port 80 to be reachable from the internet. If you want SSL certificates for internal services that should never be publicly accessible — services only reachable via VPN, for example — use the DNS-01 challenge instead.
With Cloudflare as your DNS provider:
- Get a Cloudflare API token with
Zone:DNS:Editpermissions for your domain - In NPM, go to SSL Certificates → Add SSL Certificate → Let’s Encrypt
- Enter your domain (e.g.,
*.internal.yourdomain.comfor a wildcard) - ✅ Check Use a DNS Challenge
- Select Cloudflare as the provider
- Enter your Cloudflare API token
- Save — NPM creates a DNS TXT record via the Cloudflare API, Let’s Encrypt verifies it, certificate issued
The benefit: port 80 never needs to be open. Let’s Encrypt validates via DNS, not HTTP. Your internal service gets a real, trusted SSL certificate without any internet exposure.
Securing the Admin Panel (Port 81)
Port 81 is the biggest security risk in a default NPM deployment. Anyone who reaches it has full control over your proxy configuration and SSL certificates. Three options, in order of preference:
Option 1: Firewall rule (simplest)
# Allow port 81 only from your IP, block everything else
sudo ufw allow from YOUR.HOME.IP.HERE to any port 81
sudo ufw deny 81
Option 2: Put NPM admin behind itself
Create a proxy host pointing npm.yourdomain.com → npm:81, add an Access List restricting it to your IP, enable SSL — then remove port 81 from the host’s published ports in compose.yml. NPM proxies its own admin panel through itself.
Option 3: VPN-only access
Only allow port 81 from the VPN subnet. Anyone who needs to manage NPM connects via VPN first.
Whatever approach you choose, the key point from our Docker Container Security Best Practices guide applies directly here: any admin interface with full system control should not be exposed to the open internet.
Common Issues and Quick Fixes
| Symptom | Likely Cause | Fix |
|---|---|---|
| Can’t reach admin UI on port 81 | Firewall blocking port 81, or using https:// by mistake | Admin panel is plain HTTP; try http://ip:81. Check ufw status |
| SSL certificate won’t issue | Port 80 not reachable from internet, or DNS not yet propagated | Confirm port 80 is open; wait for DNS propagation; check Let’s Encrypt rate limits |
| 502 Bad Gateway | NPM can’t reach the backend container | Verify both containers are on the same Docker network; use container name, not localhost |
| WebSocket connections drop | Websockets not enabled on proxy host | Edit proxy host → Details tab → enable “Websockets Support” |
| Container name not resolving | Backend container on a different network than NPM | Add proxy network to both NPM and the backend container’s Compose config |
| Certificate works but browser shows “not secure” | HSTS not enabled, or mixed content (HTTP resources on HTTPS page) | Enable HSTS in SSL tab; fix mixed content in your app |
| Let’s Encrypt rate limit hit | Too many certificate requests in 7 days | Wait 7 days or use staging certificates for testing |
NPM vs Traefik: Which One to Choose
A common question for anyone setting up a Docker-based reverse proxy:
| Nginx Proxy Manager | Traefik | |
|---|---|---|
| Configuration method | Web GUI | Labels in compose.yml / config files |
| Learning curve | Low | Moderate to high |
| Docker integration | Manual (shared network) | Native (auto-discovers containers via labels) |
| Best for | Self-hosted, homelabs, small teams | DevOps/infra-as-code, automated deployments |
| Dashboard | Built-in web UI | Built-in web UI |
| SSL automation | Let’s Encrypt (HTTP + DNS challenge) | Let’s Encrypt (HTTP + DNS challenge) |
| Config in version control | Not natural (config stored in DB) | Native (labels/files are code) |
Use NPM when: you want something running in under an hour, the team isn’t deeply technical, or you prefer clicking over YAML.
Use Traefik when: you want containers to self-register as proxy hosts automatically (zero-touch deployments), or you need infra-as-code where the proxy config lives in Git alongside everything else.
Both are valid choices — the “right” answer depends on your workflow, not which one is technically superior.
Conclusion
With Nginx Proxy Manager running, every other Docker-based service in your stack can now have a real domain and SSL certificate in minutes:
- Put your Prometheus + Grafana monitoring stack behind NPM —
grafana.yourdomain.comwith HTTPS, no direct port exposure - Put Apache Superset behind NPM —
superset.yourdomain.comwith SSL and access list for internal access only - Apply access lists to any admin-facing service — Docker Container Security Best Practices covers the full principle of restricting management interfaces
- Add a Cloudflare DNS challenge certificate for wildcard domains — one certificate covers every subdomain you create
NPM turns what used to be an afternoon of Nginx config files and certbot commands into a 30-second form submission. The time saved compounds every time you add a new service to your stack.
Related posts:
 A Complete Guide to Nginx Proxy Manager (NPM)
 Run Redis in Docker: Complete Setup Guide 2026
 How To Install Nginx On OpenSUSE Tumbleweed
 How to Install Apache Iceberg on Docker: A Complete Guide
 How to Install MQTT on Docker (Step-by-Step Tutorial for Beginners)
 How to Install GlassFish with Docker (Step-by-Step Guide)
 MongoDB with Docker Compose: Authentication, Replica Set, and Production-Ready Setup
 How to Set Up Prometheus and Grafana Monitoring Stack with Docker Compose
