How to Install Podman on Ubuntu 26.04 LTS (2026)

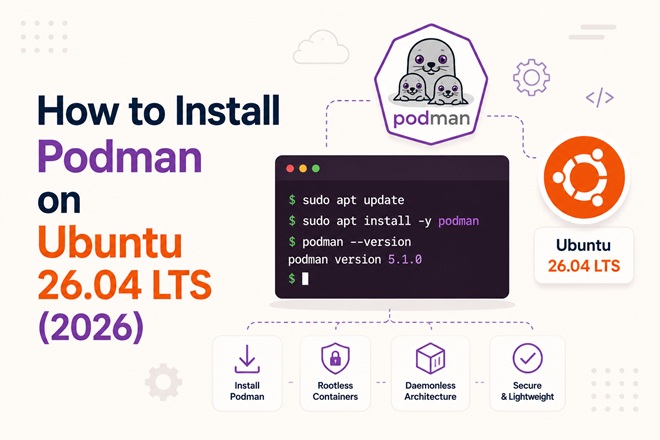
Podman is a daemonless, OCI-compliant container engine developed by Red Hat and now under the Cloud Native Computing Foundation, built as a drop-in alternative to Docker. Unlike Docker’s client-daemon architecture, Podman runs containers directly as child processes of the user who launched them — no long-running privileged daemon required — which makes it a strong fit for rootless container workflows and systems where running an always-on background service is undesirable. This guide walks through installing Podman on Ubuntu 26.04 LTS, covering the default APT package (which installs cleanly out of the box, currently around the Podman 5.7.x line) and building from source for teams that specifically need the newest upstream release (6.0.2 at the time of writing), alongside full rootless setup.
By the end of this tutorial you’ll have Podman installed and verified, a rootless container running under your own user account, Podman Compose available for multi-container workflows, and the option to run Podman as a systemd service via Quadlet.
Table of Contents
- Prerequisites
- Installation Methods Compared
- Architecture: Podman vs the Docker Daemon Model
- Method 1: Installing Podman via APT (Recommended for Most Users)
- Method 2: Building the Latest Podman from Source
- Verifying the Installation
- Running Your First Rootless Container
- Configuring Rootless Networking and Storage
- Installing Podman Compose
- Running Podman Containers as systemd Services with Quadlet
- Podman vs Docker: Command Compatibility
- Troubleshooting
- Uninstalling Podman
- FAQ
- Related Reads on bckinfo.com
Prerequisites
Before installing Podman, make sure your Ubuntu 26.04 LTS system meets the following requirements:
- A user account with
sudoprivileges - An active internet connection
- A modern Linux kernel with
user_namespacesenabled (default on Ubuntu 26.04 LTS) - At least 2 GB of free disk space for the engine, images, and container storage
slirp4netnsorpastafor rootless container networking (installed automatically as a dependency in both methods below)
Confirm user namespaces are enabled, since rootless Podman depends on them:
sysctl kernel.unprivileged_userns_cloneIf it returns 0 instead of 1, enable it:
sudo sysctl kernel.unprivileged_userns_clone=1
echo "kernel.unprivileged_userns_clone=1" | sudo tee /etc/sysctl.d/99-podman-userns.conf
Installation Methods Compared
| Method | Best For | Version Freshness | Rootless Ready | Root Required to Install |
|---|---|---|---|---|
| APT (Ubuntu repos) | Most users, quick setup, long-term stability | Ubuntu 26.04 LTS ships roughly the 5.7.x line — stable but a few minor versions behind upstream | Yes, out of the box | Yes |
| Build from Source | Users who need the newest Podman release, contributors, custom builds | Whatever tag/commit you build (e.g., the latest 6.0.x release) | Yes, with correct build flags | Yes (for make install) |
For most readers, Method 1 (APT) is sufficient and gets you a fully rootless-capable Podman with zero extra configuration — it’s the officially documented path for Ubuntu, and the old third-party “Kubic” OBS repository some older tutorials reference has since been discontinued and no longer publishes Podman packages, so it should not be used. Reach for Method 2 (build from source) only if you specifically need a Podman feature or CVE fix newer than what Ubuntu 26.04 LTS’s APT package currently ships.
Architecture: Podman vs the Docker Daemon Model
The core architectural difference between Podman and Docker is the absence of a central daemon. Docker’s dockerd runs as root and every docker command talks to it over a socket; Podman’s podman binary talks directly to the OCI runtime (crun or runc) and manages containers as ordinary child processes.
                    Docker Model                          Podman Model
        ┌─────────────────────────────┐        ┌─────────────────────────────┐
        │   docker CLI (client)       │        │   podman CLI                │
        └───────────┬─────────────────┘        └───────────┬─────────────────┘
                    │ talks to socket                       │ talks directly to
                    ▼                                        ▼
        ┌─────────────────────────────┐        ┌─────────────────────────────┐
        │   dockerd (daemon, root)    │        │   crun / runc (OCI runtime) │
        │   - manages all containers  │        │   - launched per-container  │
        │   - single point of failure │        │   - runs as invoking user   │
        └───────────┬─────────────────┘        └───────────┬─────────────────┘
                    ▼                                        ▼
        ┌─────────────────────────────┐        ┌─────────────────────────────┐
        │   Containers (children of   │        │   Containers (children of   │
        │   dockerd, run as root      │        │   the podman-invoking user, │
        │unless configured otherwise) │        │   rootless by default)      │
        └─────────────────────────────┘        └─────────────────────────────┘
Because there’s no daemon, if the terminal session that launched a container exits, Podman uses a lightweight conmon process to keep the container alive independently — so containers still survive logout, just without a central always-on service coordinating everything.
Method 1: Installing Podman via APT (Recommended for Most Users)
Step 1 — Update package lists
sudo apt updateStep 2 — Install Podman
sudo apt install -y podmanThis single command pulls in Podman along with its required dependencies — conmon, crun, netavark, passt/slirp4netns, and the container storage libraries — all pre-configured for rootless use.
Step 3 — Confirm the installed version
podman --versionIf your organization requires the very latest Podman release rather than whatever Ubuntu 26.04 LTS’s APT package currently ships, continue to Method 2 and build from source instead.
Method 2: Building the Latest Podman from Source
Note: Older tutorials commonly point to the openSUSE “Kubic” OBS repository (
devel:kubic:libcontainers:stable) for a newer Podman than Ubuntu’s own package. That repository has since been discontinued and no longer ships Podman builds, and its setup also relied on the deprecatedapt-key addcommand. Do not use it. If you need a Podman release newer than what Ubuntu 26.04 LTS’s APT package provides, build from source instead.
Step 1 — Install build dependencies
sudo apt update
sudo apt install -y golang-go make git btrfs-progs libbtrfs-dev libassuan-dev \
  libglib2.0-dev libc6-dev libgpgme-dev libgpg-error-dev libseccomp-dev \
  libsystemd-dev pkg-config uidmap crun catatonit netavark passt
Step 2 — Clone the Podman source and check out the desired release tag
git clone https://github.com/containers/podman.git ~/podman-src
cd ~/podman-src
git checkout v6.0.2
Check the official releases page for the current latest stable tag before checking it out, since newer releases ship regularly.
Step 3 — Build and install
make BUILDTAGS="seccomp"
sudo make install PREFIX=/usr/local
Step 4 — Confirm the newer version is now first on PATH
hash -r
podman --version
If it still reports the older APT-installed version, confirm /usr/local/bin precedes /usr/bin in your PATH, or remove the APT package first with sudo apt remove -y podman before building from source.
Verifying the Installation
Regardless of which method you used, run Podman’s built-in diagnostic command to confirm everything is configured correctly:
podman infoLook for rootless: true and confirm the ociRuntime section shows crun (or runc) with a valid path — this confirms the OCI runtime is correctly detected.
Run the classic hello-world test:
podman run --rm hello-worldExpected output includes a confirmation message stating the installation is working correctly, pulled and run entirely without root privileges.
Running Your First Rootless Container
Step 1 — Pull and run an image
podman run -d --name my-nginx -p 8080:80 docker.io/library/nginx:stable-alpineStep 2 — Confirm it’s running
podman psStep 3 — Test it
curl http://localhost:8080You should see the default Nginx welcome page HTML returned.
Step 4 — Inspect logs and stop the container
podman logs my-nginx
podman stop my-nginx
Note that rootless Podman can’t bind to privileged ports (below 1024) by default — that’s why this example maps to host port 8080 rather than 80. See the troubleshooting section below if you need a rootless container to serve on a low port.
Configuring Rootless Networking and Storage
Extending the rootless UID/GID range
Rootless containers map container UIDs to a range of unprivileged UIDs on the host, defined in /etc/subuid and /etc/subgid. Ubuntu configures a reasonable default range automatically when a user account is created, but confirm it’s present:
grep "$USER" /etc/subuid /etc/subgidIf either file has no entry for your user, add one and reload:
sudo usermod --add-subuids 100000-165536 --add-subgids 100000-165536 "$USER"
podman system migrate
Persistent storage location
By default, rootless Podman stores images and container data under ~/.local/share/containers. Check current usage and location:
podman system df
podman info --format '{{.Store.GraphRoot}}'
Allowing rootless containers to bind to privileged ports (optional)
To let unprivileged users bind ports below 1024 system-wide (use with care):
echo "net.ipv4.ip_unprivileged_port_start=80" | sudo tee /etc/sysctl.d/99-podman-privileged-ports.conf
sudo sysctl --system
Installing Podman Compose
Podman supports Docker Compose-style multi-container workflows via podman-compose or, on newer Podman releases, native podman compose (which delegates to Docker Compose’s own binary if present, or to podman-compose).
Install podman-compose via APT
sudo apt install -y podman-composeExample usage
mkdir ~/podman-compose-demo && cd ~/podman-compose-demo
nano compose.yaml
services:
web:
image: docker.io/library/nginx:stable-alpine
ports:
- "8080:80"podman-compose up -d
podman-compose ps
podman-compose downRunning Podman Containers as systemd Services with Quadlet
Quadlet lets you define containers declaratively as systemd unit files, so Podman containers start automatically at boot and integrate with systemctl/journalctl like any other service — without needing Docker Compose or manual podman run invocations.
Step 1 — Create a rootless Quadlet unit directory
mkdir -p ~/.config/containers/systemdStep 2 — Define a container as a .container unit
nano ~/.config/containers/systemd/my-nginx.container[Unit]
Description=My Nginx Container
[Container]
Image=docker.io/library/nginx:stable-alpine
PublishPort=8080:80
[Service]
Restart=always
[Install]
WantedBy=default.targetStep 3 — Reload and start it as a systemd user service
systemctl --user daemon-reload
systemctl --user start my-nginx.service
systemctl --user status my-nginx.service
Step 4 — Enable it to persist across reboots for your user
loginctl enable-linger "$USER"
systemctl --user enable my-nginx.service
loginctl enable-linger allows your user’s systemd services to keep running (and start at boot) even without an active login session.
Podman vs Docker: Command Compatibility
Podman’s CLI mirrors Docker’s almost one-to-one, and many teams simply alias docker=podman to migrate existing scripts with minimal changes.
| Task | Docker Command | Podman Command |
|---|---|---|
| Run a container | docker run | podman run |
| List running containers | docker ps | podman ps |
| Build an image | docker build | podman build |
| Pull an image | docker pull | podman pull |
| Compose up | docker compose up | podman-compose up / podman compose up |
| View logs | docker logs | podman logs |
| Daemon required | Yes (dockerd) | No |
| Rootless by default | No (requires separate rootless mode setup) | Yes |
For CI pipelines and scripts written against the Docker CLI, creating a shell alias is often the fastest migration path:
echo "alias docker=podman" >> ~/.bashrc
source ~/.bashrc
Troubleshooting
| Symptom | Likely Cause | Fix |
|---|---|---|
podman: command not found | Package not installed, or shell session predates install | Re-run sudo apt install -y podman, then open a new terminal |
Error: rootless mode: cannot re-exec process | Missing or misconfigured /etc/subuid//etc/subgid entries | Add UID/GID ranges as shown in the rootless networking section, then run podman system migrate |
| Container can’t bind to port 80/443 | Rootless containers can’t use privileged ports (<1024) by default | Map to a port ≥1024 (e.g., 8080), or set net.ipv4.ip_unprivileged_port_start as shown above |
podman-compose command not found | Package not installed separately from podman | Run sudo apt install -y podman-compose |
Pulled image fails with short-name resolution enforced | Ambiguous image name resolves to multiple registries | Prefix the image with a fully qualified registry, e.g. docker.io/library/nginx instead of just nginx |
| Old tutorial’s Kubic/OBS repository URL returns 404 | The devel:kubic:libcontainers:stable repository has been discontinued and no longer publishes Podman packages | Don’t use it — install via APT (Method 1), or build from source (Method 2) for a newer version |
| Container disappears after SSH session ends | conmon not properly detached, or session cleanup killing lingering processes | Run loginctl enable-linger "$USER" so user services/processes persist after logout |
Error: netavark: unable to find internally managed network | Networking database inconsistency after an upgrade | Run podman network reload or, as a last resort, podman system reset (destroys all local containers/images) |
Uninstalling Podman
If installed via APT (Method 1):
sudo apt remove --purge -y podman podman-compose
sudo apt autoremove -y
If installed by building from source (Method 2):
cd ~/podman-src
sudo make uninstall PREFIX=/usr/local
rm -rf ~/podman-src
Remove leftover rootless storage and configuration (per user):
podman system reset --force
rm -rf ~/.local/share/containers ~/.config/containers
FAQ
Does Ubuntu 26.04 LTS include Podman by default?
No, but it is available directly from Ubuntu’s default repositories via sudo apt install podman — no third-party repository is required for a working, rootless-capable install.
Do I need root privileges to run Podman containers?
No. Podman is rootless by default once installed; regular users can pull, build, and run containers without sudo, unlike Docker’s daemon-based model, which traditionally required root or a separately configured rootless mode.
Can Podman run Docker Compose files directly?
Mostly yes, through podman-compose or native podman compose, which reads standard compose.yaml/docker-compose.yml files. Some advanced Compose features may behave slightly differently, so test complex stacks before relying on them in production.
Is Podman a full replacement for Docker Desktop on Linux?
For running containers, yes. Podman Desktop (a separate GUI application) provides a Docker Desktop-like graphical interface on top of the Podman engine, including Kubernetes integration, if you want a UI in addition to the CLI.
Why would I choose Podman over Docker for a production server?
The main draws are the absence of a root-owned daemon (reducing the attack surface if the container runtime is compromised), native systemd/Quadlet integration for service management, and out-of-the-box rootless operation — all of which matter more on shared or security-sensitive hosts than on a single-developer workstation.
Related posts:
 How To Install Podman On Ubuntu 20.04 LTS
 How to Install Kubernetes Cluster on Ubuntu 26.04 LTS Using kubeadm (2026 Guide)
 How to Install Kubernetes Dashboard on Ubuntu 26.04 with Secure Access
 How to Install Helm on Ubuntu 26.04 LTS (Complete Guide 2026)
How To Install Podman On CentOS Stream 9
How to Install Helm on Ubuntu 26.04 LTS (Complete Guide 2026)
How To Install Podman On CentOS Stream 9
 How To Install LXD on Ubuntu 24.04
 How to Install Docker and Docker Compose on Ubuntu 26.04 LTS
 How to Install Apache HertzBeat on Ubuntu 26.04 LTS
