How to Install Kubernetes Cluster on Ubuntu 26.04 LTS Using kubeadm (2026 Guide)

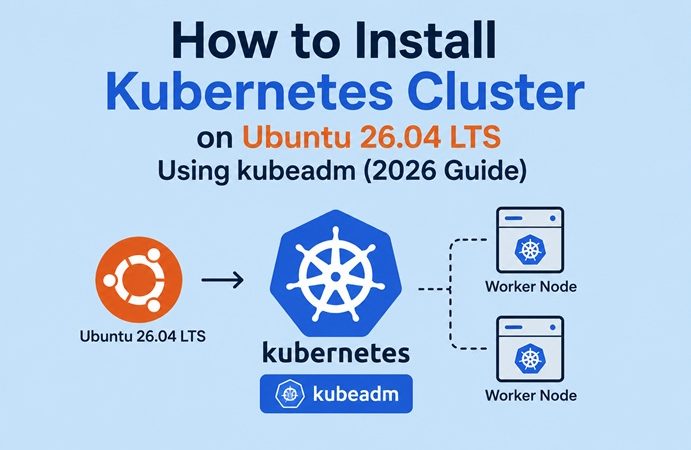
Table of Contents
- What is kubeadm and Why Use It
- Ubuntu 26.04 Specifics: What Changed for Kubernetes
- Cluster Architecture
- Hardware Requirements
- Prerequisites: All Nodes
- Step 1: Disable Swap
- Step 2: Configure Kernel Modules and sysctl
- Step 3: Install containerd (Container Runtime)
- Step 4: Configure containerd for cgroup v2
- Step 5: Install kubeadm, kubelet, and kubectl
- Step 6: Initialize the Control Plane (Master Node Only)
- Step 7: Install Calico CNI Network Plugin
- Step 8: Join Worker Nodes to the Cluster
- Step 9: Verify the Cluster
- Step 10: Deploy Your First Application
- Install Metrics Server
- Optional: Install KubeSphere Web UI
- Single-Node Cluster: Remove Control Plane Taint
- Common Issues and Quick Fixes
- Next Steps
Setting up a Kubernetes cluster from scratch on Ubuntu 26.04 requires one non-obvious change: configuring containerd for cgroup v2. Ubuntu 26.04 dropped cgroup v1 entirely with systemd 259, so the old default won’t work. Skip this step and kubelet will fail to start with a cryptic cgroup error that sends you down the wrong rabbit hole.
This guide walks through installing a production-grade Kubernetes 1.36 cluster on Ubuntu 26.04 LTS (Resolute Raccoon) using kubeadm — covering everything from kernel module configuration to joining worker nodes and deploying your first application. Every Ubuntu 26.04-specific gotcha is called out explicitly so you don’t waste hours troubleshooting misconfigurations that aren’t obvious from older guides.
What is kubeadm and Why Use It
kubeadm is the official tool for bootstrapping Kubernetes clusters. It automates the complex setup of the control plane and worker nodes, and is the recommended approach for production-grade clusters that you manage yourself.
kubeadm gives you a real Kubernetes cluster — not a simplified local version like minikube or k3s. The tradeoff: more setup steps than managed alternatives, but full control over every component and no vendor lock-in.
kubeadm vs alternatives:
| Tool | Use case | Complexity | Production-ready |
|---|---|---|---|
| kubeadm | Self-managed production cluster | Medium | ✅ Yes |
| k3s | Lightweight, edge, IoT, single-node | Low | ✅ Yes (limited) |
| minikube | Local development only | Low | ❌ No |
| KubeKey | Kubernetes + KubeSphere together | Medium | ✅ Yes |
| Managed (EKS/GKE/AKS) | Cloud-native, no node management | Low (ops) | ✅ Yes |
Use kubeadm when you need a self-managed cluster with full control and you’re comfortable managing the underlying nodes.
Ubuntu 26.04 Specifics: What Changed for Kubernetes
If you’ve installed Kubernetes on Ubuntu 22.04 or 24.04 before, these changes in Ubuntu 26.04 affect the installation:
1. cgroup v2 only — cgroup v1 removed.
Ubuntu 26.04 uses cgroup v2 exclusively. systemd 259 removed cgroup v1 support entirely. containerd must be explicitly configured to use the systemd cgroup driver, or kubelet and containerd will use mismatched drivers and the cluster will fail to initialize.
2. Kubernetes 1.36 is the current stable release (July 2026).
v1.33 is the recommended LTS-supported release for production stability. v1.36 is the latest stable release as of mid-2026. This guide uses 1.36.
3. Old Kubernetes APT repository is removed.
The old repository https://apt.kubernetes.io kubernetes-xenial is deprecated and removed. Use the pkgs.k8s.io repository instead.
4. Calico installation method changed.
The docs.projectcalico.org/manifests/calico.yaml URL is dead. The current recommended approach is the Tigera Operator method, which handles lifecycle management automatically.
Cluster Architecture
This guide sets up a standard kubeadm cluster:
┌─────────────────────────────────┐
│  Control Plane Node (master)    │
│  ├── kube-apiserver             │
│  ├── kube-controller-manager   │
│  ├── kube-scheduler            │
│  ├── etcd                      │
│  └── CoreDNS                   │
└──────────────┬──────────────────┘
               │ cluster network
       ┌───────┴────────┐
       ▼                ▼
┌─────────────┐  ┌─────────────┐
│ Worker Node │  │ Worker Node │
│  ├── kubelet│  │  ├── kubelet│
│  ├── kube-  │  │  ├── kube-  │
│  │  proxy   │  │  │  proxy   │
│  └── Pods   │  │  └── Pods   │
└─────────────┘  └─────────────┘
For a single-node cluster (development/testing), run all steps on one machine and remove the control plane taint in Step 18.
Hardware Requirements
| Role | CPU | RAM | Storage | Count |
|---|---|---|---|---|
| Control Plane | 2+ cores | 4GB+ | 50GB+ | 1 (or 3 for HA) |
| Worker Node | 2+ cores | 4GB+ | 50GB+ | 1+ |
Minimum per node: 2 CPUs, 2GB RAM. The control plane alone consumes about 1.5GB RAM — give it at least 4GB for anything beyond a quick test.
All nodes must have:
- Unique hostname, MAC address, and product UUID
- Full network connectivity to each other
- Ubuntu 26.04 LTS installed
- A user with
sudoprivileges
Prerequisites: All Nodes
Run all steps in this section on every node — both control plane and worker nodes — unless explicitly noted otherwise.
Set unique hostnames on each node:
# On control plane
sudo hostnamectl set-hostname k8s-master

# On worker 1
sudo hostnamectl set-hostname k8s-worker-1

# On worker 2
sudo hostnamectl set-hostname k8s-worker-2
Add all cluster nodes to /etc/hosts on every node:
sudo nano /etc/hosts192.168.1.10 k8s-master
192.168.1.11 k8s-worker-1
192.168.1.12 k8s-worker-2Replace with your actual IP addresses.
Step 1: Disable Swap
Kubernetes requires swap to be disabled. The kubelet cannot accurately determine memory usage when swap is enabled, which leads to unpredictable scheduling and resource management.
# Disable swap immediately
sudo swapoff -a

# Disable swap permanently (comment out swap entry in fstab)
sudo sed -i '/ swap / s/^\(.*\)$/#\1/g' /etc/fstab
Verify swap is off:
swapon --show
# Should return no output (empty = no swap active)

free -h
# Swap line should show: 0B 0B 0B
Step 2: Configure Kernel Modules and sysctl
Kubernetes requires two kernel modules and specific network settings:
# Load required kernel modules
cat <<EOF | sudo tee /etc/modules-load.d/k8s.conf
overlay
br_netfilter
EOF

sudo modprobe overlay
sudo modprobe br_netfilter
Configure sysctl settings for Kubernetes networking:
cat <<EOF | sudo tee /etc/sysctl.d/k8s.conf
net.bridge.bridge-nf-call-iptables  = 1
net.bridge.bridge-nf-call-ip6tables = 1
net.ipv4.ip_forward                 = 1
EOF

# Apply sysctl settings without reboot
sudo sysctl --system
Verify the settings are applied:
sysctl net.bridge.bridge-nf-call-iptables net.ipv4.ip_forward
# Expected:
# net.bridge.bridge-nf-call-iptables = 1
# net.ipv4.ip_forward = 1
Step 3: Install containerd (Container Runtime)
Kubernetes needs a CRI-compatible container runtime. containerd is the standard choice and ships in Docker’s apt repository with the latest stable builds. For kubeadm clusters, standalone containerd is the cleanest approach.
Note: We install containerd from Docker’s repository (not Ubuntu’s default repo) to get the latest version:
# Install prerequisites
sudo apt update
sudo apt install -y ca-certificates curl gnupg

# Add Docker's GPG key
sudo install -m 0755 -d /etc/apt/keyrings
sudo curl -fsSL https://download.docker.com/linux/ubuntu/gpg \
  -o /etc/apt/keyrings/docker.asc
sudo chmod a+r /etc/apt/keyrings/docker.asc

# Add Docker repository
echo \
  "Types: deb
URIs: https://download.docker.com/linux/ubuntu
Suites: $(. /etc/os-release && echo "${UBUNTU_CODENAME:-$VERSION_CODENAME}")
Components: stable
Architectures: $(dpkg --print-architecture)
Signed-By: /etc/apt/keyrings/docker.asc" | \
  sudo tee /etc/apt/sources.list.d/docker.sources > /dev/null

# Install containerd (standalone — not the full Docker CE)
sudo apt update
sudo apt install -y containerd.io
Verify containerd is running:
sudo systemctl status containerd
# Should show: Active: active (running)
Step 4: Configure containerd for cgroup v2
This is the step that trips up most installations on Ubuntu 26.04. The default containerd configuration uses SystemdCgroup = false — which causes a mismatch with Ubuntu 26.04’s cgroup v2 setup:
# Generate default containerd config
sudo mkdir -p /etc/containerd
containerd config default | sudo tee /etc/containerd/config.toml
Enable SystemdCgroup:
sudo sed -i 's/SystemdCgroup = false/SystemdCgroup = true/' /etc/containerd/config.tomlVerify the change was applied:
grep "SystemdCgroup" /etc/containerd/config.toml
# Expected: SystemdCgroup = true
Restart containerd:
sudo systemctl restart containerd
sudo systemctl enable containerd
Verify cgroup v2 is correctly detected:
stat -fc %T /sys/fs/cgroup
# Expected: cgroup2fs
# If it shows tmpfs — cgroup v2 is not active (should not happen on Ubuntu 26.04)
Step 5: Install kubeadm, kubelet, and kubectl
Add the Kubernetes APT repository. Use the version you intend to install — this example uses 1.36:
# Add Kubernetes GPG key
curl -fsSL https://pkgs.k8s.io/core:/stable:/v1.36/deb/Release.key | \
  sudo gpg --dearmor -o /etc/apt/keyrings/kubernetes-apt-keyring.gpg
sudo chmod 644 /etc/apt/keyrings/kubernetes-apt-keyring.gpg

# Add Kubernetes repository
echo 'deb [signed-by=/etc/apt/keyrings/kubernetes-apt-keyring.gpg] https://pkgs.k8s.io/core:/stable:/v1.36/deb/ /' | \
  sudo tee /etc/apt/sources.list.d/kubernetes.list
sudo chmod 644 /etc/apt/sources.list.d/kubernetes.list
Install the Kubernetes tools:
sudo apt update
sudo apt install -y kubelet kubeadm kubectl

# Pin the version — prevent accidental upgrades that break the cluster
sudo apt-mark hold kubelet kubeadm kubectl
Verify:
kubeadm version
kubectl version --client
Enable and start kubelet:
sudo systemctl enable --now kubeletNote: kubelet will restart continuously until kubeadm init is run — this is normal behavior before cluster initialization.
Step 6: Initialize the Control Plane (Master Node Only)
Run this only on the control plane node:
sudo kubeadm init \
  --pod-network-cidr=192.168.0.0/16 \
  --apiserver-advertise-address=<CONTROL-PLANE-IP>
Replace <CONTROL-PLANE-IP> with the actual IP address of your control plane node.
The --pod-network-cidr must match your CNI plugin:
- Calico:
192.168.0.0/16(used in this guide) - Flannel:
10.244.0.0/16 - Cilium:
10.0.0.0/8
The initialization takes 2-3 minutes. On success, you’ll see:
Your Kubernetes control-plane has initialized successfully!

To start using your cluster, you need to run the following as a regular user:

  mkdir -p $HOME/.kube
  sudo cp -i /etc/kubernetes/admin.conf $HOME/.kube/config
  sudo chown $(id -u):$(id -g) $HOME/.kube/config

...

Then you can join any number of worker nodes by running the following on each as root:

kubeadm join 192.168.1.10:6443 --token xxxxx.xxxxxxxxxxxxxxxx \
    --discovery-token-ca-cert-hash sha256:xxxxxxxxxxxxxxxxxxxxxxxxxxxxxxxxxxxxxxxx
Save the kubeadm join command — you’ll need it for worker nodes. Tokens expire after 24 hours (see troubleshooting if it expires before you join all nodes).
Configure kubectl for your user:
mkdir -p $HOME/.kube
sudo cp -i /etc/kubernetes/admin.conf $HOME/.kube/config
sudo chown $(id -u):$(id -g) $HOME/.kube/config
Verify the control plane is running:
kubectl get nodes
# NAME         STATUS     ROLES           AGE   VERSION
# k8s-master   NotReady   control-plane   1m    v1.36.x
NotReady is expected at this point — the node needs a CNI network plugin before it shows Ready.
Step 7: Install Calico CNI Network Plugin
The current recommended Calico installation approach is the Tigera Operator method, which handles lifecycle management automatically.
Install the Tigera Operator:
kubectl create -f https://raw.githubusercontent.com/projectcalico/calico/v3.29.3/manifests/tigera-operator.yamlDownload the custom resources manifest:
curl https://raw.githubusercontent.com/projectcalico/calico/v3.29.3/manifests/custom-resources.yaml -OVerify the pod CIDR matches what you used in kubeadm init:
cat custom-resources.yaml | grep cidr
# Should show: cidr: 192.168.0.0/16
If your kubeadm init used a different CIDR, update it:
sed -i 's|192.168.0.0/16|YOUR_POD_CIDR|' custom-resources.yamlApply the custom resources:
kubectl create -f custom-resources.yamlWatch Calico pods come up:
watch kubectl get pods -n calico-systemWait until all pods show Running. This typically takes 2-3 minutes.
Verify the control plane node is now Ready:
kubectl get nodes
# NAME         STATUS   ROLES           AGE   VERSION
# k8s-master   Ready    control-plane   5m    v1.36.x
Step 8: Join Worker Nodes to the Cluster
Run this on each worker node using the kubeadm join command from Step 6:
sudo kubeadm join 192.168.1.10:6443 \
  --token xxxxx.xxxxxxxxxxxxxxxx \
  --discovery-token-ca-cert-hash sha256:xxxxxxxxxxxxxxxxxxxxxxxxxxxxxxxxxxxxxxxx
If the token has expired (>24 hours), generate a new one on the control plane:
# Generate a new token
kubeadm token create --print-join-command
# Outputs the full join command with a fresh token
After joining, verify on the control plane:
kubectl get nodes
# NAME            STATUS   ROLES           AGE   VERSION
# k8s-master      Ready    control-plane   10m   v1.36.x
# k8s-worker-1    Ready    <none>          2m    v1.36.x
# k8s-worker-2    Ready    <none>          1m    v1.36.x
All nodes should show Ready. If a worker shows NotReady, check that containerd is running on that node (sudo systemctl status containerd) and that Steps 1-4 were completed correctly.
Step 9: Verify the Cluster
Check all system pods are running:
kubectl get pods -n kube-system
# All pods should show Running or Completed
Check cluster component health:
kubectl get componentstatuses
# All components should show Healthy
Check cluster info:
kubectl cluster-info
# Kubernetes control plane is running at https://192.168.1.10:6443
# CoreDNS is running at https://192.168.1.10:6443/api/v1/...
Check node resource usage:
kubectl top nodes
# (requires Metrics Server — see next section)
Step 10: Deploy Your First Application
Deploy an Nginx application to verify the cluster can run workloads:
# Create a deployment
kubectl create deployment nginx-test \
  --image=nginx:alpine \
  --replicas=2

# Expose it as a NodePort service
kubectl expose deployment nginx-test \
  --type=NodePort \
  --port=80

# Check deployment status
kubectl get deployments
kubectl get pods
kubectl get services
Get the NodePort assigned:
kubectl get service nginx-test
# NAME         TYPE       CLUSTER-IP      EXTERNAL-IP   PORT(S)        AGE
# nginx-test   NodePort   10.96.xxx.xxx   <none>        80:31234/TCP   1m
Access the application at http://<any-node-ip>:31234 — you should see the Nginx welcome page.
Clean up the test:
kubectl delete deployment nginx-test
kubectl delete service nginx-test
Install Metrics Server
kubeadm does not install the Metrics Server component during initialization. It must be installed separately. Without it, kubectl top nodes and kubectl top pods don’t work, and Horizontal Pod Autoscaler has no data to act on.
kubectl apply -f https://github.com/kubernetes-sigs/metrics-server/releases/latest/download/components.yamlFor clusters using self-signed certificates (common in kubeadm setups), patch the Metrics Server to skip TLS verification:
kubectl patch deployment metrics-server \
  -n kube-system \
  --type json \
  -p '[{"op":"add","path":"/spec/template/spec/containers/0/args/-","value":"--kubelet-insecure-tls"}]'
Wait 60 seconds, then verify:
kubectl top nodes
# NAME            CPU(cores)   CPU%   MEMORY(bytes)   MEMORY%
# k8s-master      150m         7%     1800Mi          45%
# k8s-worker-1    80m          4%     900Mi           22%
Optional: Install KubeSphere Web UI
Once the cluster is running, add KubeSphere for a full web-based management interface. KubeSphere installs via Helm on your existing cluster:
helm upgrade --install \
  -n kubesphere-system \
  --create-namespace \
  ks-core \
  https://charts.kubesphere.io/main/ks-core-1.1.3.tgz \
  --debug --wait
Access the KubeSphere console:
kubectl get svc ks-console -n kubesphere-system
# NodePort is typically 30880
Open http://<control-plane-ip>:30880 — login: admin / P@88w0rd (change immediately).
For the full KubeSphere security hardening guide after installation, see our KubeSphere and Kubernetes Security guide.
Single-Node Cluster: Remove Control Plane Taint
By default, Kubernetes prevents workload pods from being scheduled on the control plane node. For a single-node cluster (development/testing), remove this restriction:
kubectl taint nodes --all node-role.kubernetes.io/control-plane-
# node/k8s-master untainted
Now pods can be scheduled on the control plane node, making it a fully functional single-node cluster.
Common Issues and Quick Fixes
| Symptom | Likely Cause | Fix |
|---|---|---|
kubelet keeps restarting before init | Expected — kubelet loops until init completes | Normal behavior — run kubeadm init to complete |
kubeadm init fails with cgroup error | SystemdCgroup = false in containerd config | Set SystemdCgroup = true in /etc/containerd/config.toml, restart containerd |
Node stays in NotReady after init | CNI plugin not installed | Install Calico/Flannel CNI — Step 7 |
CoreDNS pods stuck in Pending | No CNI installed yet | Install CNI first — CoreDNS requires pod networking |
Worker fails to join — token expired | Bootstrap token only valid 24 hours | Run kubeadm token create --print-join-command on control plane |
kubectl top nodes shows error: Metrics API not available | Metrics Server not installed | Install Metrics Server — Step 16 |
| Pods can’t reach each other | br_netfilter module not loaded | Run sudo modprobe br_netfilter and check sysctl settings |
kubeadm reset needed (failed init) | Partial initialization | Run: sudo kubeadm reset -f && sudo rm -rf $HOME/.kube && sudo iptables -F |
Reset and retry after a failed init:
sudo kubeadm reset -f
sudo rm -rf $HOME/.kube
sudo iptables -F && sudo iptables -t nat -F && sudo iptables -t mangle -F && sudo iptables -X
# Then re-run kubeadm init from Step 6
Next Steps
With a working Kubernetes cluster on Ubuntu 26.04:
- Security hardening — a fresh kubeadm cluster has many default insecurities. Our KubeSphere and Kubernetes Security guide covers RBAC, Pod Security Standards, network policies, and secret encryption — implement these before running production workloads.
- Add monitoring — deploy
kube-prometheus-stackto your cluster and integrate with Prometheus + Grafana for cluster-level metrics (node CPU, pod memory, API server latency). - Centralized logging — deploy Fluent Bit as a DaemonSet to ship all pod logs to Grafana Loki for centralized log search and alerting.
- KubeSphere management UI — install KubeSphere (Step 17) for a web-based interface for workload management, multi-tenancy, and DevOps pipelines without writing YAML for every operation.
- Upgrade Kubernetes — kubeadm supports in-place version upgrades. Always upgrade the control plane first, then worker nodes, one at a time. Never skip minor versions.
Related posts:
 Install and Configure K3s with NVIDIA GPU Operator on Ubuntu 22.04
 How To Install Docker On Ubuntu 22.04
 Top 15 Kubernetes Interview Questions and Answers for Beginners (2025)
How to Install Docker on Ubuntu 24.04 LTS (Step-by-Step Beginner Guide)
Top 15 Kubernetes Interview Questions and Answers for Beginners (2025)
How to Install Docker on Ubuntu 24.04 LTS (Step-by-Step Beginner Guide)
 How to Install Apache Kafka on Ubuntu 26.04 LTS (KRaft Mode, No ZooKeeper)
 How to Install Apache Tomcat 11 on Ubuntu 26.04 LTS (Step-by-Step Guide)
 How to Install Ollama and Open WebUI on Ubuntu 26.04 LTS with Docker Compose
 How to Install GitLab CE with Docker Compose on Ubuntu 26.04 LTS
