How to Install Ollama and Open WebUI on Ubuntu 26.04 LTS with Docker Compose

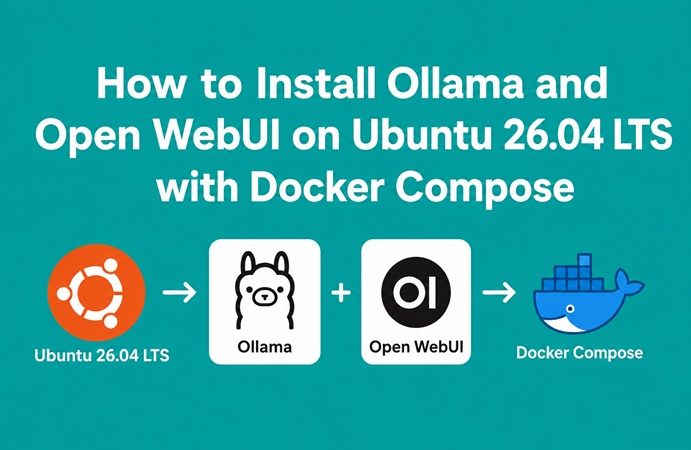
Table of Contents
- What is Ollama and Open WebUI
- Architecture Overview
- Prerequisites and Hardware Requirements
- Step 1: Install Docker on Ubuntu 26.04
- Step 2: Install Ollama on the Host
- Step 3: Pull Your First Model
- Step 4: Deploy Open WebUI with Docker Compose
- Step 5: Full Stack — Ollama + Open WebUI in Docker Compose
- Step 6: Enable NVIDIA GPU Acceleration
- Step 7: Put Open WebUI Behind Nginx Reverse Proxy
- Managing Models with Ollama
- Open WebUI: First Login and Key Features
- Connecting External AI APIs (OpenAI, Anthropic)
- Production Hardening Checklist
- Common Issues and Quick Fixes
- Next Steps
Running AI models privately — on your own hardware, with your own data, without sending anything to a third-party API — has become genuinely practical in 2026. Ollama is an open-source project that makes running large language models simple. It supports hundreds of models and runs them locally on your machine with a lightweight interface. Open WebUI is an extensible, feature-rich, and user-friendly self-hosted AI platform designed to operate entirely offline, supporting various LLM runners like Ollama and OpenAI-compatible APIs.
Together, they give you a private ChatGPT alternative running entirely on your own server — your conversations stay on your hardware, your data never leaves your network, and you pay nothing per token.
This guide covers the full setup on Ubuntu 26.04 LTS (Resolute Raccoon): Ollama as the model backend, Open WebUI as the chat interface, Docker Compose for deployment, GPU acceleration for faster inference, and Nginx as a reverse proxy for HTTPS access.
What is Ollama and Open WebUI
Ollama is the model runner — it downloads, manages, and serves large language models through a local HTTP API on port 11434. Think of it as the engine room: it handles all the complexity of loading model weights, managing GPU/CPU memory, and exposing a clean API. Local execution means running AI models on your own hardware, keeping your data private, with easy installation and model management.
Open WebUI is the interface — a full-featured web application that connects to Ollama (or any OpenAI-compatible API) and provides:
- A chat interface comparable to ChatGPT or Claude’s web UI
- Multi-user support with authentication
- Conversation history and memory
- Document upload for RAG (Retrieval Augmented Generation)
- Web search integration
- Image generation support
- Voice input/output
- API access management
Open WebUI has over 80,000 stars on GitHub, making it the most popular choice for creating a chat interface for Ollama.
Architecture Overview
User (browser)
      │
      │ HTTPS (443)
      ▼
Nginx Reverse Proxy
      │
      │ HTTP (3000 internal)
      ▼
Open WebUI container
      │
      │ HTTP API (11434)
      ▼
Ollama (host or container)
      │
      │ loads model weights
      ▼
GPU/CPU memory → LLM inference
Two deployment patterns exist:
Pattern A: Ollama on host + Open WebUI in Docker (recommended for GPU setups)
Ollama runs as a systemd service on the host, accessing the GPU directly. Open WebUI runs in Docker and connects to Ollama via host.docker.internal:11434. This gives Ollama the most direct GPU access.
Pattern B: Both in Docker Compose (simplest for CPU-only or evaluation)
Both services run as containers in the same Compose stack. Easier to manage, but GPU passthrough to Docker requires the NVIDIA Container Toolkit.
Prerequisites and Hardware Requirements
Open WebUI itself needs about 500MB of RAM to run. The total RAM you need depends on which model you plan to run. Open WebUI and Docker together use about 1GB. The rest goes to the LLM.
Minimum for CPU-only:
| Component | Minimum | Recommended |
|---|---|---|
| RAM | 8GB | 16GB+ |
| Storage | 20GB free | 50GB+ |
| CPU | 4 cores | 8 cores |
| GPU | Not required | NVIDIA with 8GB+ VRAM |
Model size guide:
| Model | Parameters | RAM (CPU) | VRAM (GPU) | Speed (CPU) |
|---|---|---|---|---|
| Gemma 3 1B | 1B | 2GB | 2GB | Fast |
| Llama 3.2 3B | 3B | 4GB | 4GB | Good |
| Gemma 3 4B | 4B | 6GB | 4GB | Good |
| Llama 3.1 8B | 8B | 10GB | 8GB | Slow on CPU |
| Llama 3.3 70B | 70B | 45GB+ | 40GB+ | Very slow on CPU |
For most users starting out: a 4B or 7B model on CPU gives usable results. With an NVIDIA RTX 3090 or better (24GB VRAM), any 7B or 13B model runs comfortably.
Step 1: Install Docker on Ubuntu 26.04
Docker CE 29.4.1 and Docker Compose v5.1.3 are the versions tested on Ubuntu 26.04 LTS.
If Docker is not yet installed, follow our complete Install Docker and Docker Compose on Ubuntu 26.04 LTS guide. The quick version:
# Remove old packages
for pkg in docker.io docker-doc docker-compose containerd runc; do
  sudo apt remove -y $pkg 2>/dev/null
done

# Add Docker's official repository
sudo apt update && sudo apt install -y ca-certificates curl gnupg
sudo install -m 0755 -d /etc/apt/keyrings
sudo curl -fsSL https://download.docker.com/linux/ubuntu/gpg \
  -o /etc/apt/keyrings/docker.asc
sudo chmod a+r /etc/apt/keyrings/docker.asc

echo "Types: deb
URIs: https://download.docker.com/linux/ubuntu
Suites: $(. /etc/os-release && echo "${UBUNTU_CODENAME:-$VERSION_CODENAME}")
Components: stable
Architectures: $(dpkg --print-architecture)
Signed-By: /etc/apt/keyrings/docker.asc" | \
  sudo tee /etc/apt/sources.list.d/docker.sources > /dev/null

sudo apt update
sudo apt install -y docker-ce docker-ce-cli containerd.io \
  docker-buildx-plugin docker-compose-plugin

# Add your user to docker group
sudo usermod -aG docker $USER && newgrp docker
Step 2: Install Ollama on the Host
The official Ollama installer drops the binary at /usr/local/bin/ollama, creates an ollama system user, and installs a systemd unit.
curl -fsSL https://ollama.com/install.sh | shVerify the installation:
sudo systemctl status ollama
ollama --version
# ollama version is 0.21.x
Configure Ollama to accept connections from Docker containers:
By default, Ollama binds only to 127.0.0.1:11434. Open WebUI running in Docker cannot reach localhost — it needs Ollama to listen on the Docker gateway IP. Edit the systemd service:
sudo systemctl edit ollamaAdd these lines in the editor:
[Service]
Environment="OLLAMA_HOST=0.0.0.0:11434"
Save and restart:
sudo systemctl daemon-reload
sudo systemctl restart ollama
Security note:
OLLAMA_HOST=0.0.0.0makes Ollama reachable on all interfaces. This is fine in a trusted private network, but never expose port 11434 directly to the internet — Ollama has no built-in authentication. Use UFW to restrict it:sudo ufw allow from 172.17.0.0/16 to any port 11434 comment "Ollama from Docker" sudo ufw deny 11434
Step 3: Pull Your First Model
Before Open WebUI is running, test Ollama from the command line:
# Pull Gemma 3 4B — good balance of quality and speed
ollama pull gemma3:4b

# Or Llama 3.2 3B — faster on CPU
ollama pull llama3.2:3b

# Test it immediately
ollama run gemma3:4b "Explain what Docker is in 2 sentences."
List available models:
ollama list
# NAME            ID              SIZE      MODIFIED
# gemma3:4b       ...             3.3 GB    ...
Popular models in 2026:
| Model | Best for | Size |
|---|---|---|
gemma3:1b | Fast responses, limited hardware | 815MB |
gemma3:4b | General use, good quality | 3.3GB |
llama3.2:3b | General use, fast | 2.0GB |
llama3.1:8b | Higher quality responses | 4.9GB |
deepseek-r1:7b | Reasoning and analysis | 4.7GB |
codellama:7b | Code generation and review | 3.8GB |
phi4:14b | Microsoft’s efficient model | 9.1GB |
Step 4: Deploy Open WebUI with Docker Compose
The simplest setup: Open WebUI in Docker connecting to Ollama running on the host.
Create the project directory:
mkdir -p ~/open-webui && cd ~/open-webui.env file:
WEBUI_SECRET_KEY=generate_a_long_random_string_here
OLLAMA_BASE_URL=http://host.docker.internal:11434
TZ=Asia/Jakarta
Generate a secret key:
openssl rand -hex 32
# Paste the output as WEBUI_SECRET_KEYcompose.yml:
version: '3.8'

services:
  open-webui:
    image: ghcr.io/open-webui/open-webui:main
    container_name: open-webui
    restart: unless-stopped
    ports:
      - "3000:8080"
    environment:
      OLLAMA_BASE_URL: ${OLLAMA_BASE_URL}
      WEBUI_SECRET_KEY: ${WEBUI_SECRET_KEY}
      TZ: ${TZ}
    extra_hosts:
      - "host.docker.internal:host-gateway"  # Lets container reach host's Ollama
    volumes:
      - open-webui-data:/app/backend/data
    healthcheck:
      test: ["CMD", "curl", "-f", "http://localhost:8080/health"]
      interval: 30s
      timeout: 10s
      retries: 5
      start_period: 60s

volumes:
  open-webui-data:
Start the stack:
docker compose up -d
docker compose logs -f open-webui
Open WebUI needs 30 to 60 seconds to initialize its database and run migrations on first start. Watch for Application startup complete in the logs, then open http://<your-server-ip>:3000.
Step 5: Full Stack — Ollama + Open WebUI in Docker Compose
For environments where you want everything containerized (easier to move between hosts):
version: '3.8'

services:
  ollama:
    image: ollama/ollama:latest
    container_name: ollama
    restart: unless-stopped
    ports:
      - "127.0.0.1:11434:11434"    # Localhost only — don't expose publicly
    volumes:
      - ollama-data:/root/.ollama   # Models persist here — don't lose this volume!
    environment:
      OLLAMA_HOST: "0.0.0.0:11434"
    healthcheck:
      test: ["CMD", "curl", "-f", "http://localhost:11434/api/version"]
      interval: 30s
      timeout: 10s
      retries: 5
      start_period: 30s

  open-webui:
    image: ghcr.io/open-webui/open-webui:main
    container_name: open-webui
    restart: unless-stopped
    ports:
      - "3000:8080"
    environment:
      OLLAMA_BASE_URL: "http://ollama:11434"   # Service name — not localhost!
      WEBUI_SECRET_KEY: ${WEBUI_SECRET_KEY}
      TZ: ${TZ}
    volumes:
      - open-webui-data:/app/backend/data
    depends_on:
      ollama:
        condition: service_healthy

volumes:
  ollama-data:      # Large volume — contains all downloaded models
  open-webui-data:  # Contains chat history, users, settings
Critical: The
ollama-datavolume contains all your downloaded models. A single model can be 2-10GB. Back up this volume before any Docker cleanup, and never rundocker volume prunewithout checking first.
Step 6: Enable NVIDIA GPU Acceleration
With GPU acceleration, a 7B model responds in 2 to 5 seconds instead of 30 to 60 seconds on CPU.
Install NVIDIA Container Toolkit:
# Add NVIDIA Container Toolkit repository
curl -fsSL https://nvidia.github.io/libnvidia-container/gpgkey | \
  sudo gpg --dearmor -o /usr/share/keyrings/nvidia-container-toolkit-keyring.gpg

curl -s -L https://nvidia.github.io/libnvidia-container/stable/deb/nvidia-container-toolkit.list | \
  sed 's#deb https://#deb [signed-by=/usr/share/keyrings/nvidia-container-toolkit-keyring.gpg] https://#g' | \
  sudo tee /etc/apt/sources.list.d/nvidia-container-toolkit.list

sudo apt update
sudo apt install -y nvidia-container-toolkit

# Configure Docker to use NVIDIA runtime
sudo nvidia-ctk runtime configure --runtime=docker
sudo systemctl restart docker
Update compose.yml to enable GPU for Ollama:
services:
  ollama:
    image: ollama/ollama:latest
    container_name: ollama
    restart: unless-stopped
    deploy:
      resources:
        reservations:
          devices:
            - driver: nvidia
              count: all           # Use all available GPUs
              capabilities: [gpu]
    volumes:
      - ollama-data:/root/.ollama
    environment:
      OLLAMA_HOST: "0.0.0.0:11434"
Verify GPU is being used:
# After pulling and running a model
docker compose exec ollama ollama run gemma3:4b "Hello"

# In another terminal — check GPU usage
nvidia-smi
# VRAM usage should show the model loaded
AMD GPU (ROCm):
services:
  ollama:
    image: ollama/ollama:rocm     # ROCm-specific image
    devices:
      - /dev/kfd
      - /dev/dri
    group_add:
      - video
      - render
Step 7: Put Open WebUI Behind Nginx Reverse Proxy
Port 3000 over plain HTTP is fine for a private home lab but not for anything accessible beyond your local network. Use Nginx Proxy Manager for the easiest SSL setup:
- In Nginx Proxy Manager → Proxy Hosts → Add Proxy Host
- Domain:
ai.yourdomain.com - Forward Hostname:
open-webui(service name) orlocalhost - Forward Port:
3000 - Enable WebSockets Support (required for streaming responses)
- SSL tab: Request Let’s Encrypt certificate, enable Force SSL
For manual Nginx config:
server {
    listen 443 ssl http2;
    server_name ai.yourdomain.com;

    ssl_certificate     /etc/letsencrypt/live/ai.yourdomain.com/fullchain.pem;
    ssl_certificate_key /etc/letsencrypt/live/ai.yourdomain.com/privkey.pem;

    # Security headers
    add_header X-Frame-Options "SAMEORIGIN" always;
    add_header X-Content-Type-Options "nosniff" always;

    location / {
        proxy_pass         http://localhost:3000;
        proxy_set_header   Host $host;
        proxy_set_header   X-Real-IP $remote_addr;
        proxy_set_header   X-Forwarded-For $proxy_add_x_forwarded_for;
        proxy_set_header   X-Forwarded-Proto $scheme;

        # Required for streaming AI responses
        proxy_http_version 1.1;
        proxy_set_header   Upgrade $http_upgrade;
        proxy_set_header   Connection "upgrade";
        proxy_buffering    off;           # Critical — disables response buffering for streaming
        proxy_read_timeout 300s;          # Long timeout for slow model inference
        proxy_send_timeout 300s;
    }
}
proxy_buffering offis essential — AI responses stream token by token. Without this, Nginx buffers the entire response before sending it to the browser, making it look like the model is “thinking” silently instead of typing progressively.
Managing Models with Ollama
# Pull a new model
ollama pull llama3.1:8b

# List downloaded models
ollama list

# Run a model interactively in terminal
ollama run gemma3:4b

# Delete a model (frees disk space)
ollama rm llama3.2:3b

# Show model details
ollama show gemma3:4b

# Pull a specific quantization (smaller = faster but lower quality)
ollama pull llama3.1:8b-instruct-q4_K_M   # 4-bit quantized, 4.9GB
ollama pull llama3.1:8b-instruct-q8_0     # 8-bit quantized, 8.5GB, better quality
Quantization guide:
q4_K_M— best balance of size and quality for most use casesq8_0— higher quality, twice the sizefp16— full precision, maximum quality, requires more VRAM
You can also pull models directly from the Open WebUI interface: Settings → Models → Pull a model from Ollama.com.
Open WebUI: First Login and Key Features
Open http://<server-ip>:3000 (or your configured domain).
First user = Admin: The first account registered becomes the administrator — create this immediately. Disable signups afterward if this is a private deployment:
In Open WebUI → Admin Panel → Settings → General → Enable New User Signup: OFF
Key features worth setting up:
1. Web Search integration
Settings → Web Search → enable DuckDuckGo or SearXNG. This lets any model search the web and cite sources during conversations.
2. Document RAG
Upload PDFs, Word documents, or text files in any conversation. The model reads and answers questions from your documents — useful for internal documentation or research papers.
3. System prompts per model
Admin Panel → Models → select a model → set a system prompt. Useful for creating specialized assistants: a coding helper, a formal writing assistant, or a customer-facing bot with restricted topic scope.
4. Multi-model conversations
Start a conversation and add multiple models using the + button — compare responses from Gemma 3 and Llama 3 side by side for the same question.
5. Usage analytics
Admin Panel → Dashboard → view message volume, token consumption, and per-user activity. Admin dashboards track message volume, token consumption, and cost across users and models.
Connecting External AI APIs (OpenAI, Anthropic)
Open WebUI connects to Anthropic, OpenAI, and other compatible APIs alongside local Ollama models from a single interface.
Add an external API connection:
- Admin Panel → Settings → Connections → OpenAI API
- API URL:
https://api.openai.com/v1 - API Key: your OpenAI API key
After saving, OpenAI models (GPT-4o, o1, etc.) appear in the model selector alongside your local Ollama models. You can use cloud models for complex tasks and local models for sensitive or offline work — switching is a single dropdown in the chat interface.
This also works for any OpenAI-compatible API: Groq, Together AI, Mistral, local vLLM deployments, and Anthropic’s Claude API.
Production Hardening Checklist
Before opening Open WebUI to a wider audience or any internet-facing access:
- Disable public signup — Admin Panel → Settings → General → disable “Enable New User Signup” after your initial admin account is created
- Set a strong
WEBUI_SECRET_KEY— this signs session cookies; rotate it only during a maintenance window (invalidates all active sessions) - Put behind HTTPS — never expose Open WebUI over plain HTTP if it’s accessible beyond localhost
- Restrict Ollama port — port 11434 should only be accessible from the Docker network or localhost, never from the internet
- Volume backups — back up
open-webui-data(chat history, users, settings) andollama-data(downloaded models) on a schedule. See the backup scripting approach in our Redis with Docker Compose guide for the pattern - Resource limits — add memory limits to prevent an inference request from consuming all host memory:
services:
  ollama:
    deploy:
      resources:
        limits:
memory: 12G # Adjust based on your largest model size- Monitor resource usage — integrate with Prometheus + Grafana to track GPU/CPU utilization, memory consumption, and container health during model inference
Common Issues and Quick Fixes
| Symptom | Likely Cause | Fix |
|---|---|---|
| Open WebUI can’t connect to Ollama | Container can’t reach host.docker.internal | Add extra_hosts: - "host.docker.internal:host-gateway" to compose.yml |
| Model responses are very slow | Running large model on CPU only | Switch to a smaller model (1B-4B) or enable GPU acceleration |
open-webui container exits after start | Insufficient memory | Check docker logs open-webui; increase host RAM or reduce model size |
| Streaming responses don’t show progressively | Nginx buffering enabled | Add proxy_buffering off to Nginx config |
| GPU not detected by Ollama container | NVIDIA Container Toolkit not installed | Install nvidia-container-toolkit and restart Docker |
Models disappear after docker compose down | ollama-data volume missing or pruned | Always use named volumes; never use docker volume prune without inspecting |
| First user can’t log in | WebUI still initializing | Wait 60-90 seconds; check logs for Application startup complete |
Next Steps
With Ollama and Open WebUI running on Ubuntu 26.04:
- Add more models —
ollama pull deepseek-r1:7bfor reasoning tasks,ollama pull codellama:7bfor code review - Set up HTTPS — use Nginx Proxy Manager to add a real domain and Let’s Encrypt certificate in under 5 minutes
- Monitor the stack — add the Open WebUI and Ollama containers to your Prometheus + Grafana monitoring stack to track GPU utilization, memory usage, and request throughput
- Harden the Docker host — review the Docker Container Security Best Practices guide to ensure the host running your AI stack is properly secured
- Explore RAG pipelines — connect Open WebUI to a vector database for document-based question answering over your own knowledge base
Related posts:
 How to Install Docker and Docker Compose on Ubuntu 26.04 LTS
 Nginx Proxy Manager with Docker Compose: Reverse Proxy and Free SSL Setup
 Installing Wkhtmltopdf On Ubuntu 20.04 LTS Step by Step
 How to Install OpenJDK 8, 11, 17 and 18 on Ubuntu 22.04
 How To Install AnyDesk On Ubuntu 20.04
 How to Install GlassFish on Ubuntu 24.04 LTS (Step-by-Step Guide)
 MongoDB with Docker Compose: Authentication, Replica Set, and Production-Ready Setup
 How to Install Apache Tomcat 11 on Ubuntu 26.04 LTS (Step-by-Step Guide)
