DNS Server with Docker Compose: CoreDNS, Pi-hole, and Service Discovery Guide

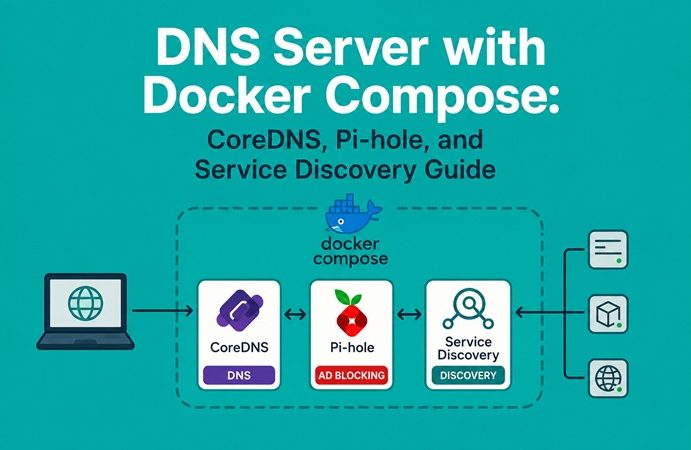
Table of Contents
- How Docker DNS Actually Works
- When You Need More Than Docker’s Built-in DNS
- DNS Tool Comparison: CoreDNS vs Pi-hole vs Bind9 vs Technitium
- Option 1: CoreDNS for Internal Service Discovery
- Option 2: Pi-hole for Network-Wide DNS and Ad Blocking
- Option 3: Pi-hole + Unbound for Full DNS Privacy
- Configuring Docker Compose DNS Settings
- System-Wide Docker DNS via daemon.json
- Testing and Troubleshooting DNS Inside Containers
- Security Hardening for Production DNS
- Common Issues and Quick Fixes
- Next Steps
DNS is the part of your infrastructure you think about least — until it breaks. Inside Docker, name resolution involves several layers that aren’t always obvious: Docker’s own embedded DNS resolver, the host’s system resolver, and any custom DNS servers you’ve configured. This guide covers all three, then goes further to show how to run CoreDNS and Pi-hole as proper production DNS services inside Docker Compose, with persistent configuration, health checks, and network-wide coverage.
If you’re looking for a basic local DNS setup using Bind9 in Docker, our earlier guide on setting up a local DNS server using Docker covers that approach. This guide is the production-grade companion — covering more modern tools, full Docker Compose setups, and patterns that scale beyond a single development machine.
How Docker DNS Actually Works
Before running any custom DNS server, it’s worth understanding what Docker already provides — because in many cases, it’s enough.
On custom bridge networks, Docker runs an embedded DNS server at 127.0.0.11. This server resolves container names and service names to container IPs, and forwards external DNS queries to the host’s configured DNS resolvers.
This embedded DNS server is what makes service-to-service communication work by name in Docker Compose without any configuration:
services:
  api:
    image: myapp:latest

  database:
    image: postgres:15
In this stack, the api container can reach database by just using the hostname database — Docker’s embedded DNS at 127.0.0.11 resolves it to the database container’s IP automatically. No /etc/hosts entries, no manual IP configuration.
Key facts about Docker’s embedded DNS:
Container resolution flow:
  container → 127.0.0.11 (Docker embedded DNS)
      ├── Is it a service/container name? → Return container IP
└── Is it external? → Forward to host resolver → Internet- Only works on custom bridge networks — not the default
bridgenetwork - Available in all Docker Compose stacks automatically (Compose always creates a custom network)
- Supports DNS aliases — a container can be reachable by multiple names via
aliasesin the network config - Does not provide wildcard resolution or custom zone management
For user-defined bridge networks, Docker runs an embedded DNS server at 127.0.0.11 that handles service discovery between containers. For the default bridge network, Docker copies /etc/resolv.conf from the host into the container.
When You Need More Than Docker’s Built-in DNS
Docker’s embedded DNS is sufficient for most Compose stacks. You need a custom DNS server when:
- Internal domain resolution — you want
api.mycompany.internalto resolve to specific IPs across multiple hosts or stacks - Network-wide ad blocking — you want all containers (and optionally all devices on the network) to have tracking/ad domains blocked at the DNS level
- Split-horizon DNS — different DNS answers for internal vs external clients for the same hostname
- Cross-stack service discovery — services in separate Compose stacks need to find each other by name (Docker’s embedded DNS only sees services within the same Compose project)
- DNS privacy — you want recursive resolution that doesn’t log queries to upstream providers like Google (8.8.8.8) or Cloudflare (1.1.1.1)
- Air-gapped environments — no external DNS access; all resolution must be handled internally
DNS Tool Comparison: CoreDNS vs Pi-hole vs Bind9 vs Technitium
| CoreDNS | Pi-hole | Bind9 | Technitium | |
|---|---|---|---|---|
| Primary use | Service discovery, Kubernetes DNS | Ad blocking + local DNS | Full-featured authoritative DNS | All-in-one homelab DNS |
| Config style | Corefile (plugin-based) | Web UI + config files | Zone files (complex) | Web UI |
| Docker image | Official (coredns/coredns) | Official (pihole/pihole) | Community (internetsystemsconsortium/bind9) | Official (technitium/dns-server) |
| Ad blocking | ❌ No | ✅ Yes (built-in) | ❌ No | ✅ Yes |
| Web UI | ❌ No (metrics only) | ✅ Yes | ❌ No | ✅ Yes |
| Kubernetes default | ✅ Yes | ❌ No | ❌ No | ❌ No |
| Native clustering | Via Kubernetes | Via Nebula Sync | Manual | ✅ Native (v2025+) |
| Learning curve | Low-moderate | Low | High | Low |
| Best for | Service discovery, custom zones | Ad blocking, homelab, privacy | Enterprise, advanced DNS features | Full-featured homelab/SMB DNS |
Recommendation:
- Service discovery between Docker containers → CoreDNS
- Homelab with ad blocking + privacy → Pi-hole (+ Unbound for recursive)
- Enterprise environment needing authoritative DNS → Bind9 (see our local DNS with Bind9 guide)
- Full-featured self-hosted DNS with native clustering → Technitium
Option 1: CoreDNS for Internal Service Discovery
CoreDNS is the DNS server running inside every Kubernetes cluster. Outside of Kubernetes, it’s an excellent lightweight choice for adding custom internal zones to a Docker environment — minimal footprint, plugin-based configuration, and a simple text config file.
Project structure:
coredns/
├── compose.yml
├── Corefile
└── zones/
    └── internal.zone
Corefile — CoreDNS configuration:
# Forward queries for internal.local to our zone file
internal.local:53 {
    file /root/zones/internal.zone internal.local
    log
    errors
}

# Forward everything else to public DNS with caching
.:53 {
    forward . 8.8.8.8 8.8.4.4 {
        max_concurrent 1000
        health_check 5s
    }
    cache 300
    log
    errors
    health :8080
}
zones/internal.zone — DNS records:
$ORIGIN internal.local.
$TTL 3600

@   IN  SOA ns.internal.local. admin.internal.local. (
            2026070101  ; Serial (YYYYMMDDNN)
            3600        ; Refresh
            600         ; Retry
            86400       ; Expire
            60          ; Negative Cache TTL
)

    IN  NS  ns.internal.local.

; Name server record
ns      IN  A   172.25.0.53

; Internal services — add your services here
api     IN  A   172.25.0.10
db      IN  A   172.25.0.20
cache   IN  A   172.25.0.30
monitor IN A 172.25.0.40compose.yml:
version: '3.8'

networks:
  dns-net:
    driver: bridge
    ipam:
      config:
        - subnet: 172.25.0.0/24

volumes:
  coredns-data:

services:
  coredns:
    image: coredns/coredns:latest
    container_name: coredns
    restart: unless-stopped
    command: -conf /etc/coredns/Corefile
    volumes:
      - ./Corefile:/etc/coredns/Corefile:ro
      - ./zones:/root/zones:ro
    ports:
      - "127.0.0.1:53:53/udp"    # Bind only to localhost — don't expose publicly
      - "127.0.0.1:53:53/tcp"
    networks:
      dns-net:
        ipv4_address: 172.25.0.53
    healthcheck:
      test: ["CMD", "wget", "-qO-", "http://localhost:8080/health"]
      interval: 10s
      timeout: 3s
      retries: 5

  # Example app using CoreDNS for resolution
  app:
    image: nginx:alpine
    container_name: app
    dns:
      - 172.25.0.53          # Use CoreDNS first
      - 8.8.8.8              # Fallback to Google DNS
    dns_search:
      - internal.local       # Short names resolve under .internal.local
    depends_on:
      coredns:
        condition: service_healthy
    networks:
      - dns-net
Start and verify:
docker compose up -d

# Test internal zone resolution
docker compose exec app nslookup api.internal.local
# Expected: Address: 172.25.0.10

# Test external resolution (forwarded to 8.8.8.8)
docker compose exec app nslookup google.com
# Expected: normal resolution

# Test short name (uses dns_search domain)
docker compose exec app nslookup api
# Expected: resolves to api.internal.local → 172.25.0.10
Adding CoreDNS to an existing Compose stack (without a fixed subnet):
services:
  coredns:
    image: coredns/coredns:latest
    command: -conf /etc/coredns/Corefile
    volumes:
      - ./Corefile:/etc/coredns/Corefile:ro
      - ./zones:/root/zones:ro
    ports:
      - "127.0.0.1:5353:53/udp"  # Use non-standard port to avoid conflict with host DNS

  myapp:
    image: myapp:latest
    dns:
      - 172.x.x.x   # CoreDNS container IP (check with `docker inspect coredns`)
Option 2: Pi-hole for Network-Wide DNS and Ad Blocking
Pi-hole is the most popular self-hosted DNS solution for homelabs and small networks — it blocks ads and tracking domains at the DNS level for every device on the network, with a polished web interface for management.
Project structure:
pihole/
├── compose.yml
├── .env
└── data/
    ├── pihole/
└── dnsmasq.d/.env:
PIHOLE_PASSWORD=change_this_strong_password
TZ=Asia/Jakarta
PIHOLE_DOMAIN=home.localcompose.yml:
version: '3.8'

services:
  pihole:
    image: pihole/pihole:latest
    container_name: pihole
    restart: unless-stopped
    ports:
      - "53:53/tcp"              # DNS TCP
      - "53:53/udp"              # DNS UDP
      - "127.0.0.1:8080:80"     # Web UI (localhost only — put behind Nginx Proxy Manager)
    environment:
      TZ: ${TZ}
      FTLCONF_webserver_api_password: ${PIHOLE_PASSWORD}
      FTLCONF_dns_upstreams: "8.8.8.8;8.8.4.4"
      FTLCONF_dns_listeningMode: "all"
      FTLCONF_LOCAL_IPV4: "0.0.0.0"
    volumes:
      - ./data/pihole:/etc/pihole
      - ./data/dnsmasq.d:/etc/dnsmasq.d
    cap_add:
      - NET_ADMIN                # Required for full DNS operation
    healthcheck:
      test: ["CMD", "dig", "+short", "+norecurse", "+retry=0", "@127.0.0.1", "pi.hole"]
      interval: 30s
      timeout: 10s
      retries: 5
      start_period: 60s
Start and access:
docker compose up -d
docker compose logs -f pihole
Access the admin interface at http://localhost:8080/admin and log in with the password from .env.
Add local DNS records (your services):
In the Pi-hole admin → Local DNS → DNS Records, add entries like:
grafana.home.local  →  192.168.1.100
superset.home.local →  192.168.1.100
portainer.home.local →  192.168.1.100
This is the fastest way to give real hostnames to services running behind Nginx Proxy Manager — Pi-hole resolves the name, NPM routes the traffic, and Let’s Encrypt provides the certificate.
Point your router to Pi-hole:
After Pi-hole is running, configure your router’s DHCP to hand out the Pi-hole server’s IP as the DNS server for all devices. Every device on the network then gets ad blocking automatically — without installing anything on individual devices.
Option 3: Pi-hole + Unbound for Full DNS Privacy
By default, Pi-hole forwards your DNS queries to upstream resolvers (Google 8.8.8.8, Cloudflare 1.1.1.1) — those providers still see what you’re resolving. Unbound replaces this upstream with a recursive resolver that queries the root servers directly — no third party sees your DNS traffic.
version: '3.8'

services:
  unbound:
    image: mvance/unbound:latest
    container_name: unbound
    restart: unless-stopped
    volumes:
      - ./unbound/unbound.conf:/opt/unbound/etc/unbound/unbound.conf:ro
    networks:
      dns-net:
        ipv4_address: 172.30.0.2

  pihole:
    image: pihole/pihole:latest
    container_name: pihole
    restart: unless-stopped
    environment:
      TZ: ${TZ}
      FTLCONF_webserver_api_password: ${PIHOLE_PASSWORD}
      # Point to Unbound instead of public DNS
      FTLCONF_dns_upstreams: "172.30.0.2#5335"
      FTLCONF_dns_listeningMode: "all"
    ports:
      - "53:53/tcp"
      - "53:53/udp"
      - "127.0.0.1:8080:80"
    volumes:
      - ./data/pihole:/etc/pihole
    cap_add:
      - NET_ADMIN
    depends_on:
      - unbound
    networks:
      - dns-net

networks:
  dns-net:
    driver: bridge
    ipam:
      config:
- subnet: 172.30.0.0/24unbound/unbound.conf:
server:
    verbosity: 1
    interface: 0.0.0.0@5335
    port: 5335
    do-ip4: yes
    do-udp: yes
    do-tcp: yes
    do-ip6: no

    # Performance
    num-threads: 1
    cache-max-ttl: 86400
    cache-min-ttl: 300

    # Privacy: minimize query data sent to root servers
    qname-minimisation: yes

    # Security: DNSSEC validation
    auto-trust-anchor-file: "/var/lib/unbound/root.key"

    # Refuse requests from outside (only accept from Pi-hole container)
    access-control: 172.30.0.0/24 allow
    access-control: 0.0.0.0/0 refuse
With this setup: devices → Pi-hole (filtering) → Unbound (recursive) → Root servers. No upstream DNS provider sees your queries.
Configuring Docker Compose DNS Settings
Beyond running a DNS server as a container, Docker Compose has built-in options for controlling DNS behavior per-service:
services:
  app:
    image: myapp:latest

    # Primary and fallback DNS servers for this container
    dns:
      - 172.25.0.53    # Custom internal DNS (CoreDNS/Pi-hole)
      - 8.8.8.8        # Public fallback

    # Search domains — short names get these appended automatically
    dns_search:
      - internal.local
      - mycompany.com

    # DNS resolver options (same as /etc/resolv.conf options)
    dns_opt:
      - timeout:2      # 2 second timeout per query
      - attempts:3     # 3 retry attempts
      - ndots:2        # Use search domains for names with fewer than 2 dots
The dns_search option sets the search domain list for hostname lookups. When a container tries to resolve a short hostname, the DNS resolver appends each search domain and tries the lookup again. For example, if your search domain is mycompany.internal and your application tries to connect to api, the resolver will also try api.mycompany.internal.
Practical dns_search example with Nginx Proxy Manager:
services:
  app:
    image: myapp:latest
    dns:
      - 192.168.1.100  # Pi-hole running on the same host
    dns_search:
      - home.local     # Pi-hole's local domain
    environment:
      # App can now connect to 'grafana' instead of 'grafana.home.local'
      GRAFANA_URL: http://grafana:3000
      REDIS_URL: redis://cache:6379
System-Wide Docker DNS via daemon.json
If every container in your Docker environment should use the same DNS, configure it once at the daemon level:
sudo nano /etc/docker/daemon.json{
"dns": ["192.168.1.100", "8.8.8.8"],
"dns-search": ["home.local", "internal.local"],
"dns-opts": ["timeout:2", "attempts:3"]
}sudo systemctl restart dockerAll containers now use 192.168.1.100 (your Pi-hole or CoreDNS) as their primary DNS, without needing to set dns: in every Compose file. Override per-service where needed.
Verify it’s working:
docker run --rm busybox cat /etc/resolv.conf
# Should show your custom DNS servers
Testing and Troubleshooting DNS Inside Containers
# Check what DNS servers a container is using
docker exec <container> cat /etc/resolv.conf

# Test DNS resolution from inside a container
docker exec <container> nslookup google.com
docker exec <container> dig api.internal.local @172.25.0.53

# Test Pi-hole is responding
dig @127.0.0.1 pi.hole
# Expected: 0.0.0.0 (Pi-hole's self-test domain)

# Test CoreDNS health endpoint
curl http://localhost:8080/health
# Expected: OK

# Check CoreDNS query logs
docker compose logs coredns -f

# Check if port 53 is already in use (common conflict)
sudo ss -tlnup | grep :53
# If systemd-resolved is using port 53:
sudo systemctl disable systemd-resolved
sudo systemctl stop systemd-resolved
Port 53 conflict on Ubuntu: Ubuntu 26.04 runs systemd-resolved which listens on port 53 by default. To run your own DNS server on port 53:
# Disable systemd-resolved's stub listener
sudo nano /etc/systemd/resolved.conf
[Resolve]
DNSStubListener=nosudo systemctl restart systemd-resolved
# Port 53 is now free for your DNS containerSecurity Hardening for Production DNS
A DNS server running in Docker needs the same hardening discipline as any other infrastructure service — see our Docker Container Security Best Practices guide for the full framework:
1. Bind DNS ports to specific interfaces:
ports:
  - "127.0.0.1:53:53/udp"    # Only localhost — for host-only use
  # OR
  - "192.168.1.100:53:53/udp" # Only internal network interface
  # NOT:
  # - "53:53/udp"             # This binds to ALL interfaces including internet-facing ones
2. Restrict recursion in CoreDNS:
.:53 {
    forward . 8.8.8.8 {
        # Only allow recursive queries from internal networks
        acl {
            allow net 172.0.0.0/8
            allow net 192.168.0.0/16
            allow net 10.0.0.0/8
            block
        }
    }
}
3. Rate limiting (prevent DNS amplification attacks):
.:53 {
    forward . 8.8.8.8
    # Limit to 100 queries per second per IP
    ratelimit 100
}
4. Firewall rules:
# Allow DNS only from trusted subnets
sudo ufw allow from 192.168.0.0/16 to any port 53
sudo ufw allow from 10.0.0.0/8 to any port 53
sudo ufw deny 53
sudo ufw reload
5. Monitor DNS queries:
Integrate CoreDNS or Pi-hole metrics with your Prometheus + Grafana monitoring stack — both expose Prometheus-compatible metrics endpoints for query rates, cache hits, and blocked domains.
Common Issues and Quick Fixes
| Symptom | Likely Cause | Fix |
|---|---|---|
| Port 53 already in use | systemd-resolved occupying port 53 | Disable DNSStubListener in /etc/systemd/resolved.conf |
| Containers can’t resolve external names | DNS server running but no upstream forwarder configured | Add forward . 8.8.8.8 to CoreDNS Corefile or set upstream in Pi-hole |
| Pi-hole web UI not loading | Port 80 conflict with another service | Change Pi-hole’s web port mapping to 127.0.0.1:8080:80 |
| Short hostname not resolving | dns_search not set in Compose | Add dns_search: - internal.local to the service config |
| DNS works inside stack but not across stacks | Docker embedded DNS scoped to one Compose project | Use CoreDNS or Pi-hole as shared DNS server; set dns: in both stacks |
| Pi-hole blocking legitimate domains | Blocklist too aggressive | Add domain to Pi-hole allowlist in the admin UI |
| CoreDNS returns SERVFAIL for internal zone | Zone file syntax error | Validate zone file with named-checkzone internal.local zones/internal.zone |
Next Steps
With a proper DNS server running in Docker, the rest of your infrastructure benefits immediately:
- Nginx Proxy Manager — combine Pi-hole’s local DNS records with Nginx Proxy Manager for a complete solution: Pi-hole resolves
app.home.localto your server IP, NPM routes the request to the right container and terminates SSL - Monitoring — add CoreDNS or Pi-hole to your Prometheus + Grafana stack to track query rates, blocked domains, and cache hit rates
- Security — review the Docker Container Security Best Practices guide to ensure your DNS container follows the same hardening discipline as the rest of your stack
- Local dev DNS — for a simpler single-developer setup using Bind9 without the production overhead, see our original local DNS server guide
Related posts:
 How to Set Up a Local DNS Server Using Docker: A Practical Guide for Developers
 How To Install Docker On CentOS 7
 How To Install Docker On Ubuntu 22.04
Setting Up an Ubuntu Docker Container with SSH Access
How To Install Docker On Ubuntu 22.04
Setting Up an Ubuntu Docker Container with SSH Access
 Run Redis in Docker: Complete Setup Guide 2026
 How To Run Commands Inside Docker Containers: A Step-by-Step Guide
 Docker Network Security: A Complete Guide to Securing Container Communication in 2026
 MongoDB with Docker Compose: Authentication, Replica Set, and Production-Ready Setup
