How to Install GitLab CE with Docker Compose on Ubuntu 26.04 LTS

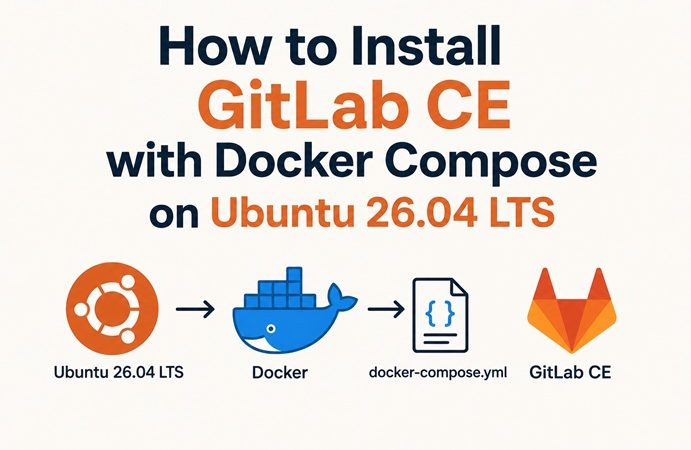
How to Install GitLab CE with Docker Compose on Ubuntu 26.04 LTS
Table of Contents
- Why Docker Compose is the Right Way to Install GitLab on Ubuntu 26.04
- What You Get with GitLab CE
- Hardware Requirements
- Prerequisites
- Project Structure
- Step 1: Configure Environment Variables
- Step 2: The Docker Compose File
- Step 3: Start GitLab and Get the Initial Root Password
- Step 4: Configure SSL with Let’s Encrypt
- Step 5: Install and Register GitLab Runner
- Step 6: Your First CI/CD Pipeline
- Step 7: Backup and Restore
- Performance Tuning for Low-Memory Servers
- Upgrading GitLab
- GitLab CE vs Gitea vs Forgejo: Which to Choose
- Common Issues and Quick Fixes
- Next Steps
GitLab CE is one of the most complete self-hosted DevOps platforms available — Git hosting, CI/CD pipelines, container registry, issue tracking, wiki, and code review, all under one roof. If your team needs any combination of these features and wants everything on your own infrastructure, GitLab CE is difficult to beat.
Why Docker Compose is the Right Way to Install GitLab on Ubuntu 26.04
At the time of this writing, GitLab has not released its official APT repository support for Ubuntu 26.04. This means the standard Omnibus package installation — the typical method on older Ubuntu versions — doesn’t yet work cleanly on Resolute Raccoon. Docker Compose sidesteps this entirely: the official gitlab/gitlab-ce Docker image works on Ubuntu 26.04 today, without waiting for official APT repository support.
This is also the recommended approach from GitLab’s own documentation for environments where the host OS isn’t in GitLab’s supported list, and gives you additional benefits:
- Portability — move your entire GitLab instance to another host by copying the Compose file and restoring the volume backup
- Clean upgrades — update by changing the image tag and running
docker compose pull && docker compose up -d - Isolated dependencies — PostgreSQL, Redis, Nginx, and all other components bundled inside the container, no host-level conflicts
What You Get with GitLab CE
GitLab CE (Community Edition) is a comprehensive self-hosted DevOps platform: Git hosting, CI/CD pipelines, container registry, wiki, issue tracking, and more — all in one package.
Key features in GitLab CE 18.x (2026):
- Git repositories — unlimited private and public repositories
- CI/CD pipelines — built-in pipeline engine with
.gitlab-ci.yml, supporting parallel jobs, artifacts, and caching - Container Registry — built-in Docker image registry at
registry.yourdomain.com - Issue tracking — boards, milestones, labels, and time tracking
- Merge requests — code review with inline comments, approvals, and branch protection
- Wiki — per-project and per-group documentation
- Web IDE — browser-based code editor for quick edits
- Package Registry — host npm, Maven, PyPI, and other packages
- Security scanning — SAST, dependency scanning, and secret detection (some features EE-only)
Hardware Requirements
GitLab’s minimum requirements are real — respect them. GitLab on a machine with less than 8GB RAM will work but will feel sluggish. At 4GB it’s genuinely painful.
| Setup | CPU | RAM | Storage |
|---|---|---|---|
| Minimum (evaluation) | 2 cores | 8GB | 20GB |
| Small team (1-10 users) | 4 cores | 8GB | 50GB+ |
| Medium team (10-50 users) | 8 cores | 16GB | 100GB+ |
| Larger team (50+ users) | 16+ cores | 32GB+ | 200GB+ |
Storage grows with repositories, CI artifacts, and container registry images — plan for more than you think you need.
Prerequisites
- Ubuntu 26.04 LTS with Docker and Docker Compose installed — see our Install Docker on Ubuntu 26.04 guide
- A domain name with an A record pointing to your server (
gitlab.yourdomain.com) - Ports 80, 443, and 2222 (for Git over SSH) open in your firewall
- At least 8GB RAM
Project Structure
gitlab/
├── compose.yml
├── .env
└── data/
    ├── config/      ← gitlab.rb and gitlab-secrets.json live here
    ├── data/        ← repositories, uploads, registry
    └── logs/        ← GitLab logs
mkdir -p ~/gitlab/data/{config,data,logs}
cd ~/gitlabStep 1: Configure Environment Variables
.env file:
# Your domain — GitLab uses this for all URLs, emails, and clone paths
GITLAB_EXTERNAL_URL=https://gitlab.yourdomain.com

# SSH port (2222 avoids conflict with host SSH on port 22)
GITLAB_SSH_PORT=2222

# GitLab image version — pin to a specific version for predictable upgrades
GITLAB_IMAGE=gitlab/gitlab-ce:18.10.1-ce.0

# Timezone
TZ=Asia/Jakarta

# Email settings (optional — for notifications, password reset)
GITLAB_EMAIL_FROM=gitlab@yourdomain.com
GITLAB_SMTP_HOST=smtp.yourdomain.com
GITLAB_SMTP_PORT=587
GITLAB_SMTP_USER=gitlab@yourdomain.com
GITLAB_SMTP_PASSWORD=your_smtp_password
Pin the GitLab version. The
latesttag is tempting but risky for GitLab specifically — GitLab requires sequential upgrades between major versions and skipping versions can corrupt your database. Always use a specific version tag and follow the GitLab upgrade path.
Step 2: The Docker Compose File
version: '3.8'

services:
  gitlab:
    image: ${GITLAB_IMAGE}
    container_name: gitlab
    restart: unless-stopped
    hostname: gitlab.yourdomain.com
    environment:
      GITLAB_OMNIBUS_CONFIG: |
        # External URL — must match your domain exactly
        external_url '${GITLAB_EXTERNAL_URL}'

        # SSH configuration
        gitlab_rails['gitlab_ssh_host'] = 'gitlab.yourdomain.com'
        gitlab_rails['gitlab_shell_ssh_port'] = ${GITLAB_SSH_PORT}

        # PostgreSQL (bundled)
        postgresql['shared_buffers'] = "256MB"

        # Email notifications
        gitlab_rails['smtp_enable'] = true
        gitlab_rails['smtp_address'] = '${GITLAB_SMTP_HOST}'
        gitlab_rails['smtp_port'] = ${GITLAB_SMTP_PORT}
        gitlab_rails['smtp_user_name'] = '${GITLAB_SMTP_USER}'
        gitlab_rails['smtp_password'] = '${GITLAB_SMTP_PASSWORD}'
        gitlab_rails['smtp_authentication'] = 'login'
        gitlab_rails['smtp_enable_starttls_auto'] = true
        gitlab_rails['gitlab_email_from'] = '${GITLAB_EMAIL_FROM}'

        # Backup configuration
        gitlab_rails['backup_keep_time'] = 604800  # 7 days in seconds

        # Container Registry
        registry_external_url 'https://registry.yourdomain.com'

        # Reduce memory footprint (important for 8GB servers)
        puma['worker_processes'] = 2
        sidekiq['concurrency'] = 10
        prometheus_monitoring['enable'] = false  # Disable if RAM is tight

        # Timezone
        gitlab_rails['time_zone'] = '${TZ}'
    ports:
      - '80:80'
      - '443:443'
      - '${GITLAB_SSH_PORT}:22'
    volumes:
      - ./data/config:/etc/gitlab
      - ./data/logs:/var/log/gitlab
      - ./data/data:/var/opt/gitlab
    shm_size: '256m'
    healthcheck:
      test: ["CMD", "curl", "-f", "http://localhost/-/health"]
      interval: 60s
      timeout: 30s
      retries: 10
      start_period: 300s    # GitLab takes 3-5 minutes to fully start
Why shm_size: '256m'? GitLab’s bundled PostgreSQL uses shared memory for buffer caching. Without this, PostgreSQL may fail to start with a “No space left on device” error related to /dev/shm — a common gotcha in Docker deployments.
Step 3: Start GitLab and Get the Initial Root Password
docker compose up -dGitLab takes 3-5 minutes to fully initialize on first boot — it runs gitlab-ctl reconfigure internally, which configures PostgreSQL, Redis, Nginx, and all other components. Watch the progress:
docker compose logs -f gitlabWait until you see:
gitlab | ==> /var/log/gitlab/gitlab-rails/production.log <==or check the health endpoint:
curl -s http://localhost/-/health
# Expected: GitLab OK
Get the initial root password:
docker exec gitlab grep 'Password:' /etc/gitlab/initial_root_passwordThis file is automatically deleted after 24 hours — save the password immediately. Open https://gitlab.yourdomain.com and log in as root with this password, then change it under User Settings → Password.
Step 4: Configure SSL with Let’s Encrypt
GitLab’s built-in Nginx can handle Let’s Encrypt automatically. Update your .env:
GITLAB_EXTERNAL_URL=https://gitlab.yourdomain.comAdd to GITLAB_OMNIBUS_CONFIG in compose.yml:
# Enable Let's Encrypt auto SSL
letsencrypt['enable'] = true
letsencrypt['contact_emails'] = ['admin@yourdomain.com']
letsencrypt['auto_renew'] = true
letsencrypt['auto_renew_hour'] = 12
letsencrypt['auto_renew_minute'] = 30
Restart GitLab to apply:
docker compose down && docker compose up -dGitLab requests and installs the certificate automatically during startup. Renewal is handled by a cron job inside the container.
Alternative: Use Nginx Proxy Manager for SSL
If you already run Nginx Proxy Manager for other services, you can put GitLab behind it instead. Change the external URL to HTTP and let NPM handle HTTPS termination:
external_url 'http://gitlab.yourdomain.com'
nginx['listen_port'] = 80
nginx['listen_https'] = false
nginx['proxy_set_headers'] = {
  "X-Forwarded-Proto" => "https",
  "X-Forwarded-Ssl" => "on"
}
Then in NPM: add a proxy host pointing gitlab.yourdomain.com → gitlab:80, enable SSL and WebSocket support. Note that the Container Registry and SSH clone URL need separate handling when using an external reverse proxy.
Step 5: Install and Register GitLab Runner
GitLab Runner is a separate agent that executes CI/CD pipeline jobs. Add it to your Compose stack:
# Add to compose.yml
  gitlab-runner:
    image: gitlab/gitlab-runner:latest
    container_name: gitlab-runner
    restart: unless-stopped
    volumes:
      - ./data/runner:/etc/gitlab-runner
      - /var/run/docker.sock:/var/run/docker.sock   # For Docker executor
    depends_on:
      - gitlab
Start the runner:
docker compose up -d gitlab-runnerRegister the runner with GitLab:
- In GitLab → Admin Area → CI/CD → Runners → New instance runner
- Copy the registration token
- Run the registration command:
docker exec -it gitlab-runner gitlab-runner register \
  --non-interactive \
  --url "https://gitlab.yourdomain.com" \
  --token "YOUR_REGISTRATION_TOKEN" \
  --executor "docker" \
  --docker-image "alpine:latest" \
  --description "Docker Runner" \
  --tag-list "docker,linux" \
  --run-untagged="true" \
  --locked="false"
After registration, the runner appears in Admin Area → CI/CD → Runners with a green circle indicating it’s online and ready.
Step 6: Your First CI/CD Pipeline
Create a .gitlab-ci.yml file in your repository root. GitLab automatically detects and runs it on every push:
# .gitlab-ci.yml — example pipeline for a Java Maven project
stages:
  - build
  - test
  - package
  - deploy

variables:
  MAVEN_OPTS: "-Dmaven.repo.local=$CI_PROJECT_DIR/.m2/repository"
  DOCKER_IMAGE: $CI_REGISTRY_IMAGE:$CI_COMMIT_SHORT_SHA

# Cache Maven dependencies between pipeline runs
cache:
  paths:
    - .m2/repository/

# Stage 1: Build
build:
  stage: build
  image: maven:3.9-eclipse-temurin-21
  script:
    - mvn compile -B --no-transfer-progress
  artifacts:
    paths:
      - target/classes/

# Stage 2: Test
test:
  stage: test
  image: maven:3.9-eclipse-temurin-21
  script:
    - mvn test -B --no-transfer-progress
  artifacts:
    reports:
      junit: target/surefire-reports/TEST-*.xml
    when: always

# Stage 3: Package
package:
  stage: package
  image: maven:3.9-eclipse-temurin-21
  script:
    - mvn package -B --no-transfer-progress -DskipTests
    - docker build -t $DOCKER_IMAGE .
    - docker login -u $CI_REGISTRY_USER -p $CI_REGISTRY_PASSWORD $CI_REGISTRY
    - docker push $DOCKER_IMAGE
  only:
    - main
    - tags

# Stage 4: Deploy to staging
deploy-staging:
  stage: deploy
  image: alpine:latest
  before_script:
    - apk add --no-cache openssh-client
    - eval $(ssh-agent -s)
    - echo "$STAGING_SSH_KEY" | ssh-add -
  script:
    - ssh -o StrictHostKeyChecking=no deploy@staging.yourdomain.com
      "docker pull $DOCKER_IMAGE && docker compose up -d"
  environment:
    name: staging
    url: https://staging.yourdomain.com
  only:
    - main
This pipeline pairs naturally with the Apache Maven on Ubuntu 26.04 setup — GitLab CI uses the same mvn commands you’d run locally, but automated on every commit.
Key CI/CD variables automatically available in every pipeline:
| Variable | Value |
|---|---|
$CI_REGISTRY | Your GitLab Container Registry URL |
$CI_REGISTRY_USER | Registry login username |
$CI_REGISTRY_PASSWORD | Registry login password |
$CI_COMMIT_SHORT_SHA | Short git commit hash |
$CI_COMMIT_BRANCH | Current branch name |
$CI_PROJECT_DIR | Working directory in runner |
Add sensitive variables (SSH keys, API tokens, passwords) under Project → Settings → CI/CD → Variables with the “Masked” flag to prevent them from appearing in job logs.
Step 7: Backup and Restore
GitLab backups are stored inside the gitlab-data volume at /var/opt/gitlab/backups/.
Create a backup:
docker exec -t gitlab gitlab-backup create STRATEGY=copyThe STRATEGY=copy flag prevents locking repositories during backup — important on active instances.
The backup does NOT include /etc/gitlab/gitlab.rb and /etc/gitlab/gitlab-secrets.json — both contain encryption keys and configuration. Back those up separately.
# Backup the config files (critical — without these, backup is useless)
sudo cp ./data/config/gitlab.rb ./gitlab.rb.backup
sudo cp ./data/config/gitlab-secrets.json ./gitlab-secrets.json.backup
Automated backup script:
#!/bin/bash
# /etc/cron.d/gitlab-backup — runs daily at 2 AM

BACKUP_DIR="/home/$(whoami)/gitlab-backups"
mkdir -p "$BACKUP_DIR"
DATE=$(date +%Y%m%d-%H%M%S)

# Create GitLab backup
docker exec -t gitlab gitlab-backup create STRATEGY=copy CRON=1

# Copy config files
cp ~/gitlab/data/config/gitlab.rb "$BACKUP_DIR/gitlab.rb.$DATE"
cp ~/gitlab/data/config/gitlab-secrets.json "$BACKUP_DIR/gitlab-secrets.json.$DATE"

# Copy latest backup archive
LATEST=$(ls -t ~/gitlab/data/data/backups/*.tar | head -1)
cp "$LATEST" "$BACKUP_DIR/"

# Remove backups older than 7 days
find "$BACKUP_DIR" -mtime +7 -delete

echo "GitLab backup completed: $DATE"
Add to crontab:
(crontab -l 2>/dev/null; echo "0 2 * * * /home/$(whoami)/gitlab-backup.sh >> /var/log/gitlab-backup.log 2>&1") | crontab -Restore from backup:
# Stop GitLab services (keep database running)
docker exec gitlab gitlab-ctl stop puma
docker exec gitlab gitlab-ctl stop sidekiq

# Copy backup file to backups directory
cp /path/to/backup_file.tar ~/gitlab/data/data/backups/

# Restore (replace TIMESTAMP with your backup timestamp)
docker exec -t gitlab gitlab-backup restore BACKUP=TIMESTAMP

# Restore config files
cp gitlab.rb.backup ~/gitlab/data/config/gitlab.rb
cp gitlab-secrets.json.backup ~/gitlab/data/config/gitlab-secrets.json

# Reconfigure and restart
docker exec gitlab gitlab-ctl reconfigure
docker exec gitlab gitlab-ctl restart
Performance Tuning for Low-Memory Servers
GitLab’s default configuration assumes plenty of RAM. On an 8GB server, these settings in GITLAB_OMNIBUS_CONFIG significantly reduce memory usage:
# Reduce Puma web workers (default is based on CPU count)
puma['worker_processes'] = 2
puma['min_threads'] = 1
puma['max_threads'] = 4

# Reduce Sidekiq concurrency (background job processor)
sidekiq['concurrency'] = 10

# Reduce PostgreSQL shared buffers
postgresql['shared_buffers'] = "256MB"
postgresql['max_connections'] = 100

# Disable built-in Prometheus monitoring (saves ~200MB RAM)
prometheus_monitoring['enable'] = false

# Use external Grafana instead (connect to your existing monitoring stack)
grafana['enable'] = false
After changing any gitlab.rb setting, reconfigure inside the container:
docker exec gitlab gitlab-ctl reconfigureIntegrate with your existing Prometheus + Grafana: If you run the Prometheus + Grafana monitoring stack, add GitLab as a scrape target. GitLab exposes metrics at http://gitlab/-/metrics — add a scrape job to your prometheus.yml:
scrape_configs:
  - job_name: 'gitlab'
    metrics_path: '/-/metrics'
    static_configs:
      - targets: ['gitlab:80']
    params:
      token: ['YOUR_GITLAB_METRICS_TOKEN']
Upgrading GitLab
GitLab requires sequential major version upgrades — you cannot skip from 17.x to 18.x directly if you’re on 16.x. Always check the GitLab upgrade path tool before upgrading.
For minor version upgrades (e.g., 18.9 → 18.10):
# Update the image tag in .env
nano .env
# GITLAB_IMAGE=gitlab/gitlab-ce:18.10.1-ce.0

# Pull new image and restart
docker compose pull
docker compose up -d

# Monitor startup
docker compose logs -f gitlab
Always create a backup before upgrading:
docker exec -t gitlab gitlab-backup create STRATEGY=copyAnd verify the backup completed successfully before pulling the new image.
GitLab CE vs Gitea vs Forgejo: Which to Choose
| GitLab CE | Gitea | Forgejo | |
|---|---|---|---|
| RAM minimum | 8GB | 512MB | 512MB |
| Storage (base) | 5GB+ | 200MB | 200MB |
| Built-in CI/CD | ✅ Yes (full-featured) | ✅ Yes (Gitea Actions) | ✅ Yes (Forgejo Actions) |
| Container Registry | ✅ Yes | ✅ Yes | ✅ Yes |
| Issue tracking | ✅ Full-featured | ✅ Basic | ✅ Basic |
| Code review | ✅ Excellent | ✅ Good | ✅ Good |
| Package registry | ✅ Yes | ✅ Yes | ✅ Yes |
| Wiki | ✅ Yes | ✅ Yes | ✅ Yes |
| Setup complexity | High | Low | Low |
| Best for | Teams needing full DevOps platform | Small teams, resource-constrained | GitHub Actions compatible, lightweight |
Choose GitLab CE when:
- Your team needs mature, enterprise-grade CI/CD with complex pipeline logic
- You want everything in one place (Git, CI/CD, registry, issues, wikis)
- You have the hardware to support it (8GB+ RAM)
- Your team already knows GitLab or is coming from GitLab.com
Choose Gitea or Forgejo when:
- Resources are limited (Gitea runs happily on a Raspberry Pi)
- You want GitHub-compatible Actions syntax (Forgejo)
- You need a simple Git hosting solution without the full GitLab overhead
Common Issues and Quick Fixes
| Symptom | Likely Cause | Fix |
|---|---|---|
| GitLab never finishes starting | Insufficient RAM | Check docker stats — if RAM is maxed, add swap or more RAM |
502 Bad Gateway after startup | Puma not ready yet | Wait 3-5 minutes; GitLab starts Nginx before Puma is ready |
| Initial root password not found | File already deleted (24h window) | Reset via: docker exec gitlab gitlab-rake "gitlab:password:reset" |
| Git clone via SSH fails | Wrong SSH port in clone URL | Set gitlab_rails['gitlab_shell_ssh_port'] in omnibus config |
| Container Registry push fails | Registry external URL not configured | Add registry_external_url to GITLAB_OMNIBUS_CONFIG |
| CI pipeline stuck “pending” | No runner registered or runner offline | Check Admin → Runners; re-register runner if offline |
| High memory usage | Default Puma/Sidekiq settings too aggressive | Reduce puma['worker_processes'] and sidekiq['concurrency'] |
| Let’s Encrypt certificate fails | Port 80 not reachable from internet | Verify port 80 is open in UFW and cloud firewall |
Next Steps
With GitLab CE running on Ubuntu 26.04:
- Connect your build tools — set up Maven-based Java pipelines using the Apache Maven guide and run
mvn packagedirectly in your.gitlab-ci.yml - Add HTTPS via Nginx Proxy Manager — if you prefer not to use GitLab’s built-in Let’s Encrypt, put it behind Nginx Proxy Manager for centralized SSL management
- Monitor your GitLab instance — add GitLab metrics to your Prometheus + Grafana monitoring stack to track pipeline duration, job queues, and database performance
- Harden the Docker host — review the Docker Container Security Best Practices guide to lock down the server running your GitLab instance
- Set up GitLab Container Registry — use the built-in registry (
registry.yourdomain.com) to store Docker images built by your CI pipelines, then deploy them to staging or production automatically
Related posts:
 How to Install Ollama and Open WebUI on Ubuntu 26.04 LTS with Docker Compose
 How To Install GitLab on Ubuntu 22.04
 How To Install Apache Web Server on Ubuntu 18.04 LTS
 How To Install Golang On Ubuntu 20.04 LTS
 How To Install Atom Text Editor on Ubuntu 18.04
 How To Install PHP Composer on Ubuntu 22.04
 Installing MediaWiki On Ubuntu 22.04
 How To Install Cmatrix on Ubuntu 22.04 LTS
