Secure Docker Host: Complete Hardening Guide for 2026
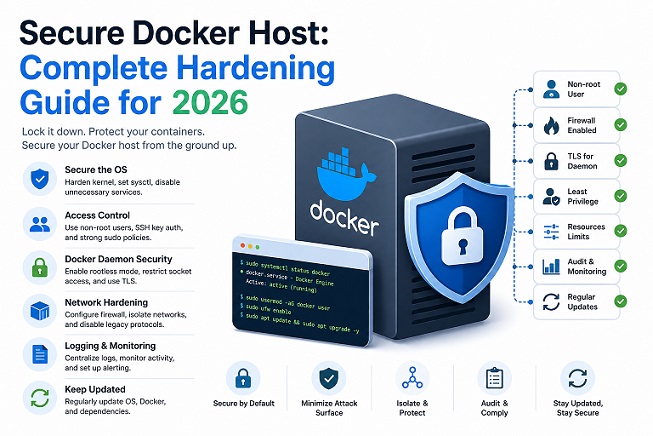
Most Docker security guides focus on containers and images. But here is the uncomfortable truth: if your Docker host is insecure, nothing else matters. A hardened container running on a vulnerable host is like locking your front door while leaving the back window wide open.
This guide covers how to secure a Docker host from the ground up — from the operating system and kernel settings to daemon configuration, firewall rules, and ongoing auditing — with concrete commands you can run today.
What Is a Docker Host and Why Does It Need Hardening?
A Docker host is the physical or virtual machine running the Docker Engine and all its containers. Because containers share the host kernel, any weakness at the host level can be exploited to escape container isolation entirely.
Common Docker host attack vectors include:
- An exposed Docker daemon API with no authentication
- An unpatched Linux kernel with known privilege escalation CVEs
- Overly permissive firewall rules that expose internal container ports
- Unnecessary system services running alongside Docker
- Weak SSH configurations on the host itself
- No audit logging to detect intrusion attempts
Hardening the Docker host is the foundation on which every other container security practice is built.
1. Start with a Minimal, Dedicated Operating System
The first rule of securing a Docker host: run nothing on it that is not Docker-related. Every additional service installed on the host is a potential attack vector.
Recommended approaches:
- Use a minimal server OS — Ubuntu Server Minimal, Debian Netinst, or Rocky Linux minimal install
- Consider a container-optimized OS designed specifically for running containers with a reduced attack surface:
- Flatcar Container Linux
- Fedora CoreOS
- Ubuntu Core
Remove unnecessary packages after installation:
# List manually installed packages
apt list --installed 2>/dev/null | grep -v automatic

# Remove packages you don't need
sudo apt remove --purge <package_name>
sudo apt autoremove

# Disable and stop unnecessary services
sudo systemctl disable bluetooth
sudo systemctl disable cups
sudo systemctl stop bluetooth cups
The fewer services running, the smaller the attack surface — it is that simple.
2. Keep the Host OS and Kernel Fully Updated
An unpatched kernel is one of the most common paths to container escape. Linux kernel privilege escalation vulnerabilities such as Dirty Pipe (CVE-2022-0847) and Dirty COW (CVE-2016-5195) have been actively exploited to break out of container isolation.
Set up automatic security updates on Ubuntu/Debian:
sudo apt install unattended-upgrades

# Configure automatic security updates
sudo dpkg-reconfigure --priority=low unattended-upgrades

# Verify the configuration
cat /etc/apt/apt.conf.d/20auto-upgrades
On RHEL/Rocky Linux:
sudo dnf install dnf-automatic

# Enable and start the automatic update timer
sudo systemctl enable --now dnf-automatic.timer

# Check status
sudo systemctl status dnf-automatic.timer
Verify your current kernel version and check for updates:
uname -r
sudo apt update && apt list --upgradable 2>/dev/null | grep linux
Make kernel updates a non-negotiable part of your maintenance schedule.
3. Harden SSH Access to the Docker Host
SSH is typically the primary entry point to a Docker host. A misconfigured SSH daemon is one of the most exploited attack surfaces in cloud environments.
Edit /etc/ssh/sshd_config and apply these settings:
# Disable root login entirely
PermitRootLogin no

# Disable password authentication — use SSH keys only
PasswordAuthentication no
ChallengeResponseAuthentication no

# Limit login attempts
MaxAuthTries 3

# Set idle timeout (disconnect after 5 minutes of inactivity)
ClientAliveInterval 300
ClientAliveCountMax 0

# Only allow specific users to SSH in
AllowUsers deployer ops-user

# Disable empty passwords
PermitEmptyPasswords no

# Use only modern, secure SSH protocol
Protocol 2

# Restrict to specific IP if possible (via AllowUsers or firewall)
Restart SSH to apply changes:
sudo systemctl restart sshd

# Verify the new configuration before closing your current session
sudo sshd -t
Additional SSH hardening steps:
# Generate a strong SSH key pair on your local machine
ssh-keygen -t ed25519 -C "your_email@example.com"

# Copy the public key to the server
ssh-copy-id -i ~/.ssh/id_ed25519.pub user@your-docker-host

# Install and configure Fail2Ban to block brute-force attempts
sudo apt install fail2ban
sudo systemctl enable --now fail2ban
4. Configure the Firewall — Allow Only What Is Necessary
Docker automatically modifies iptables rules to expose container ports, which can bypass your UFW or firewalld rules if not configured carefully. This is a well-known and frequently overlooked Docker host vulnerability.
The Docker + UFW conflict:
By default, when you publish a port with -p 8080:80, Docker punches a hole in iptables directly — bypassing UFW rules entirely. A port you blocked with UFW may still be publicly accessible.
Fix this by configuring Docker to not manipulate iptables directly:
# Edit or create the Docker daemon configuration
sudo nano /etc/docker/daemon.json
{
"iptables": false
}Warning: Setting
iptables: falserequires you to manage all Docker networking rules manually with iptables or nftables. Only do this if you are comfortable with manual firewall management.
The safer approach — use UFW with explicit rules:
# Allow SSH
sudo ufw allow 22/tcp

# Allow only specific ports for your application
sudo ufw allow 80/tcp
sudo ufw allow 443/tcp

# Block everything else
sudo ufw default deny incoming
sudo ufw default allow outgoing

# Enable UFW
sudo ufw enable

# Check status
sudo ufw status verbose
To prevent Docker from bypassing UFW, edit /etc/ufw/after.rules and add Docker-specific rules, or use a tool like ufw-docker:
# Install ufw-docker
sudo wget -O /usr/local/bin/ufw-docker \
  https://github.com/chaifeng/ufw-docker/raw/master/ufw-docker
sudo chmod +x /usr/local/bin/ufw-docker

# Apply ufw-docker rules
sudo ufw-docker install
sudo systemctl restart ufw
5. Secure the Docker Daemon Configuration
The Docker daemon (dockerd) itself has a number of configuration options that significantly affect host security. All of these are set in /etc/docker/daemon.json.
Recommended production daemon configuration:
{
  "icc": false,
  "log-driver": "json-file",
  "log-opts": {
    "max-size": "10m",
    "max-file": "3"
  },
  "no-new-privileges": true,
  "live-restore": true,
  "userland-proxy": false,
  "default-ulimits": {
    "nofile": {
      "Name": "nofile",
      "Hard": 64000,
      "Soft": 32000
    }
  },
  "storage-driver": "overlay2"
}
What each setting does:
| Setting | Effect |
|---|---|
icc: false | Disables inter-container communication by default — containers can only communicate if explicitly connected to the same network. |
no-new-privileges: true | Prevents containers from gaining additional privileges through setuid or setgid binaries. |
live-restore: true | Keeps containers running even if the Docker daemon is restarted or crashes. |
userland-proxy: false | Uses iptables NAT instead of the userland proxy for port forwarding, improving efficiency and reducing the attack surface. |
log-driver | Enforces log rotation and centralized logging to prevent disk exhaustion. |
Restart Docker to apply:
sudo systemctl restart docker

# Verify the configuration was applied
docker info | grep -E "Logging|Storage|Security"
6. Never Expose the Docker Daemon API Without TLS
By default, the Docker daemon listens on a Unix socket at /var/run/docker.sock. This is safe as long as only trusted users have access to it. The danger comes when the daemon is exposed over TCP for remote access.
What you should never do:
# ❌ Exposes Docker API to the entire network with no authentication
dockerd -H tcp://0.0.0.0:2375
Anyone who can reach port 2375 on your host can control every container, pull images, and mount the host filesystem. This is how thousands of Docker hosts have been compromised in crypto-mining attacks.
If you need remote Docker API access, always use TLS mutual authentication:
# Step 1: Create a Certificate Authority (CA)
openssl genrsa -aes256 -out ca-key.pem 4096
openssl req -new -x509 -days 365 -key ca-key.pem -sha256 -out ca.pem

# Step 2: Create server key and certificate
openssl genrsa -out server-key.pem 4096
openssl req -subj "/CN=your-docker-host.com" -sha256 \
  -new -key server-key.pem -out server.csr

echo subjectAltName = DNS:your-docker-host.com,IP:your-server-ip >> extfile.cnf
echo extendedKeyUsage = serverAuth >> extfile.cnf

openssl x509 -req -days 365 -sha256 -in server.csr \
  -CA ca.pem -CAkey ca-key.pem -CAcreateserial \
  -out server-cert.pem -extfile extfile.cnf

# Step 3: Start Docker with TLS
dockerd \
  --tlsverify \
  --tlscacert=ca.pem \
  --tlscert=server-cert.pem \
  --tlskey=server-key.pem \
  -H=0.0.0.0:2376
Port 2376 (with TLS) vs 2375 (without TLS) — always use 2376 in production.
7. Restrict Who Can Run Docker Commands
On Linux, any user in the docker group effectively has root-level access to the host — because Docker can mount the host filesystem, create privileged containers, and escape to the host shell.
# Check who is in the docker group
grep docker /etc/group

# Only add users who genuinely need Docker access
sudo usermod -aG docker trusted-user

# NEVER add general application users to the docker group
Use sudo with restrictions for controlled Docker access:
# Edit sudoers to allow a specific user to run only specific Docker commands
sudo visudo

# Example: allow 'deployer' to run docker but not docker run with --privileged
deployer ALL=(root) NOPASSWD: /usr/bin/docker ps, /usr/bin/docker logs *, /usr/bin/docker stats
Consider enabling Docker rootless mode for non-production workloads — it runs the Docker daemon and containers as a non-root user entirely:
# Install rootless Docker
dockerd-rootless-setuptool.sh install

# Start rootless Docker
systemctl --user start docker

# Set the DOCKER_HOST environment variable
export DOCKER_HOST=unix://$XDG_RUNTIME_DIR/docker.sock
8. Enable Linux Security Modules (AppArmor / SELinux)
Linux Security Modules provide mandatory access control (MAC) that limits what processes — including Docker containers — can do at the kernel level, even if they have been compromised.
Check if AppArmor is enabled:
sudo apparmor_status
# or
sudo aa-status
Load the Docker AppArmor profile:
# Install AppArmor utilities
sudo apt install apparmor-utils

# Check Docker's default profile is loaded
sudo apparmor_status | grep docker
On RHEL/Rocky Linux — enable SELinux:
# Check SELinux status
sestatus

# If disabled, enable in /etc/selinux/config
SELINUX=enforcing

# Reboot to apply
sudo reboot

# Verify
getenforce
# Output: Enforcing
Enable SELinux labeling for Docker containers:
# In /etc/docker/daemon.json
{
  "selinux-enabled": true
}
9. Set Up Audit Logging on the Docker Host
Without audit logging, you have no forensic trail when something goes wrong. Linux’s auditd can track every Docker-related event — daemon starts, container launches, file accesses, and permission changes.
Install and configure auditd:
sudo apt install auditd audispd-plugins
sudo systemctl enable --now auditd
Add Docker-specific audit rules:
sudo nano /etc/audit/rules.d/docker.rules# Monitor Docker daemon binary
-w /usr/bin/docker -p rwxa -k docker
# Monitor Docker socket
-w /var/run/docker.sock -p rwxa -k docker
# Monitor Docker daemon configuration
-w /etc/docker -p rwxa -k docker
# Monitor Docker systemd service file
-w /lib/systemd/system/docker.service -p rwxa -k docker
# Monitor containerd
-w /usr/bin/containerd -p rwxa -k docker
-w /usr/bin/runc -p rwxa -k dockerApply the rules and restart auditd:
sudo augenrules --load
sudo systemctl restart auditd

# Search audit logs for Docker-related events
sudo ausearch -k docker | tail -20
10. Run Docker Bench for Security — Full Host Audit
Docker Bench for Security is the official tool that audits your entire Docker host and daemon configuration against the CIS Docker Benchmark — the industry-standard security checklist.
# Run the full host audit
docker run -it --net host --pid host --userns host --cap-add audit_control \
  -e DOCKER_CONTENT_TRUST=$DOCKER_CONTENT_TRUST \
  -v /etc:/etc:ro \
  -v /lib/systemd/system:/lib/systemd/system:ro \
  -v /usr/bin/containerd:/usr/bin/containerd:ro \
  -v /usr/bin/runc:/usr/bin/runc:ro \
  -v /usr/lib/systemd:/usr/lib/systemd:ro \
  -v /var/lib:/var/lib:ro \
  -v /var/run/docker.sock:/var/run/docker.sock:ro \
  --label docker_bench_security \
  docker/docker-bench-security
Understanding the output:
| Result | Meaning |
|---|---|
| [PASS] | Check passed — configuration is correct. |
| [WARN] | Potential security issue — investigate and fix. |
| [INFO] | Informational — review manually. |
| [NOTE] | Reminder or best practice note. |
Target: zero [WARN] items before going to production. Run this audit monthly and after any major Docker or OS update.
11. Monitor the Host with Falco for Runtime Threat Detection
While static configuration hardening is essential, runtime monitoring catches threats that static tools miss — such as a container trying to write to /etc/passwd, a process spawning an unexpected shell, or network connections to suspicious IPs.
Install Falco on the Docker host:
# Add Falco repository
curl -fsSL https://falco.org/repo/falcosecurity-packages.asc | \
  sudo gpg --dearmor -o /usr/share/keyrings/falco-archive-keyring.gpg

echo "deb [signed-by=/usr/share/keyrings/falco-archive-keyring.gpg] \
  https://download.falco.org/packages/deb stable main" | \
  sudo tee -a /etc/apt/sources.list.d/falcosecurity.list

sudo apt update
sudo apt install falco

# Start Falco
sudo systemctl enable --now falco
Example of what Falco detects in real time:
Notice  A shell was spawned in a container with an attached terminal
        container=webapp pid=12345 shell=bash

Warning Sensitive file opened for reading by non-trusted program
        file=/etc/shadow program=wget container=webapp

Critical Outbound connection to suspicious IP from container
         ip=185.220.101.x container=webapp
Falco alerts can be forwarded to Slack, PagerDuty, or your SIEM for immediate response.
Docker Host Security Hardening Checklist
Use this before every new Docker host deployment:
[ ] Minimal OS installed — no unnecessary packages or services
[ ] OS and kernel are fully updated, auto-updates enabled
[ ] SSH hardened: root login disabled, password auth off, key-only access
[ ] Fail2Ban installed and active
[ ] UFW/firewalld configured — only required ports open
[ ] Docker daemon configured with icc:false and no-new-privileges:true
[ ] Docker API NOT exposed on TCP without TLS
[ ] Docker group membership restricted to trusted users only
[ ] AppArmor or SELinux enabled and enforcing
[ ] auditd installed with Docker-specific audit rules
[ ] Docker Bench Security run — zero WARN items
[ ] Falco installed for runtime threat detection
[ ] Log rotation configured on daemon and containers
[ ] Regular patching schedule documented and followed
A hardened host is the foundation — but it is only the first layer.
Once your host is locked down, the next step is ensuring that every
container, Compose stack, and build pipeline running on top of it is
equally secure. Continue with the Docker Security series on bckinfo.com:
- Docker Compose Security: Complete Hardening Guide for 2026 — segment networks, restrict secrets, and apply resource limits across your entire stack
- Docker Container Security Best Practices: A Comprehensive Guide — harden each individual container with non-root users, dropped capabilities, and read-only filesystems
- Docker in Docker Security: Risks, Alternatives, and Safe Implementation Guide 2026 — secure your CI/CD build pipeline and understand when DinD is safe to use
- Trivy Docker Security: How to Scan and Fix Container Vulnerabilities — scan images for CVEs before they ever reach your hardened host
- A hardened host protects the infrastructure layer, but data itself needs its own safety net. If you are running a database like MongoDB on this host, firewall rules and SSH hardening will not save you from an accidental
dropCollection()or a failed migration. Pair host-level security with a proper backup strategy: MongoDB Backup: Complete Guide to Backing Up and Restoring Your Database.
Think of these guides as a layered defense stack: host → Compose →
container → image scanning → build pipeline. Skipping any one layer
leaves a gap that attackers actively look for.
Conclusion
Securing a Docker host is not a single action — it is a layered defense strategy. Each measure in this guide adds an independent layer of protection. Even if one layer is bypassed, the others remain in place to contain the damage.
The most impactful steps to implement immediately are: harden SSH access, configure the Docker daemon properly, and never expose the Docker API without TLS. These three alone eliminate the most commonly exploited attack vectors against Docker hosts in the wild.
From there, work through the checklist systematically. Run Docker Bench for Security, enable audit logging, and add Falco for runtime visibility. A properly hardened Docker host significantly raises the cost for any attacker — making your infrastructure a hard target rather than an easy one.
Have a specific hardening scenario or infrastructure setup you want to discuss? Leave a comment below.
Related posts:
 Docker in Docker Security: Risks, Alternatives, and Safe Implementation Guide 2026
 Trivy Docker Security: How to Scan and Fix Container Vulnerabilities
 Docker Compose Security: Complete Hardening Guide for 2026
 How To Install Docker On CentOS 7
 Setting Up an Ubuntu Docker Container with SSH Access
 How To Install Docker CE On Ubuntu 24.04 LTS
 Getting Started with Metasploit: The Ultimate Penetration Testing Framework